1
ø 18
ø 14
44
285
332
90
ø 270 ø 165
Ø 5,5 - 12 mm
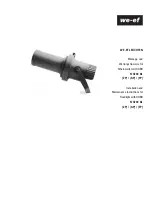
Floodlight with GOBO
Scheinwerfer mit GOBO
Lampen / Lamps
HIT 150W . . . . . . . . . . . . . . . . . . . . . . . . . . . . . . . . . . . G12
Schutzart / Protection: IP66
Schutzklasse / Class I,
, ta=25°C, tw=130°C
Windangriffsfläche / Windage aera: . . . . . . . . . . 0,117 m²
Gewicht / Weight: . . . . . . . . . . . . . . . . . . . . . max. 12,5 kg
Montage
Montage und Wartung darf nur von geschultem Fach per -
so nal mit entsprechender beruflicher Qualifikation in Über-
ein stimmung mit den neuesten elektrischen Installations-
und Sicherheitsvorschriften durchgeführt werden.
Die Hinweise der Leuchtmittelhersteller der eingesetzten
Lampe für Betrieb und Wartung sind unbedingt zu beachten.
Der Mindestabstand zu beleuchteten Gegenständen (siehe
Bildzeichen
in der Leuchte) ist unbedingt einzuhalten.
Die Leuchte darf nur mit vollständiger Schutzabdeckung
betrieben werden. Ersetzen Sie jede gebrochene Schutz -
abdeckung.
Bei Fragen wenden Sie sich bitte an unsere technische
Hotline unter +495194 909209 (Montag – Freitag von
08:00 Uhr bis 16:00 Uhr).
Vorgehensweise
1) Spannungsfreiheit der Anschlussleitung her stellen.
2) Scheinwerfer mit dem Bügel und geeignetem Material
(abhängig von der Befestigungsfläche) auf dem Unter -
grund ausrichten und befestigen.
Installation
The luminaire must be installed and maintained by a suit-
ably qualified person in compliance with latest construc-
tion and electrical regulations and relevant legislation.
The given information from the lamp manufacturer about
the correct lamp, operation and maintenance are strictly to
be observed.
The minimum distance to the illuminated object has to be
observed (see sign
inside of luminaire).
The luminaire shall be operated only with complete protec-
tion cover. Replace any broken protection cover.
In case of questions please contact our technical hotline:
+49 5194 909209 (from Monday - Friday from 08.00 until
16.00 hours.
Installation Procedure
1) Switch off mains electrical supply.
2) Adjust and fix the stirrup of the floodlight to the
ground. Suitable fixing material is to be used (depends
on the material of the fixing area).


