background image


cropping (

Off

). Note: HDMI recognizes two types of signals: „Video‟ and ‟PC‟; for PC type signals Overscan is disabled.


Picture Mode: 

Choose for User/Vivid/Soft/Standard for most pleasing image based on ambient light.


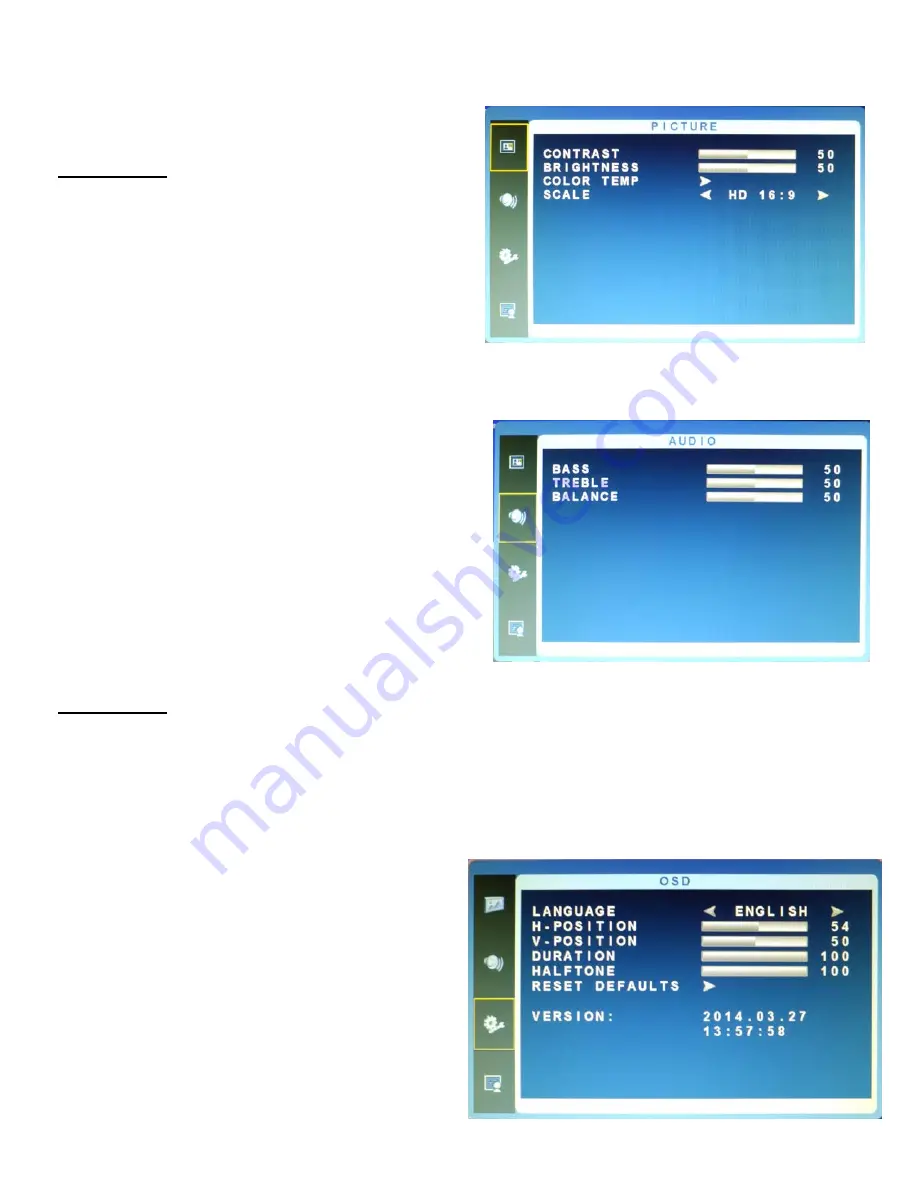
B. Picture Menu for VGA


Adjustments


Contrast:


Adjusts the contrast between light and dark areas of 

the picture.


Brightness:


Adjusts the overall picture shade and brightness.


Color Temp:


To adjust color reproduction choose between 

normal, warm 

(more red)  & 

cool

 (more blue)


Scale: 

Choose between SD 4:3 and HD 16:9 aspect ratio.


2. AUDIO MENU


Press the MENU button to bring the menu on screen, and then 
up/down buttons to move along the menu selections to highlight 
the AUDIO menu. Press MENU again to move between the left  
side main menu selector into the window of menu choices and 
parameters.


Use the up & down buttons to move the yellow highlighted sub

-

menu selection within the sub

-

menu. Pressing the right + & left 

-


buttons will adjust the value of the highlighted item. Press the 
MENU button to exit the sub

-

menu and return to the main menu 

selector. 


To exit the menu system, press the SOURCE button twice. 


Adjustments


Bass:


Boost/limit low frequency tones.


Treble:


Boost/limit high frequency tones.


Balance:


Change relative volume between left and right speakers.


3. OSD Menu


Press the MENU button to bring the menu on screen, and 
then up/down buttons to move along the menu selections to 
highlight the OSD menu. Press MENU again to move  be-
tween the left  side main menu selector into the window of 
menu choices and parameters.


Use the up & down buttons to move the yellow highlighted 
sub

-

menu selection within the sub

-

menu. Pressing the right 

+ & left 

-

 buttons will adjust the value of the highlighted item. 

Press the MENU button to exit the sub

-

menu and return to 

the main menu selector. 


To exit the menu system, press the SOURCE button twice.


Summary of Contents for OE-19LED

Page 1: ......

Page 2: ...in indoor environments as per the temperature and humidity specs 8 The monitor should be operated from a power source indicated on the rear of the monitor If you are not sure of the type of power available consult your dealer or a licensed electrician 9 The 3 wire grounding type plug having a third grounding pin used on this monitor is a safety feature Do not power the monitor without the a ground...

Page 3: ...sible NEVER REMOVE THE BACK COVER Only specially qualified personnel should remove the back cover DO NOT USE IN ENVIRONMENTS THAT MAY CAUSE HAZARDS To prevent electrical shock or a fire hazard do not expose the monitor to rain or moisture This monitor is designed to be used in the a residential or commercial environment Do not subject the monitor to excessive vibration or dust or to corrosive gase...

Page 4: ... for help Only a shielded interface cable should be used Finally any changes or modifications to the equipment by the user not expressly approved by the grantee or manufactur er could void the user s authority to operate such equipment DOC COMPLIANCE NOTICE This digital apparatus does not exceed the Class A limit for radio noise emissions from digital apparatus set out in the radio interference re...

Page 5: ...ove the yellow highlighted sub menu selection within the sub menu Pressing the right left buttons will adjust the value of the highlighted item Press the MENU button to exit the sub menu and return to the main menu selector To exit the menu system press the SOURCE button twice Settings will remain as they appear on screen Adjustments Contrast Adjusts the range of difference between light and dark ...

Page 6: ...ons to move the yellow highlighted sub menu selection within the sub menu Pressing the right left buttons will adjust the value of the highlighted item Press the MENU button to exit the sub menu and return to the main menu selector To exit the menu system press the SOURCE button twice Adjustments Bass Boost limit low frequency tones Treble Boost limit high frequency tones Balance Change relative v...

Page 7: ... the value of the highlighted item Press the MENU button to exit the sub menu and return to the main menu selector To exit the menu system press the SOURCE button twice Adjustments DLC Dynamic Light Control On Off Limits the brightness contrast ratio extremes in on screen video B GEOMETRY Menu VGA Only Press the MENU button to bring the menu on screen and then up down buttons to move along the men...

Page 8: ...hat should be used do not use longer screws or the monitor may be damaged 1 Before mounting the monitor remove the base riser vertical portion of the base by removing the four screws near the top with a screwdriver Then the base and the riser can be removed In order to prevent losing these screws we suggest replacing the screws in their original holes 2 Attach the VESA mount 100mm x 100mm plate to...

Page 9: ...LED 0E 24LED Letter Dimension mm inch mm inch mm inch A Width of monitor body 452 1 17 80 516 6 20 34 577 0 22 72 B Height of monitor body 280 3 11 04 316 7 12 47 347 7 13 69 C Depth of monitor body 50 9 2 00 51 2 2 02 51 2 2 02 D Height of monitor on base 341 0 13 42 376 1 14 81 407 1 16 03 E Width of base 260 0 10 23 260 0 10 23 260 0 10 23 F Depth of base 185 0 7 28 185 0 7 28 185 0 7 28 G Widt...

Page 10: ...o 1920x1080 Analog Video In Out HD VGA in up to 1920x1080 SD S Video in BNC CVBS In Looping Output Audio inputs stereo 1x 3 5mm mini jack Audio output headphone jack stereo 1x 3 5mm mini jack output active for inputs from both analog and HDMI digital audio Speakers Two built in 2 7 x 1 2 oval type Audio Amplifier 1 Watt Channel Filter type 3D Comb Filter De Interlace Noise Reduction 3D De Interlac...

Page 11: ... HD PRO GRADE COLOR MONITOR 18 5 Diagonal Viewing Size BNC VGA HDMI Inputs Includes Audio VGA and HDMI Cable CAUTION DO NOT EXCEED MAXIMUM LISTED WEIGHT CAPACITY SERIOUS INJURY OR PROPERTY DAMAGE MAY OCCUR ...

Reviews: