background image

20

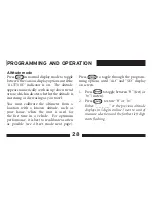
Continue  to  press 

  until  the  correct 

number displays.

7.  Press 

.

To select the 1s digit, which stops flashing.
Press 

 to exit to normal display mode.

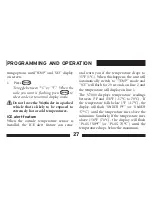
To select between true or magnetic north:

Note: The proper declination angle must first 

be  stored  as  indicated  in  the  previous  sec-

tion.
1.    Press 

  to  toggle  through  the  pro-

gramming  options  until  “

dECL

”  and 

SEt

” display on screen. 

2.   Press 

  to  select  between  true  or 

magnetic north.  

The  declination  icon  in  the  upper  left 

corner  appears  to  indicate  true  north  or 

disappears to indicate magnetic north. 

PROGRAMMING AND OPERATION

Summary of Contents for V7000

Page 1: ...OPERATION MANUAL DIGITALVEHICLECOMPASS V7000...

Page 2: ...Making Ordinary Products Extraordinary...

Page 3: ...lly measures your vehicle s magnetic field and calibrates for inaccuracies mathematically with its built in microprocessor The result is unequaled compass performance in a vehicle environment Features...

Page 4: ...elsius Declination adjustment allows the unit to be set to either true or magnetic north Bearing point stores compass heading in memory to stay on desired course Programmable backlight auto shut off f...

Page 5: ...that action is indented 4 Press means press and release a button in less than 2 seconds 5 Hold means press and hold the button for at least 2 seconds or until a display appears 6 Indicates a warning o...

Page 6: ...ramming and Operation 16 Calibration mode 16 Declination mode 18 Backlight mode 21 Photo sensor feature 22 Bearing mode 23 Barometer mode 25 Weather forecast display 26 Temperature mode 26 ICE alert f...

Page 7: ...e and Numeric Heading Bearing Point Readout Readout Declination Icon Compass Rose Altitude Barometer Buttons and Weather Forecast Readout FRONT Battery Photo Sensor Compartment Temperature 12 Volt Pow...

Page 8: ...tive to north The slow flashing of the degree symbol in line 2 indicates when magnetic interference is compromising compass accuracy or when a battery has been installed Buttons ON OFF button Press or...

Page 9: ...re and ALt altimeter and to exit a programming menu ENT button Press in normal display mode to toggle between barometric pressure altitude and weatherforecast Press inprogramming mode to store a displ...

Page 10: ...the battery wait for approximately one minute and then reinsert the battery If the battery is the only power source whenever the battery is changed or removed the Wayfinder V7000 must be recalibrated...

Page 11: ...is operational only when the 12 volt adapter is used or the optional hardwire kit is installed The photo sensor feature of the Wayfinder V7000 which allows the backlight to turn on automatically is o...

Page 12: ...assenger compartment away from engine heat or direct sunlight in a place where there is natural airflow to the sensor such as in the grill area or door jamb It is best to adhere the sensor on a surfac...

Page 13: ...dirt 3 Use the included retainer clips to secure the temperature tether to the windshield or dashboard optional If the temperature sensor is not plugged in and is toggled to outside temperature displ...

Page 14: ...th and swivel to desired angle while still maintaining the space between the bracket teeth Release once desired angle is achieved and check that the teeth have locked securely into place 5 With the ba...

Page 15: ...HEADER 13 INSTALLATION...

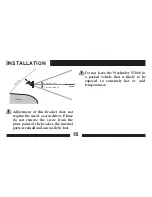
Page 16: ...t be pointing toward the rear of the vehicle The unit can be tilted up or down a maximum of 20 from horizontal plane road level If tilted more than 20 the heading information after calibration may not...

Page 17: ...om the pivot point of the bracket the internal parts are small and can easily be lost Do not leave the Wayfinder V7000 in a parked vehicle that is likely to be exposed to extremely hot or cold tempera...

Page 18: ...time in a vehicle 2 when moved to a different location in the same vehicle 3 when moved to a different vehicle or 4 when the battery is removed if neither the 12 volt adapter nor the hardwire kit is...

Page 19: ...ormal display 2 Press turn ONCE PrESS Ent to End displays Turn vehicle in one complete circle in either direction Circle size does not matter Take at least 20 seconds to complete the circle 3 Press dO...

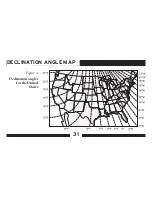
Page 20: ...lination angles vary throughout the world and change very slowly over time See page 31 for a declination angle map for the United States For the greatest possible accuracy go to the National Geophysic...

Page 21: ...ress To toggle between flashing W or E on compass rose 3 Press To select W or E The 10s position on line 2 starts flashing 4 Press Display changes from _ _ to 00 and the 10s position zero is flashing...

Page 22: ...north Note The proper declination angle must first be stored as indicated in the previous sec tion 1 Press to toggle through the pro gramming options until dECL and SEt display on screen 2 Press to se...

Page 23: ...that the backlight will stay on until it is manually turned off or when the unit shuts off after 10 minutes of no magnetic change Since the backlight uses significantly more power than the unit itsel...

Page 24: ...Photo sensor feature The Wayfinder V7000 comes equipped with a photo sensor that turns the backlight on or off depending on the amount of ambient light it senses when the 12 volt adapter is plugged i...

Page 25: ...appear on the compass rose display whenever the direction of travel differs from the stored bearing To erase bearing point see long method Long method of entering a bearing point Press to toggle throu...

Page 26: ...ess to store then press to exit The bearing value will display on line 1 In bearing display mode a flashing arrow representing the stored bearing value will appear on the compass rose if the direction...

Page 27: ...indicator is on Barometric pressure is updated every second and appears numerically on the display with an up down trend arrow The trend arrow indicates whether the pressure has increased or decrease...

Page 28: ...enough pressure data is available to provide a forecast the message Not EnouGH PrESSurE dAtA scrolls on line 3 Barometer and weather forecast readings are affected by altitude and cabin pressure chang...

Page 29: ...and warn you if the temperature drops to 35 F 1 C When this happens the unit will automatically switch to TEMP mode and ICE will flash for 20 seconds on line 2 and the temperature will display on lin...

Page 30: ...a known altitude such as your house when the unit is used for the first time in a vehicle For optimum performance it is best to recalibrate as often as possible see Alt set mode next page Press to tog...

Page 31: ...been assigned values press to exit to normal display mode Alt set mode Please refer to the Frequently Asked Questions section for altimeter reading To reset altitude back to the value set in altitude...

Page 32: ...mail at customerservice pnicorp com Please seek the assistance of an automotive accessory installer to ensure proper installation in your specific vehicle A30 foot 9m temperaturesensortether is availa...

Page 33: ...HEADER 31 DECLINATION ANGLE MAP Figure A Declination angles for the United States...

Page 34: ...0 F to 185 F 40 C to 85 C Temperature resolution accuracy 1 F 5 F within operating range 1 C 2 C Altimeter function ft m 1 500 ft to 19 995 ft 455 m to 6045 m Altimeter resolution accuracy 5 ft 75 ft...

Page 35: ...e in the earth s field from your vehicle s magnetic field The Wayfinder V7000 s microprocessor electronically subtracts out your vehicle s mag neticfields displayinghighlyaccuratecompass readings Magn...

Page 36: ...n the battery is installed Once the vehicle has moved away from the source of the magnetic field or has been calibrated the Wayfinder V7000 will be accurate If the degree symbol flashes contin uously...

Page 37: ...er forecast inaccurate Therefore to obtain an accurate weather forecast when you are changing altitude make sure you recalibrate the pressure sensor for that alti tude When recalibrating for a new alt...

Page 38: ...te reading it is recommended that you close your win dows when traveling at highway speeds and set your ventilation system to recirculate inside air instead of bringing in outside air if the fan is on...

Page 39: ...or replacement or repair to PNI Corporation please do the following 1 Obtain a return merchandise authoriza tion RMA number by contacting PNI Byphone 888 422 6672 toll freewithin the U S A only or at...

Page 40: ...ice RPS or First Class Mail to avoid loss in transit 4 Write the issued RMA number on the outside of your package and send your proof of purchase and description of the problem to the following addres...

Page 41: ...m the date of purchase This warranty does not cover wear and tear due to normal use or damage to the product as the result of improper usage neglect of care altera tion accident or unauthorized repair...

Page 42: ...e no liability for any indirect or speculative damages including but not limited to consequential incidental and special dam ages relating to the use of or inability to use this product whether arisin...

Page 43: ......

Page 44: ...PNI Corporation www pnicorp com 11381 R02 1000242 VJ2 01...

Reviews: