background image


2020-12-V1.3                                                                                                                                                                                    


The power supply of the Box 


Make sure that the Box has been activated beforehand on the user console. 

●  Ideally, place the Box in an electrical enclosure or cabinet.


●  This type of equipment is not suitable for installation in places that can 

accommodate children. 

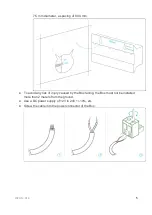
●  Attach the Box:


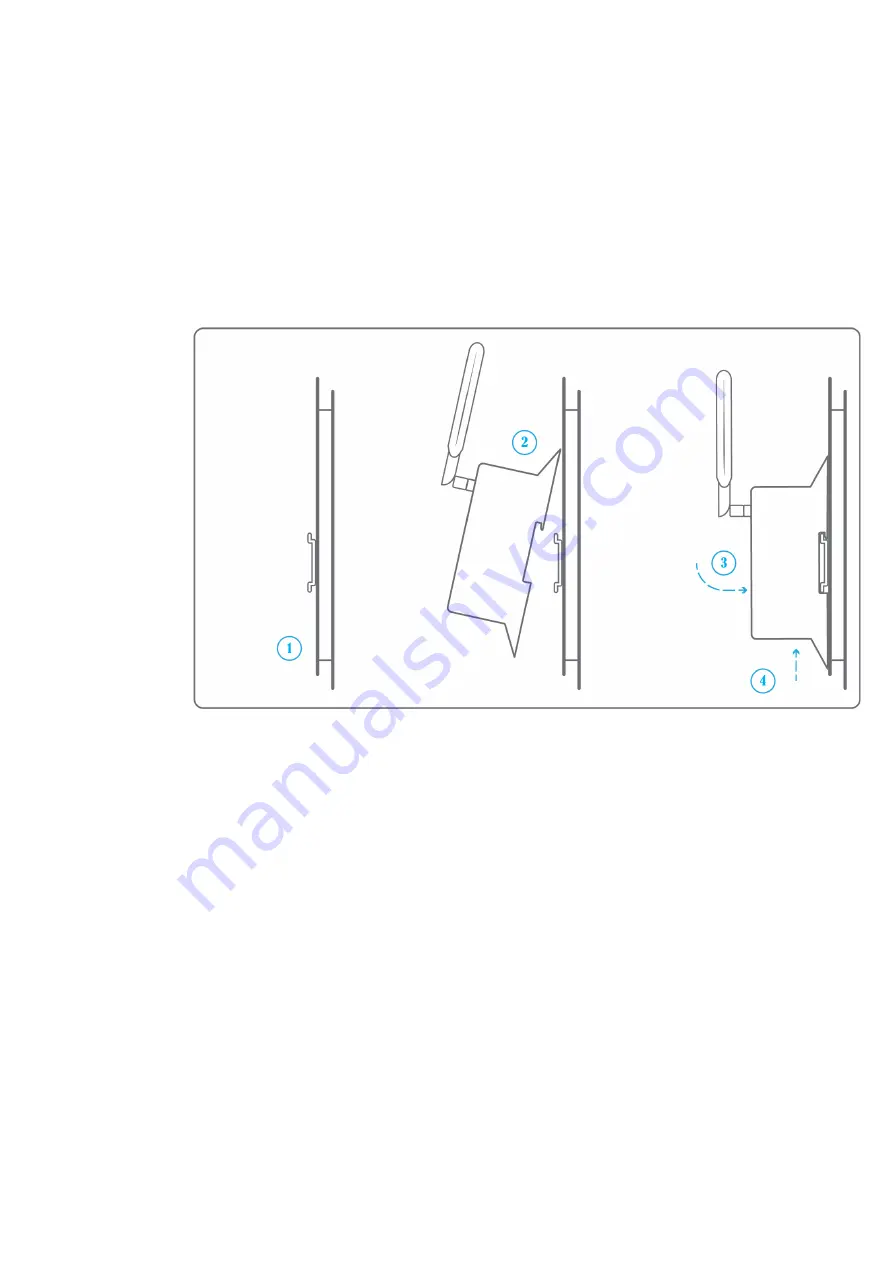
○  Mount the Box on a DIN rail. 


○  Or attach 2 screws to a wall and hook the Box using the notches on the back 

of the case: Screws of maximum 4 mm in diameter, with a head of maximum 

Summary of Contents for BOX

Page 1: ...BOX InstallationGuide UniversalBuilding Connector 2020 12 V1 3 Made in France...

Page 2: ...In case of IP network Except LON 10 In case of LON IP 852 network 13 In case of LON FT10 network 16 To connect the Box directly to the technical equipment in the absence of a BMS 18 The equipment com...

Page 3: ...110 x 55 mm Weight 340 g GSM standard antenna LoRa standard antenna Required material Powerline voltage 100 to 250VAC to 12V 24V DC 10 power supply Cable between the power supply and the Box 2 wires...

Page 4: ...fore it can be fully installed and configured If the Box hasn t been activated ask the administrator of the account to create an installation access on the Wattsense user console and retrieve the logi...

Page 5: ...the Box in an electrical enclosure or cabinet This type of equipment is not suitable for installation in places that can accommodate children Attach the Box Mount the Box on a DIN rail Or attach 2 scr...

Page 6: ...spacing of 89 4 mm To avoid any risk of injury caused by the Box falling the Box must not be installed more than 2 meters from the ground Use a DC power supply of 12V to 24V 10 2A Screw the cable int...

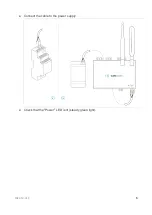
Page 7: ...2020 12 V1 3 6 Connect the cable to the power supply Check that the Power LED is lit steady green light...

Page 8: ...ected against overvoltage undervoltage overcurrent from the power supply with indication by LED green LED when the power supply is compatible red LED if it is not suitable Wait for ten seconds the Hea...

Page 9: ...Check that the Box appears on the console the presence indicator of the Box changes from red to green If the Box appears on the console it is functional you can go to the connection step of the Box to...

Page 10: ...tenna out of the cabinet use an RF extension cord with SMA connector up to 2 meters 1 adhesive support to hold the antenna If the signal quality is still insufficient use a high gain antenna with a ma...

Page 11: ...communication protocols between the BMS server and the technical equipment Obtain if possible the schematic of the communication network s of the BMS Identify where and how the BMS server connects to...

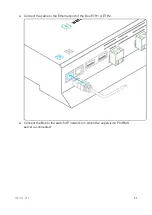
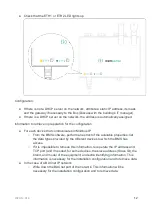
Page 12: ...2020 12 V1 3 11 Connect the cable to the Ethernet port of the Box ETH1 or ETH2 Connect the Box to the switch IP network on which the supervision PC BMS server is connected...

Page 13: ...From the BMS software perform an extract of the available properties list the data types provided by the different devices to which the BMS has access If it is impossible to retrieve this information...

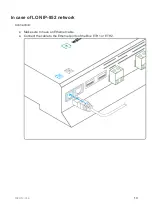
Page 14: ...2020 12 V1 3 13 In case of LON IP 852 network Connection Make sure to have an Ethernet cable Connect the cable to the Ethernet ports of the Box ETH1 or ETH2...

Page 15: ...2020 12 V1 3 14 Connect the other end of the cable to the IP 852 server on the LON network...

Page 16: ...ord is probably required Information to retrieve in preparation for the configuration Write down the neuron ID brand and model of the equipment and any identifying information This information will be...

Page 17: ...2020 12 V1 3 16 In case of LON FT10 network Connection Make sure to have a USB Echelon U60 FT DIN gateway...

Page 18: ...rmation to get in preparation for the configuration Write down the Neuron ID brand and model of the equipment and any identifying information This information will be necessary for the installation co...

Page 19: ...protocols Collect the technical documentation of each manufacturer to know where and how to connect to its devices user console configuration wizard manufacturer s site etc Draw up an installation sc...

Page 20: ...2020 12 V1 3 19 Connect the other end of the cable to the equipment Verify that the ETH1 or ETH2 LED lights up To connect 2 devices Make sure to have 2 Ethernet cables...

Page 21: ...2020 12 V1 3 20 Connect the cables to the Ethernet ports of the Box ETH1 and ETH2 Connect the cables to the 2 devices...

Page 22: ...the ETH1 and ETH2 LEDs light up To connect 3 equipment or more make sure to Have an Ethernet cable for the Box Have as many Ethernet cables as equipment to connect Have an Ethernet switch Connect the...

Page 23: ...2020 12 V1 3 22 Connect an Ethernet cable to the Ethernet port of the Box ETH1 or ETH2 Connect the other end of this cable to the Ethernet switch...

Page 24: ...68 1 3 for the third device and so on Write down the IP address and TCP port and if necessary for certain devices the address of the Slave ID the brand and model of the equipment and any information t...

Page 25: ...networks each grouping equipment with the same communication configuration and assign them to the 2 RS485 ports of the Box If the characteristics of the equipment need to constitute more than 2 homog...

Page 26: ...2020 12 V1 3 25...

Page 27: ...2020 12 V1 3 26 To connect the equipment Caution Do not group together devices with different communication parameters on the same Bus...

Page 28: ...2020 12 V1 3 27 Serial wire the network or each of the 2 networks...

Page 29: ...o 1 the 2nd to 2 the 3rd to 3 and so on Caution A network must not contain multiple slaves with the same address Write down the network to which the equipment is connected as well as its address brand...

Page 30: ...The equipment communicates in BACnet IP To connect 1 equipment Make sure to have an Ethernet cable Connect the cable to the Ethernet port of the Box ETH1 or ETH2 Connect the other end of the cable to...

Page 31: ...1 or ETH2 lights up To connect 2 or more devices Make sure to have an Ethernet cable for the Box Make sure to have as many Ethernet cables as equipment to connect Make sure to have an Ethernet switch...

Page 32: ...2020 12 V1 3 31 Connect an Ethernet cable to the Ethernet port ETH1 or ETH2 of the Box Connect the other end of this cable to the Ethernet switch...

Page 33: ...hat the ETH1 or ETH2 LED lights up Connect all equipment to the switch via the Ethernet cables To configure each of the equipment From the technical documentation of the equipment retrieve its IP addr...

Page 34: ...68 1 3 for the third device and so on Write down the IP address and BACnet port the brand and model of the equipment and any other identifying information This information will be required to configur...

Page 35: ...configure each of the equipment Retrieve the Neuron ID that appears on the equipment Write down the Neuron ID brand model of the equipment and any identifying information This information will be nec...

Page 36: ...2020 12 V1 3 35 The equipment communicates in LON IP 852 To connect 1 or several equipment Make sure to have an Ethernet cable Connect the cable to the Ethernet port of the Box ETH1 or ETH2...

Page 37: ...2020 12 V1 3 36 Connect the other end of the cable to the IP 852 server of the LON network...

Page 38: ...te down the Neuron ID brand model of the equipment and any identifying information This information will be necessary for the installation configuration and to retrieve data If you have the NL220 soft...

Page 39: ...2020 12 V1 3 38 Each device must connect its MB signal to the X Bus signal and its DB signal to To configure each of the devices...

Page 40: ...check that the equipment does not power the LPB Bus For each device configure a unique segment address from 1 to 14 Proceed to make the connection as indicated Designate one and only one equipment as...

Page 41: ...o ensure the reception of all sensors If the quality of the LoRa signal is good keep the original antenna installed on the Box If the signal quality is insufficient move the original antenna out of th...

Page 42: ...sed outside or in other floors to obtain the best signal quality For each sensor Add the sensor to the user console available at https console wattsense com by naming it to be identifiable Send the co...

Reviews: