background image

Troubleshooting 

Problem

Cause

Solutions

Low/slow production

Excessive air pressure in tank

Relieve pressure at schrader valve on tank
(set to 7psi with the tank empty)

Pump not operating

Wiring connection broken (plug 110 AC wall
plug back in at wall and/or reconnect the 24
VAC wire harness connectors)

Replace pump if needed

Fouled membrane

Replace membrane

Plugged pre-filters

Replace filters

Crimped tubing

Check tubes to make sure they are
not kinked

Angle stop or water line valve

Ensure valves are opened by turning valve

not fully opened

handle counter clockwise until it stops

Milky colored water

Air in the system

Air in the system is a normal occurrence
with initial start up of the RO system. This
milky look will disappear during normal use
within 1-2 weeks. If condition reoccurs after
filter changes, drain tank 1 to 2 times.

Faucet Dripping

Needs adjustment

see page 12

Pump short cycles

Ball valve on tank closed

Open the ball valve on the top of the tank

Blue tube blocked between

Remove kinked/damaged section and

the tank and RO system

replace if necessary Call for 

Faulty pressure switch

technical support

Bowl leaks at the top after

Damaged/Dry O-ring

Lubricate with water soluble lubricant

changing the filters

or replace O-ring as necessary
(Do not use Vaseline

®

or other

petroleum based lubricants)

Pump constantly running

Electrical fault

Call for technical support. Close faucet

Faucet left on

and let tank fill for 2 to 3 hours.

Plugged pre-filters

Replace filters

11

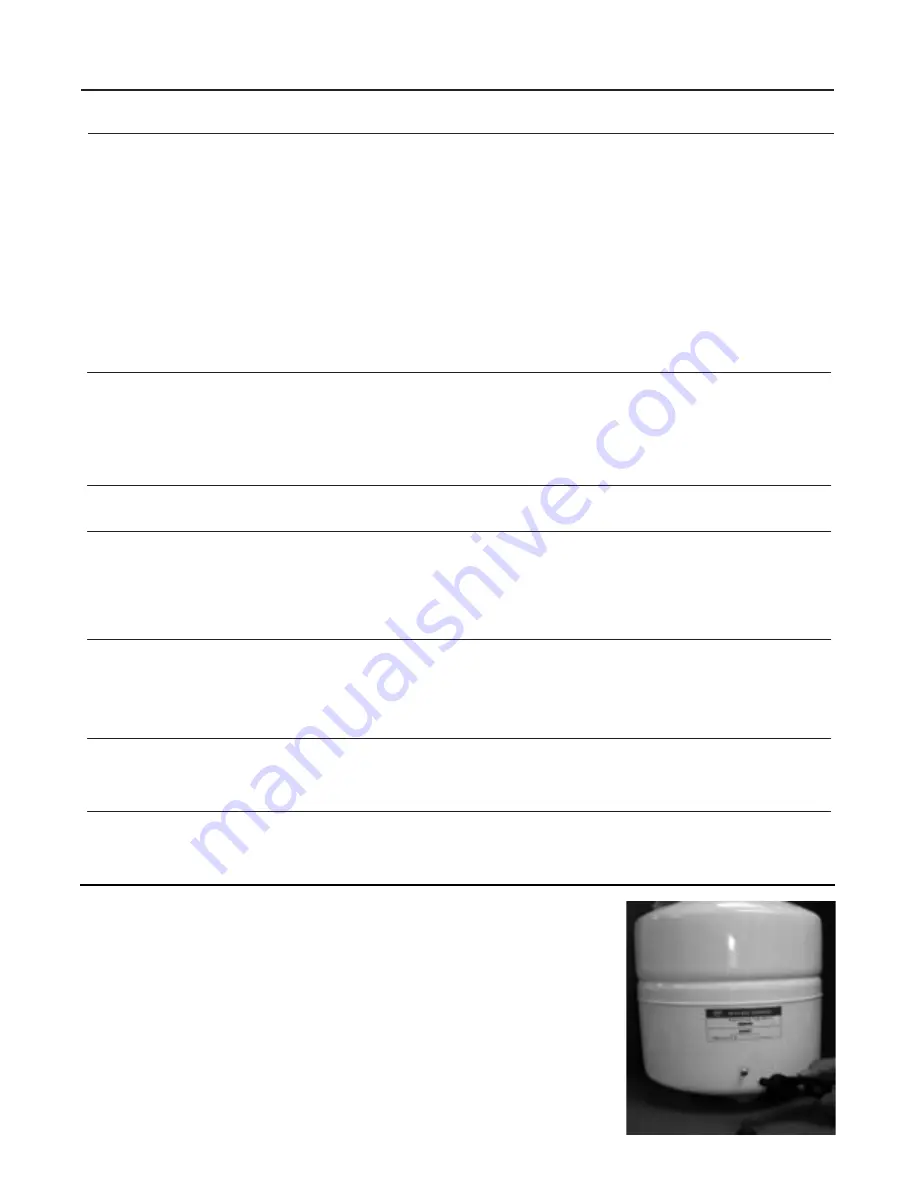
Checking air pressure in tank

Note:

Check air pressure when tank is empty.

Step 1

Open faucet and drain the tank.

Step 2

Using a digital air gauge check the air pressure in the tank. There should
always be between 5-7psi.

Step 3

If you have more than 7psi release air and recheck. If you have less than
5psi, add air. Air can be added with a bicycle pump.

Summary of Contents for ZRO-4

Page 1: ...to the product s failure and possible damage to property System Tested and certified by NSF International Against ANSI NSF Standard 58 for the reduction of claims specified on performance data sheet R...

Page 2: ...ubleshooting 11 Check air pressure in the tank 11 Adjust faucet 12 Service Record 13 Replacement Filter Kits 14 Warranty 14 Drawing and Parts list 15 Authorized Agent list Back cover 2 Thank You Thank...

Page 3: ...tion before or after the system Operating Temperatures Maximum 100 F 37 8 C Minimum 40 F 4 4 C Total Dissolved Solids TDS 1000 ppm Iron Iron in incoming water Maximum 0 2 ppm Hardness Not to exceed 7...

Page 4: ...of the sink slide on the locating washer lock washer and brass nut onto the shank Check orien tation of faucet then tighten brass nut securely Installation of Faucet Caution Porcelain sink surface ma...

Page 5: ...angle stop valves RO Tubes will be connected on page 6 For 3 8 plumbing For 1 2 plumbing Hand tighten brass nuts then apply 1 4 turn with a wrench To Sink Faucet To Sink Faucet To RO System To RO Syst...

Page 6: ...system maintenance Use a Phillips screwdriver and secure the screws 5 3 4 apart and 16 from the bottom of the cabinet Note There will be 2 Blue 1 Green and 1 Black coming from the module Do not cut t...

Page 7: ...n plastics connections Step 17 Thread 1 4 plastic connector fitting supplied in the parts bag into the ball valve attached to the tank Step 18 Postion the tank in the desired location Stand it upright...

Page 8: ...e final filter and faucet It is recommended to install a ball valve on the ice maker line 8 War ning To prevent the possibility of electrical shock clean up any water on cabinet floor and dry all wate...

Page 9: ...r reusing the connectors Note Flow arrow on final filter must be pointing in the direction of water flow to the faucet Step 3 The tank shut off switch has quick disconnect connectors Remove the blue t...

Page 10: ...ouble sided wrench part no WP 164002 can be purchased from Watts Step 3 Unwrap new membrane filter and lubricate the O rings with water soluble lubrication such as KY Jelly Insert the end with the two...

Page 11: ...tank 1 to 2 times Faucet Dripping Needs adjustment see page 12 Pump short cycles Ball valve on tank closed Open the ball valve on the top of the tank Blue tube blocked between Remove kinked damaged se...

Page 12: ...er will slide forward and com pletely off of the faucet base Small brass tee can be turned 1 2 turn counterclockwise to adjust the tension on the black lever This adjustment may be necessary to stop s...

Page 13: ...CHASE_____________DATE OF INSTALL______________INSTALLED BY_______________SERIAL ________________ Date of Maintenance 1st stage 2nd stage Final Filter TFM Sediment Carbon Block Carbon Membrane Other 6...

Page 14: ...an 3 or higher than 11 5 The incoming water pressure must be between 40 and 100 pounds per square inch 6 Incoming water to the RO cannot exceed 105 degrees F 40 degrees C 7 Incoming TDS Total Dissolve...

Page 15: ...25031 ELB PL 1 4 CX 1 8 M 90 15 113038 O RING SET FOR VESSEL 16 110005 MEM TFM 25 GPD DRY 17 113038 O RING SET FOR VESSEL 18 113032 VESSEL MEM HOUSING RES 19 134011 VALVE CHECK PLA ELBOW 1 4 CX 1 8 M...

Page 16: ...913 339 6677 913 339 9518 Phoenix Marketing Ltd 2416 Candelaria N E Albuquerque NM 87107 505 883 7100 505 883 7101 Delco Sales Inc 1930 Raymer Ave Fullerton CA 92833 714 888 2444 714 888 2448 Delco Sa...

Reviews: