background image

5

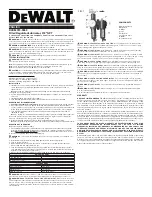
Green Tube Connection

Step 7

Locate the 1/4" green tube in the box . 

Insert one open end of the green 1/4" 

tube to the open 1/4" quick connect 

elbow fitting above the “FIVE MICRON 

SEDIMENT FILTER” label making 

sure the tube is pushed in all the way 

passed the O-ring to the tube stop .

Step 8

Insert the other open end of the green 1/4" tube into the open 1/4" 

quick connect fitting on the plastic adapt-a-valve making sure the 

tube is pushed in all the way passed the O-ring to the tube stop .

Connect Blue Tube

Step 9

Locate the 1/4" blue tube attached to the faucet . Insert the open end 

of the blue 1/4" tube into the open 1/4" quick connect elbow fitting 

above the “CARBON BLOCK PRE-FILTER” label making sure the 

tube is pushed in all the way passed the O-ring to the tube stop .

 Start Up Instructions 

To prevent the possibility of electrical shock, clean up any water 

on cabinet floor and dry all water from outside of unit.

Step 10

Turn on the incoming cold water at 

the angle stop valve and the Adapt-

a-Valve . Check the system for leaks 

and tighten any fittings as necessary . 

(Check frequently over the next  

24 hours to ensure no leaks are 

present) .

Step 11

 Turn faucet handle to the open position to start the flow of water 

through the unit . Run 7 gallons of water through the unit in order to 

flush out the normal black carbon fines (it will “sputter” until the air 

is purged out) from the unit . Initially, the water may appear cloudy 

which is due to tiny air bubbles and it will clear up shortly . Close the 

faucet when finished .
 Check for leaks . If you have any leaks, shut off the water supply to 

your system, tighten any fittings / housings and restart unit .

Step 12

Plug the (24 volt) transformer power cord connector into the UV 

module wire harness connector and plug the transformer into an 

electrical outlet . The white UV end cap will light up when in service 

(Plugged in) .

WARNING

!

Green Tube

Adapt-a-Valve

Summary of Contents for Premier WP500320 UV-3

Page 1: ...Installation 3 Drill Punch a Hole for Faucet 3 Mount Faucet and Connect Blue tube 3 Adapt a Valve Installation 4 How to use the Quick Connect Fittings 4 Connect Green Tube 5 Connect Blue Tube 5 Syste...

Page 2: ...is why it is important to change your filters at the recommended intervals as indicated in this system manual When replacing any of the filter elements pay special attention to any cleaning instructio...

Page 3: ...e that you can use for your RO faucet If you are already using it for a sprayer or soap dispenser see step 1 Porcelain sinks are extremely hard and can crack or chip easily Use extreme caution when dr...

Page 4: ...ential that the outside diameter be free of score marks and that burrs and sharp edges be removed before inserting into fitting Fitting grips before it seals Ensure tube is pushed into the tube stop P...

Page 5: ...n up any water on cabinet floor and dry all water from outside of unit Step 10 Turn on the incoming cold water at the angle stop valve and the Adapt a Valve Check the system for leaks and tighten any...

Page 6: ...g system off on will shorten the life of the UV lamp UV should be on continuously for maximum effectiveness The system requires a warm up period for proper operation Wait 20 minutes after plugging in...

Page 7: ...40 5 C Minimum 40 F 4 4 C 3 Operating Water Pressure Maximum 85 psi 5 98 kg cm2 Minimum 20 psi 4 Maximum flow Rate 0 50 gpm 1 89 lpm 5 Rated Capacity 600 Gallons 2 200 liters 6 Turbidity 5 NTU Recomme...

Page 8: ...ds per square inch 4 Incoming water to the UV cannot exceed 100 degrees F 40 degrees C 5 Incoming TDS Total Dissolved Solids not to exceed 1800 ppm 6 Do not use with water that is micro biologically u...

Page 9: ...u perforation du trou pour le robinet 3 Montage du robinet et raccordement du tube bleu 3 Installation du syst me Adapt A Valve 4 Utilisation des raccords branchement rapide 4 Raccordement du tube ver...

Page 10: ...est pourquoi il est important de remplacer vos filtres la fr quence recommand e celle ci tant indiqu e dans ce manuel d utilisation Veillez suivre les instructions de nettoyage avec soin lorsque vous...

Page 11: ...binet OI Si vous l utilisez d j pour une douchette ou un distributeur de savon reportez vous l tape 1 Les viers en porcelaine sont extr mement durs et se fissurent ou s br chent facilement Faites tr s...

Page 12: ...ords soient liss s avant d ins rer le tuyau dans le raccord Le tube se coince avant qu il ne soit compl tement ins r Assurez vous que le tube est enfonc jusqu la but e Enfoncez le tube dans le raccord...

Page 13: ...ur le plancher d armoire ou sur le module le cas ch ant tape 10 Ouvrez l arriv e d eau froide au niveau du robinet d arr t d querre et du syst me Adapt A Valve V rifiez qu il n y a pas de fuite et ser...

Page 14: ...marche r duiront la long vit de la lampe UV Pour offrir une efficacit maximale le module UV doit fonctionner en continu Une p riode de pr chauffage est n cessaire pour un fonctionnement efficace Atte...

Page 15: ...ment Maximum 100 F 40 5 C Minimum 40 F 4 4 C 3 Pression de fonctionnement pour l eau Maximum 85 psi 5 98 kg cm Minimum 20 psi 4 D bit maximal 0 50 gal min 1 89 l min 5 Capacit nominale 600 gallons 2 2...

Page 16: ...it se situer entre 20 et 100 psi livres par pouce carr 4 L eau circulant devant les ultraviolets ne doit pas d passer 100 F 40 C 5 La valeur des mati res dissoutes totales MDT ne doit pas d passer 1 8...

Reviews: