


Check Parts and Disassembly
Before reinstallation of check assembly, thoroughly clean o-ring groove and lubricate o-ring with FDA approved lubricant.
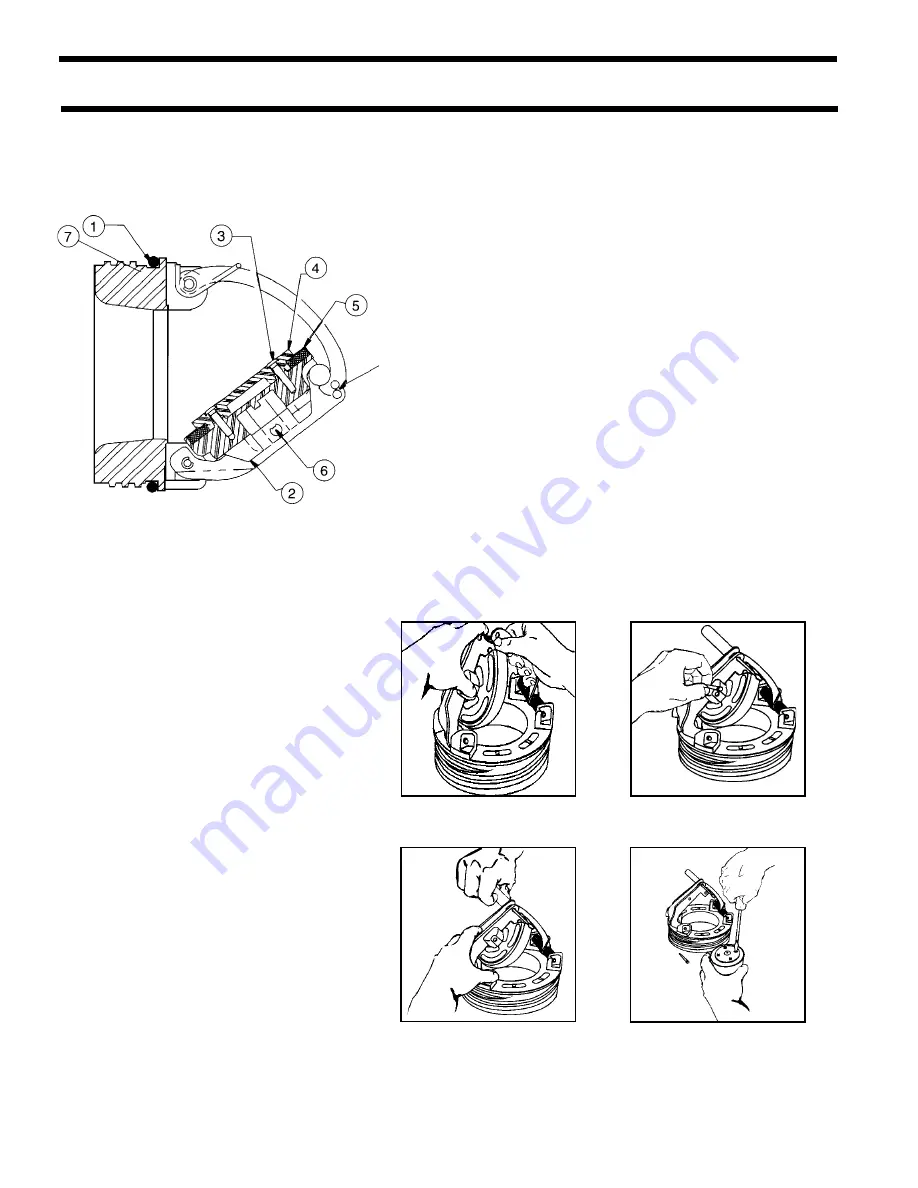
Item No.
Part Description
1.
First Check O-ring (removable)
2.
Clapper Assembly (removable)
3.
Clapper Retaining Plate Screws (removable)
4.
Clapper Retainer Plate (removable)
5.
Clapper Disc (removable)
6.
Pivot Arm Pin (removable ) Two c-clips
7.
Second Check O-ring (removable)
Note: Align holes and
insert pin or small
screwdriver to hold in
open position.
Figure 7
Figure 8
Figure 9
Figure 10
Check Disassembly
Please use caution when disassembling check.
Check Parts
6
Figure 7
Using a thin rod or screwdriver, lift the bar
up so that the clapper is free to swing up-
wards away from the seat.
Figure 8
Using your free hand, swing the clapper
open until the roller is almost to the free
end of the bar. Align the maintenance
lockout holes in the bar and the hinge
arms. Secure the check assembly in the
maintenance position by inserting a rod or
thin screwdriver through the lockout holes.
Figure 9
Remove one c-clip from the center pivot
pin. Withdraw the center pivot pin from the
clapper and the hinge arms. Remove the
clapper assembly from the check assembly
module. Remove the retainer screws. Note:
You may replace this item as an assembly or
you may continue and replace only the disc.
Figure 10
Disassemble the clapper by removing four
screws, disc retainer and the sealing disc.
Disc may be flipped if sealing surface
is damaged.


