3
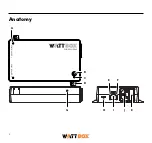
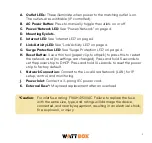
A. Outlet LEDs:
These illuminate when power to the matching outlet is on.
The outlets are switchable (IP controlled).
B. AC Power Button:
Press to manually toggle the outlets on or off.
C. Power/Network LED:
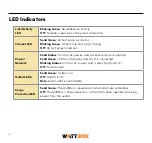
See “Power/Network” on page 4.
D. Mounting Eyelets.
E. Internet LED:
F.
Link/Activity LED:
See “Link/Activity LED” on page 4.
G. Surge Protection LED:
See “Surge Protection LED” on page 4.
H. Reset Button:
Use a thin tool (paper clip, toothpick) to press this to restart
the network card (no settings are changed). Press and hold 5 seconds to
set the power strip to DHCP. Press and hold 10 seconds to reset the power
strip to factory default.
I. Network Connection:
Connect to the Local Area Network (LAN) for IP
setup, control, and monitoring.
J. Power Inlet:
Connect a 3-prong IEC power cord.
K. External Fuse*:
May need replacement after an overload.
*Caution:
For inlet fuse rating: F10AH/250VAC. Failure to replace the fuse
with the same size, type, and ratings will damage the device,
connected, and nearby equipment, resulting in an electrical shock,
fire, explosion, or injury.

