4
DVR8EONPACK Installation
Before installing this unit, please read through the following points:
•
Do not place cords from the AC adapter where they can be pinched or stepped on.
•
Do not place heavy objects on cords, or cover cords with rugs or carpet.
•
Never immerse any component in water, and do not spray cleaners of solvents on the unit. Unplug
units before cleaning. When cleaning, use a damp, lint-free cloth only.
•
Do not expose the DVR or Cameras to excessive heat, cold, or moisture
•
Leave at least a 50mm between the DVR and other objects for air circulation around the unit.
•
Service should be handled only by qualified technicians.
Connection Guide
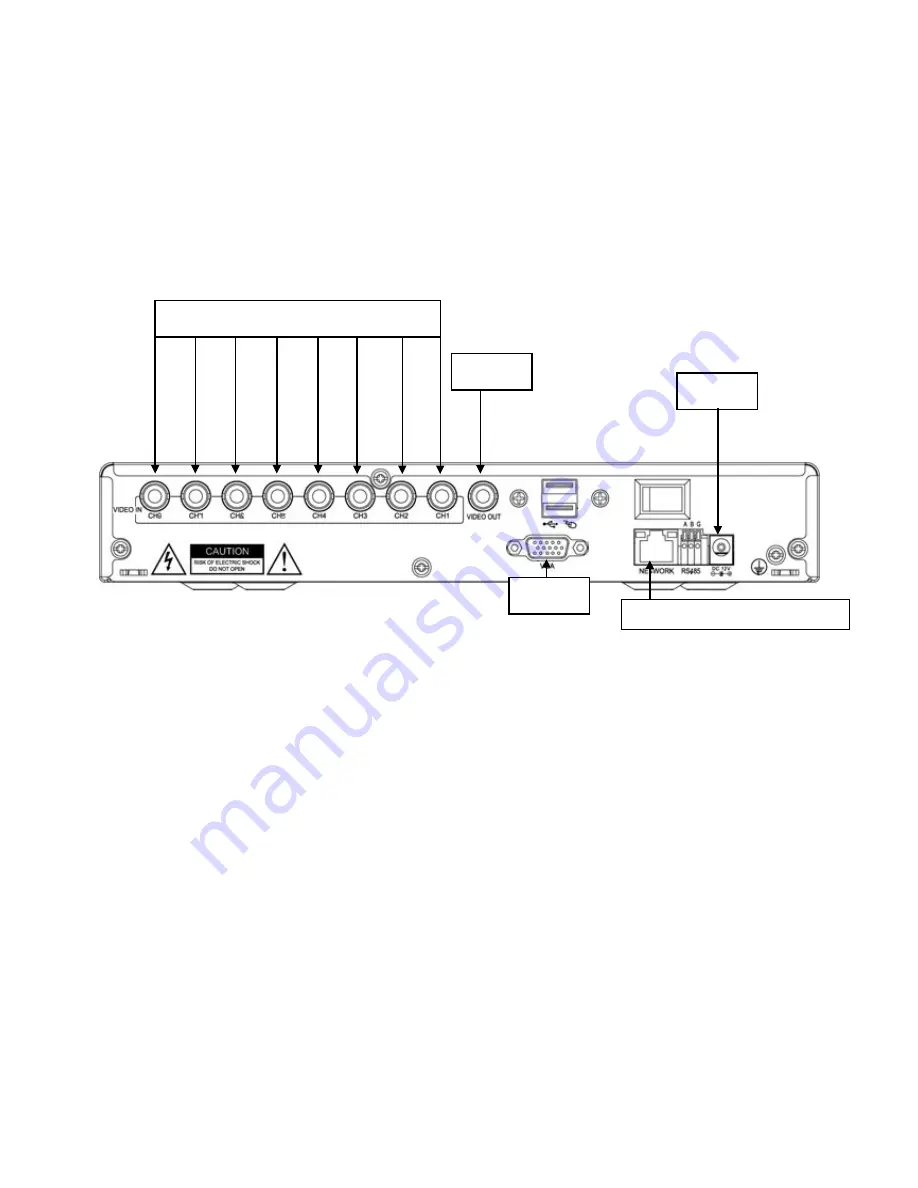
11. Locate the 8 Cameras as required and connect the supplied combination DC Power and Video
leads.
12. Connect the 8 x corresponding camera Video leads into the camera inputs at the rear of the DVR
(
Figure A
). Be sure to take note of the Camera input 1 – 8, as this will determine the camera
channels.
13. Connect the 8 x camera Power leads into the Power Splitter Cable
14. Connect the other Power Supply Cable to the DVR (
Figure D
).
15. If you are using a TV/Monitor with Composite Video Input, follow Step 6.
If you are using a TV/Monitor with VGA input, follow Step 7.
16. Connect the Monitor Connection Cable into the Composite Monitor output on the rear of the DVR
(
Figure B
). Connect the Monitor Connection Cable into the RCA Video input on your TV/Monitor
(TV/Monitor Not Supplied).
17. Connect the VGA cable to the VGA output on the rear of the DVR (
Figure C
). Connect the other end
of the VGA cable into the TV/Monitor VGA input.
18. Connect the 12VDC Power adaptor to the Power Split Cable.
19. Plug the Power adaptor into a Power-Point and switch the power-point ON
20.
The Power LED on the front of the DVR should now be illuminated and the unit will make a loud
beep sound to show that it is ready.
Figure B
Figure C
Network cable connection (Optional Use)
Figure D
Figure A


