


Page 56 of 102
Page 57 of 102
Doc: DRX Installation
Version: 7.1 January 2021
Doc: DRX Installation
Version: 7.1 January 2021
DRX INSTALLATION MANUAL
DRX INSTALLATION MANUAL
equation.
4.
Enter the calculated value for
a
into the Heading Offset in the
DATA SETUP
section
of the
DRX SETUP WEBPAGES
.
See “5.2.4. Data Setup Tab” on page 39.
5.3.5. Patch Test Validation
With on water patch tests complete the configuration can be checked.
1. Find an area with distinct features such as sand waves, depth variance, rocks etc
2. Map the area with parallel overlapping tracks in both directions.
3. Validate alignment of the features.
Any misalignment will be due to inaccuracies in the commissioning values that have
been applied.
6 RPM PROCESSING OPTION FOR SURVEY
RPM is a WASSP module which enhances the WASSP seafloor tracking for survey
applications, increasing the ping rate, especially in shallow water.
RPM instructions are in addition to a standard DRX commissioning.
RPM runs as part of DataManager therefore the Acquisition Software needs to be
connected to DataManager and DataManager need to be connected to the DRX.
This Module requires the “RPM license” on the DRX.
First set up your WASSP system as iper the DRX Installation Manual.
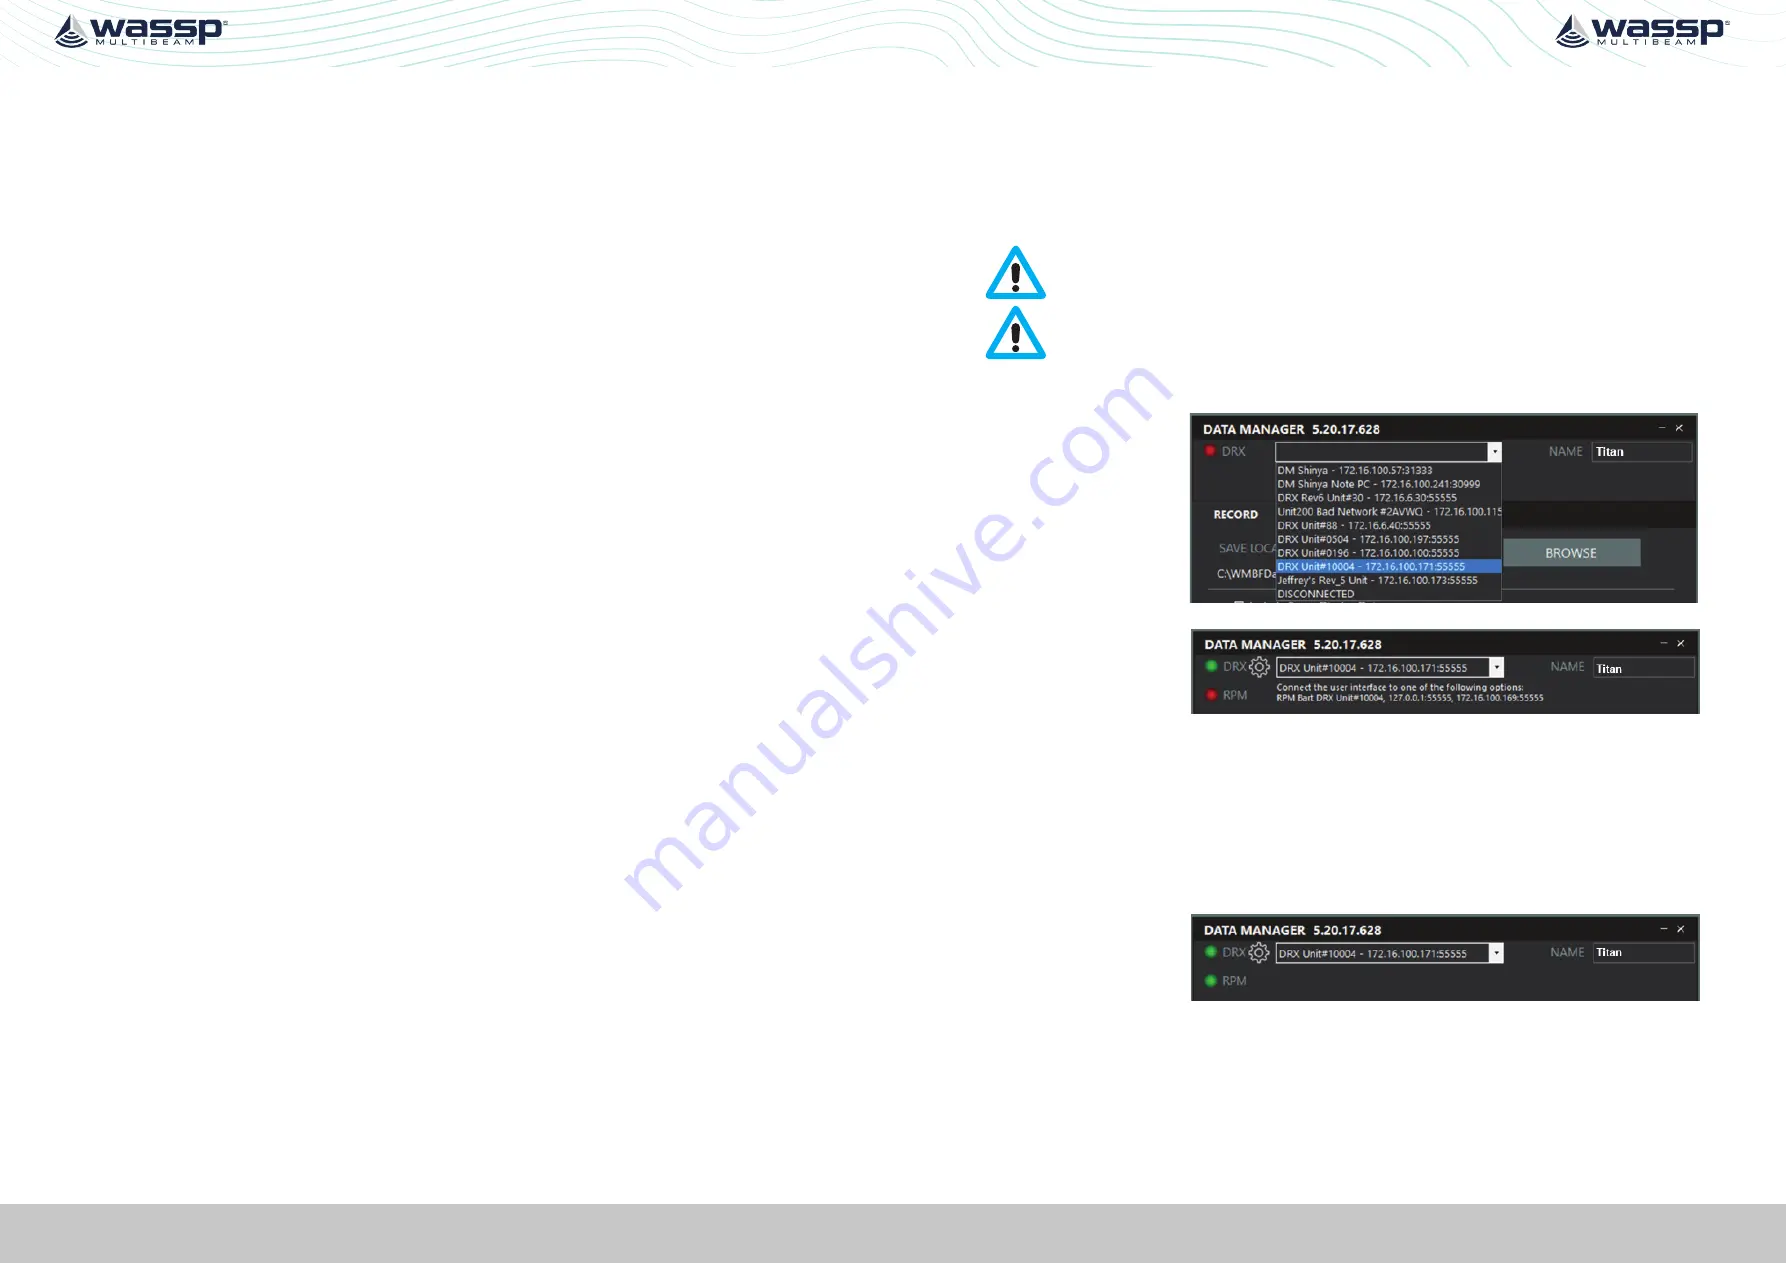
6.1. DRX CONNECTION SETUP
1. Connect
DATAMANAGER
to
the DRX.
2. RPM will now be
visible under the DRX
in
DATAMANAGER
if
the DRX has the RPM
license.
6.2. ACQUISITION SOFTWARE CONNECTION SETUP
Instead of connecting the user interface / Acquisition software to the DRX, connect the
user interface to DataManager RPM through the IP addresses listed.
127.0.0.1:55555 is the most common connection if the User Interface is running on the
same PC as DataManager.
In CDX, RPM will be
selectable from the
DEVICE
menu via RPM
[DataManagerName]
[DRX Name] E.g. “RPM
Titan DRX Unit#10004”
When the Acquisition
software is connected
the RPM LED will be
Green.


