Getting Started Guide: Cobra OCT Spectrometers
Page 2
Setting up the Cobra OCT Spectrometer
This section provides generic instructions for setting up a Cobra spectrometer. Please note each model
differs in shape, size and looks based on the selected configuration.
Step 1
Unpack items from the box that include Cobra Spectrometer and fiber optic cable. Based on choice of
camera user will have appropriate power supply or a USB cable if the device USB powered. In certain cases
the user will receive another box provided by a third party camera manufacturer.
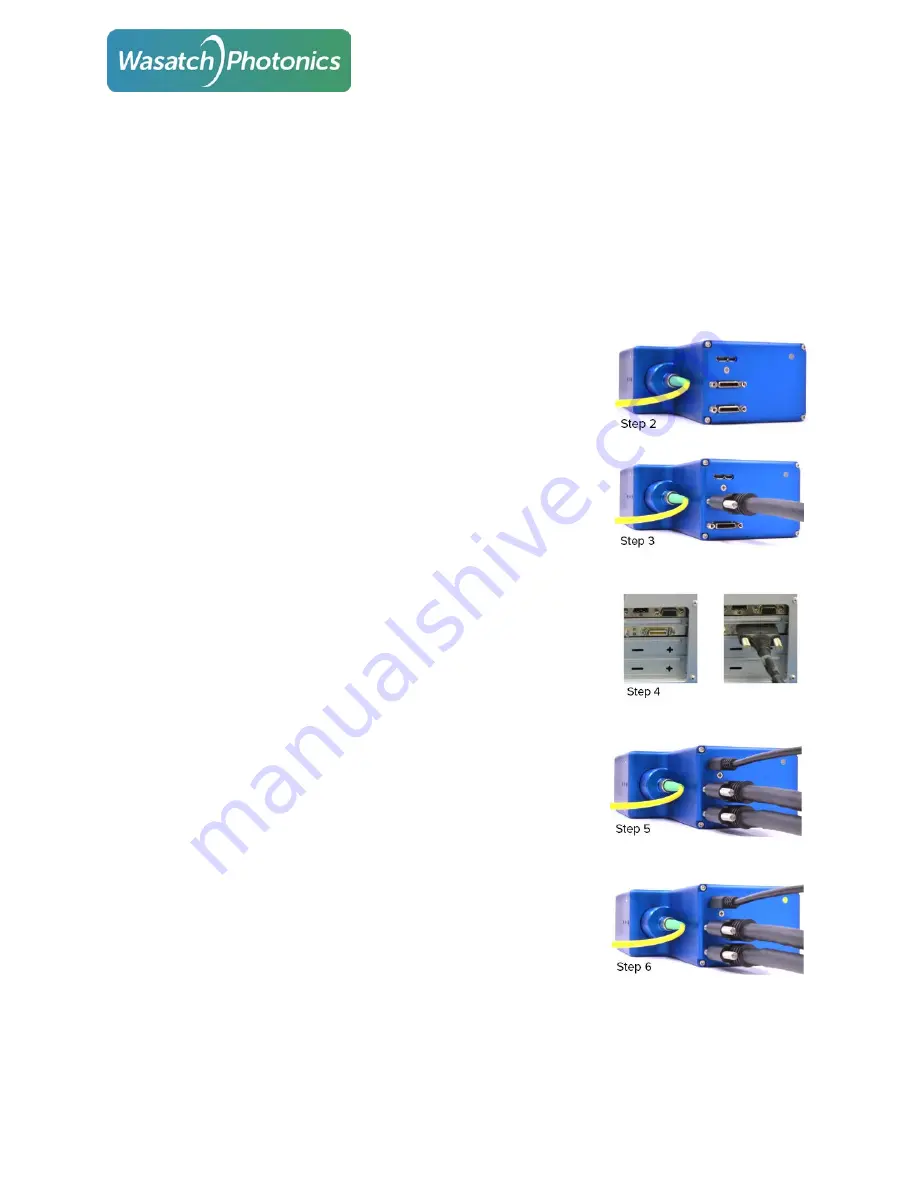
Step 2
Connect FC/PC end of optical fiber to the spectrometer as shown. Light
should be introduced to the FC/APC side of the spectrometer using a
mating connector.
Step 3
Connect the smaller end of camera link cable(s), called SDR (Shrunk Delta
Cables), to the spectrometer. Note in case the camera is being operated at
a rate where medium or full camera link mode is used, two camera link
cables are required.
Step 4
Connect the larger end of camera link cable(s), called MDR (Mini D Ribbon),
to the camera link card installed in your computer.
Step 5
If the camera is USB powered like the Cobra with a Wasatch internal
camera, connect the USB micro type B connector to the spectrometer and
USB type A side of the cable to the power. In case any other camera is
used (such as Basler, Dalsa, SUI), connect appropriate power to the
camera.
Step 6
Insert the power supply to the wall outlet (120-220 V/50-60 Hz). At this
stage the Cobra OCT Spectrometer has been setup and we are ready to
test it with control software. Control software talks to the spectrometer
via the camera link card.
Continue to the section labeled with your spectrometer part number for further detail on setting up specific
hardware combinations.


