background image

paGE 32

© 2014 OJ Electronics A/S

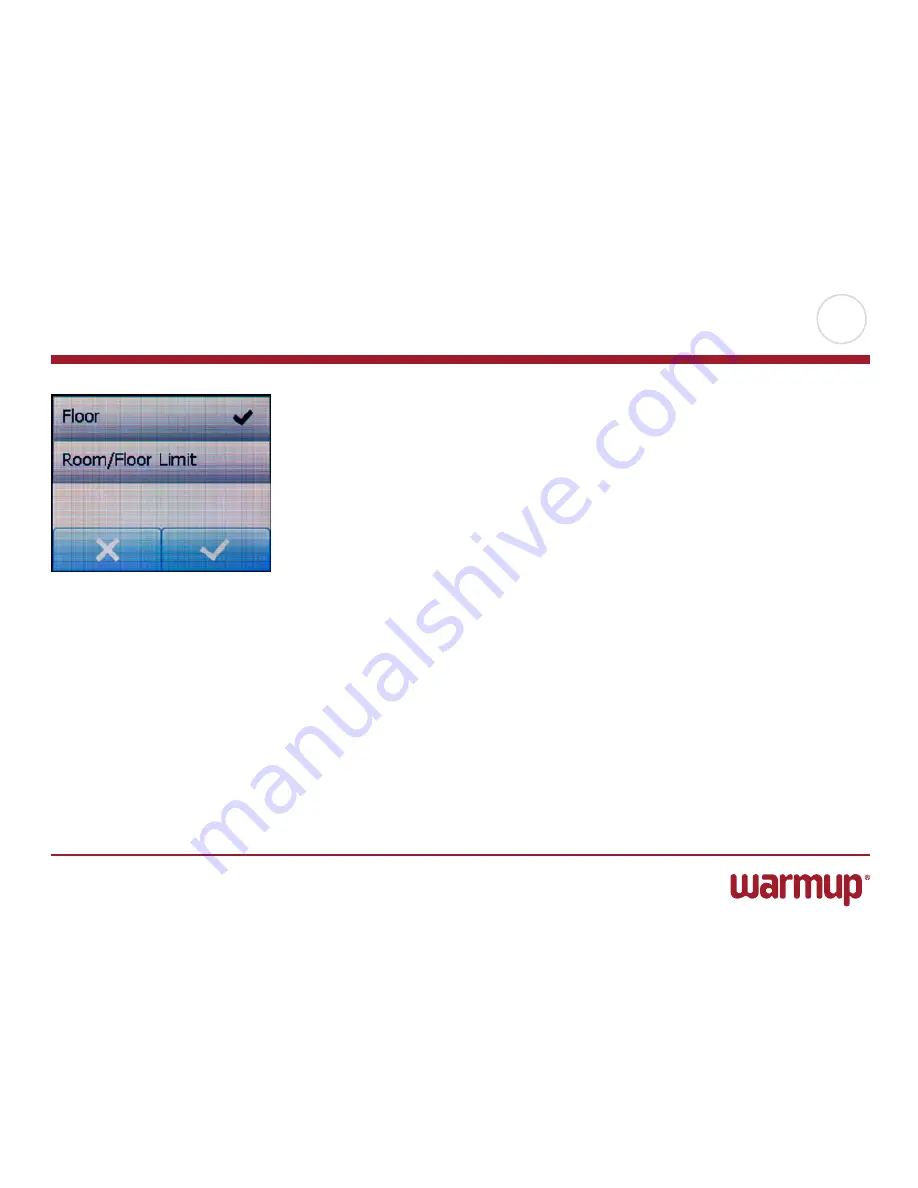
Sensor Application

This option allows you to choose which sensor is used to control the heating sys-
tem .

•  Floor (default): With this setting, the floor sensor controls the heating system. 

•   Room/Floor Limit (advanced): With this setting, the room sensor controls the 

heating system subject to maximum and minimum limits for floor temperature . 

  The maximum temperature limit protects wooden floors from excessive heat . 
   The minimum temperature limit prevents the floor from becoming too cold for 

comfort when heating is not needed, e .g . in a bathroom . Note that this function 
will increase energy consumption .

  (Floor Limit temperatures are set in the “

Temperature Scale

” menu) .

•   Room (alternative): With this setting, the room sensor inside the thermostat con-

trols the temperature .

Maximum temperature depends on floor type and temperature scale . 

1 .  Tap the “

menu

” button on the home screen . 

  Then tap the “

Engineer Settings

” button .

2 .  Tap the “

Sensor application

” button .

3 .  Accept the information displayed, then tap the application you want to use .
4 .  Confirm your choice with “

” or discard it with “

X

” .

5 .  Tap the “

Left Arrow

” button to return to “

Engineer Settings

” .

Summary of Contents for WT01

Page 1: ...www warmup co nz 2014 OJ Electronics A S WT01 Colour Touch Thermostat ...

Page 2: ... 1 2 15 Heating Schedule 2 2 16 Energy Use 17 User Settings 18 Vacation Mode 19 Frost Mode 20 Child lock 21 Display Brightness 22 Screen Saver 23 Events 24 Energy Tariff 25 Date 26 Time 27 Daylight Saving Time 28 Language 29 Information 30 Engineer Settings 31 Sensor Application 32 Sensor Type 33 Sensor Calibration 34 Temperature Scale 1 3 35 Temperature Scale 2 3 36 Temperature Scale 3 3 37 Adapt...

Page 3: ...PAGE 3 2014 OJ Electronics A S Menu Overview Heating Schedule User Settings Engineer Settings Energy Use ...

Page 4: ...re when your home is unoccupied will reduce your energy costs without reducing comfort The thermostat comes with a preset heating schedule suitable for most homes Unless you change the settings the thermostat will operate according to this preset heating schedule The thermostat features an adaptive function that automatically changes heating start times to ensure that the required temperature has ...

Page 5: ...wn Arrow button to set the day month and year Confirm each setting with OK 3 Time set the current time which is used to control the Heating Schedule Tap the parameter you want to change Use the Up Arrow or Down Arrow button to set the hours and minutes Confirm each setting with OK 4 Floor Type choose between Tile floors made of tile or stone Soft Floor wooden or other engineered floors Confirm you...

Page 6: ...stat has an ON OFF switch on the left side of the thermostat Otherwise the thermostat is intuitively operated via the high resolution colour touchscreen which is used to navigate through the menus and to change the set tings General Operation ...

Page 7: ...tomatically according to a weekly schedule of your choice The thermostat comes with a pre programmed schedule for easy and economic heating control of most homes see Factory Settings Preset Schedule The schedule can be changed in the Heating Schedule menu Programmed Heating Schedule ...

Page 8: ...een Tap Back to return to the previous menu Cancel is shown on the screen as a button marked X Although Cancel has the same effect as Back it also results in all unsaved settings being discarded As soon as you leave a home screen and enter one of the menus either a Back button or a Cancel button will be shown To return to the home screen tap Back Cancel once or multiple times depending on where yo...

Page 9: ... The thermostat offers four different modes of temperature control directly from the home screen Auto Operation Manual Override Comfort Mode Boost Mode In addition two other operating modes are available under User Settings Vacation Mode Frost Mode ...

Page 10: ...t modes are accessible from the home screen The function of the buttons and symbols shown on the home screen varies according to the chosen operating mode Auto Operation 1 Day and time info 2 Tap here to access the menus 3 Symbol showing current operating mode clock Auto Operation 4 Current target setpoint temperature if shown in red heating is being provided 5 Time of next scheduled event change ...

Page 11: ...leave the thermostat as it is While in manual override an Auto button is shown between the arrow buttons on the home screen Press this button to return the thermostat to auto operation The function of the buttons and symbols shown on the home screen varies accord ing to the chosen operating mode Manual Override 1 Indication of manual override 2 Tap here to access the menus 3 Symbol showing current...

Page 12: ... Down Arrow button to select the required temperature Confirm with OK 5 Use the Up Arrow or Down Arrow button to set the required duration of com fort mode Confirm with OK While in comfort mode an Auto button is shown on the home screen Press this button to return the thermostat to auto operation The function of the buttons and symbols shown on the home screen varies according to the chosen operat...

Page 13: ...ou wish the thermostat to activate boost mode by tapping While in boost mode an Auto button is shown on the screen Press this button to return the thermostat to auto operation The function of the buttons and symbols shown on the home screen varies accord ing to the chosen operating mode Boost Mode 1 Indication of boost mode 2 Tap here to access the menus 3 Symbol showing current operating mode clo...

Page 14: ...ptions which can be used to configure your ther mostat The main menu is accessed via the Menu button on the home screen Heating Schedule Energy Use User Settings Engineer Settings Some of the menus have various parameters which can be set Thermostat Setup Main Menu ...

Page 15: ... 4 If you chose Work days home days tap the Right Arrow button to access information about the schedule and then select the days on which you work Once you have selected your work days tap the Right Arrow button and the thermostat will automatically designate the remaining days as home days Tap the button to accept Tap the Left Arrow button to return to the Heating Schedule menu Now proceed to ste...

Page 16: ...s Confirm with OK 10 Tap the Left Arrow or Right Arrow button to toggle through the various events 11 Once you have completed setting all the events tap the Right Arrow button to view a confirmation screen and return to the heating schedule screen 12 Tap the Left Arrow button on the heating schedule screen to return to the main Menu Heating Schedule 2 2 ...

Page 17: ...ach day of the past month will be displayed The graph shows hours per three days Year A graph of usage during each month of the past year will be displayed The graph shows hours per month An overview of electricity consumption kWh and heating costs for the time periods specified above Note actual load currency and price per KWh must be set in the Energy Tariff menu under User Settings 1 You can to...

Page 18: ... menu allows you to set various parameters The menu contains the following options Vacation Mode Frost Mode Child Lock Display Brightness Screen Saver Events Energy Tariff Date Time Daylight Saving Time Language Information User Settings ...

Page 19: ...us user settings 2 Tap the Vacation Mode button 3 Tap the OFF ON button to ON and confirm with the button 4 Set the date on which you leave on vacation Tap the Right Arrow button 5 Set the date on which you plan to return Tap the Right Arrow button A con firmation screen will then be displayed briefly before the thermostat automatically returns to the User Settings menu 6 Tap the Left Arrow button...

Page 20: ... various user settings 2 Tap the Frost Mode button 3 Tap the button to enter frost mode A confirmation screen will then be dis played briefly before the thermostat automatically returns to the User Settings menu While in frost mode a snowflake is displayed on the home screen together with the target setpoint temperature 5 0 C You can cancel frost mode and return the thermostat to the previous oper...

Page 21: ...re you can operate the thermostat again you must unlock the child lock in the following way From the idle home screen a Tap the screen to activate it Three circles containing dots will be displayed on the screen b Draw an L on the screen in a single stroke without lifting your finger from the screen Start by touching the dot in the circle in the upper left corner then slide your finger downwards t...

Page 22: ...ome screen Then tap the User Settings button to access the various user settings 2 Scroll down and tap the Display Brightness button 3 Select one of the five levels of brightness using the Up Arrow or Down Ar row button 4 Confirm your choice with OK The thermostat will automatically return to User Settings Display Brightness ...

Page 23: ...s setting minimises energy consumption 1 Tap the Menu button on the home screen Then tap the User Settings button to access the various user settings 2 Scroll down and tap the Screen Saver button 3 Tap the information you want to be shown in screen saver mode 4 Confirm your choice with or discard it with X The thermostat will automatically return to User Settings Screen Saver ...

Page 24: ...ou get up in the morning you go to work you return home and you go to sleep With a six event schedule you can set six different events during work days and two different events during home days Perfect if your day is as follows You get up in the morning you go to work you return home for lunch you go back to work you return home and finally you go to sleep 1 Tap the Menu button on the home screen ...

Page 25: ... the parameter you want to change Currency a Tap the currency you prefer b Confirm with The thermostat will automatically return to Energy Tariff Price per kWh a Tap the Up Arrow or Down Arrow button to set the price you pay per kWh b Confirm with OK The thermostat will automatically return to Energy Tariff Load a Tap the Up Arrow or Down Arrow button to set the kW load of your underfloor heating ...

Page 26: ...e and Daylight Saving Time 1 Tap the Menu button on the home screen Then tap the User Settings button to access the various user settings 2 Scroll down and tap the Date button 3 Tap the parameter you want to change 4 Tap the Up Arrow or Down Arrow button to set the day month and year 5 Confirm each setting with OK 6 Tap the Left Arrow button to return to User Settings ...

Page 27: ... operation 1 Tap the Menu button on the home screen Then tap the User Settings button to access the various user settings 2 Scroll down and tap the Time button 3 Tap the parameter you want to change 4 Tap the Up Arrow or Down Arrow button to set the hours and minutes 5 Confirm each setting with OK 6 Tap the Left Arrow button to return to User Settings ...

Page 28: ...ostat clock to CET daylight saving time 1 Tap the Menu button on the home screen Then tap the User Settings button to access the various user settings 2 Scroll down and tap the Daylight Saving Time button 3 Tap the OFF ON button to the setting you prefer 4 Confirm with the button The thermostat will automatically return to User Settings ...

Page 29: ...language used on the screen 1 Tap the Menu button on the home screen Then tap the User Settings button to access the various user settings 2 Scroll down and tap the Language button 3 Tap the language you prefer English Deutch 4 Tap the Left Arrow button to return to User Settings ...

Page 30: ...g the following information Application version Unit ID Sensor temperatures 1 Tap the Menu button on the home screen Then tap the User Settings button to access the various user settings 2 Scroll down and tap the Information button 3 Tap the Left Arrow button to return to User Settings ...

Page 31: ...his menu contains all the parameters that must be set by the technician during thermostat installation or service The menu contains the following options Sensor Application Sensor Type Sensor Calibration Temperature Scale Adaptive Function Factory Reset ...

Page 32: ...s the floor from becoming too cold for comfort when heating is not needed e g in a bathroom Note that this function will increase energy consumption Floor Limit temperatures are set in the Temperature Scale menu Room alternative With this setting the room sensor inside the thermostat con trols the temperature Maximum temperature depends on floor type and temperature scale 1 Tap the Menu button on ...

Page 33: ...Scroll down and tap the Sensor Type button 3 Tap the type of floor sensor actually used 4 Confirm your choice with or discard it with X 5 If Custom is chosen you must provide resistance values for the sensor concerned at four given temperatures 15 C 20 C 25 C and 30 C ask the supplier of the sensor for these values 6 Use the Right Arrow or Left Arrow button to toggle through the temperatures 7 Tap...

Page 34: ...in steps of 0 5 C in the following way 1 Tap the Menu button on the home screen Then tap the Engineer Settings button 2 Scroll down and tap the Sensor Calibration button 3 Confirm that you want to calibrate the sensor with or cancel with X 4 If is chosen you must then offset the thermostat to reflect the room tempera ture actually measured 5 Use the Up Arrow or Down Arrow button to set the measure...

Page 35: ...ecise information please ask your flooring supplier Floor limit temperatures Floor limit temperatures allow you to set the lowest Minimum Limit Temp and highest Maximum Limit Temp permissible floor temperature during normal room temperature control If floor temperature drops below the Minimum Limit Temp the thermostat will activate the heating system to maintain the temperature above the set minim...

Page 36: ...firm that you want to set minimum and maximum operating temperatures for the thermostat by tapping or cancel with X 4 If is chosen you can set a Minimum Scale temperature 5 Use the Up Arrow or Down Arrow button to change the Minimum Scale temperature 6 Confirm the setting with OK 7 You can now set a Maximum Scale temperature 8 Use the Up Arrow or Down Arrow button to change the Maximum Scale tempe...

Page 37: ... Maximum Limit Temp 14 Use the Up Arrow or Down Arrow button to change the Maximum Limit Temp 15 Confirm the setting with OK 16 A confirmation screen will be displayed 17 The thermostat will automatically return to Engineer Settings Temperature Scale 3 3 ...

Page 38: ...d how much earlier the heating must be turned on to achieve this Select OFF if you just want the heating to start at the beginning of an event 1 Tap the Menu button on the home screen Scroll down and tap the Engineer Settings button 2 Tap the Adaptive Function button 3 Tap the OFF ON button to the setting you prefer and confirm with the button 4 The thermostat will automatically return to Engineer...

Page 39: ...rsonal settings will be lost 1 Tap the Menu button on the home screen Scroll down and tap the Engineer Settings button 2 Tap the Factory Reset button 3 Tap X if you want to maintain your settings and return to Engineer Settings Tap Reset if you want to restore the factory settings 4 The thermostat will then be reset and the Startup Wizard will appear on the screen ...

Page 40: ...d down Tap the language you prefer Confirm with OK 2 Date set the current date is used for several functions Tap the parameter you want to change Tap the Up Arrow or Down Arrow button to set the day month and year Confirm each setting with OK 3 Time set the current time is used to control the Heating Schedule Tap the parameter you want to change Use the Up Arrow or Down Arrow to set the hours and ...

Page 41: ...oint temperature dependent on Sensor Application Work days Floor Room Floor Limit Wake up 6 00 25 C 20 C Leave home 8 00 20 C 15 C Daytime home 12 00 25 C 20 C Daytime leave 13 00 20 C 15 C Come home 17 00 25 C 20 C Go to sleep 23 00 20 C 15 C Home days Floor Room Floor Limit Wake up 8 00 25 C 20 C Go to sleep 23 00 20 C 15 C You can change the settings for these temperatures to suit your needs Se...

Page 42: ...efective or short circuited Contact your technician The thermostat must be replaced E2 External sensor disconnected defective or short circuited Contact your technician for replacement E5 Internal overheating Ask your technician to come and inspect the installation Three circles containing dots are displayed on the screen the thermostat cannot be operated The thermostat is in Child Lock mode See t...

Page 43: ...to OJ Electronics A S 2014 OJ Electronics A S Contact Data WARMUP NEW ZEALAND Tel 0800 927 687 Fax 64 9 820 7090 info warmup co nz www warmup co nz WARMUP AUSTRALIA Tel 1300 138 126 Fax 61 2 9980 1803 info warmtech com au www warmtech com au ...

Reviews: