Support Email/ Skype: [email protected]
11
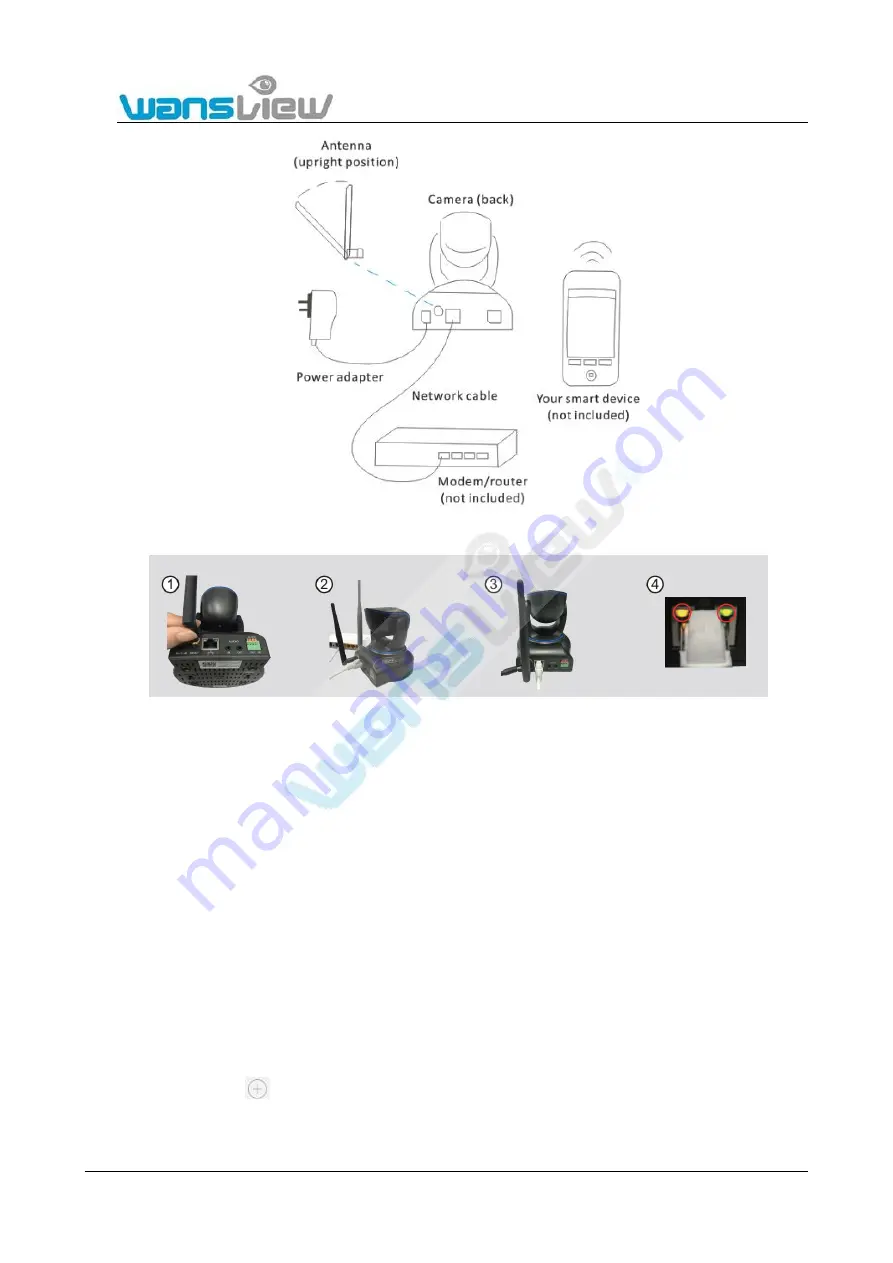
Steps for product connection:
1. Please install and tightly screw in the accessory Wi-Fi antenna into the antenna aperture on the back of the camera.
2. Connect the IP camera and router via network cable.
3. Use the accessory power adapter to power up the camera (Please verify the output voltage of the adapter and the allowable
voltage value of the camera).
4. Observe the two lights at the network interface. When the orange light on the left side is ON, it indicates that someone is
accessing the camera. When the green light on the right side is ON, it indicates that the network is connected.
Connect the camera with power supply and network cable following the four steps above, then you can view the ip camera by
computer or smart phone. Or you can connect the camera with WiFi as Section 2.2
2.2 Wi-Fi Set Up
2.2.1 Mobile Phone Wi-Fi Set Up
Method 1: One Key Wi-Fi Configuration
1)
Make sure the mobile phone is in a WIFI connection state. Install the “Wansview” app at the Android or iPhone mobile phone
device.
2)
Run the app and click
. The user can add IP cameras via the following three methods: (Directly input the camera DID ;
scan the QR code at the bottom of the camera; LAN search). Then, input the user name and password.
Reminder: When using the camera for the first time, please use the default user name of the manufacturer: admin, password 123456.


