


Controls
BX36S
3PH Self-feed Chipper
24
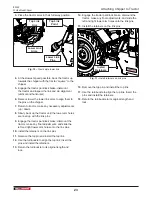
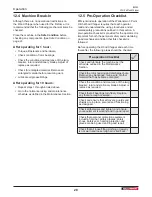
19.
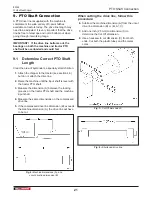
Install the PTO drive line.
IMPORTANT! Ensure correct PTO shaft length
(
PTO Shaft Connection on page 21
).
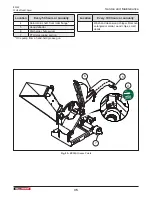
Fig. 12 –
PTO Shaft
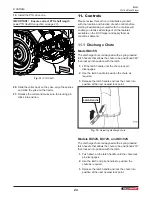
20.
Slide the collar back on the yoke, align the splines
and slide the yoke on the tractor.
21.
Release the collar and make sure the locking pin
clicks into position.
11. Controls
Please review this section to familiarize yourself
with the location and function of each control before
starting. Familiarizing yourself with the controls will
enable you to take advantage of all the features
available on the BX Chipper and apply them as
conditions demand.
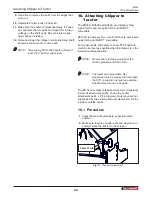
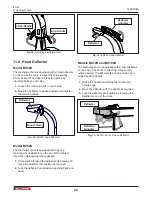
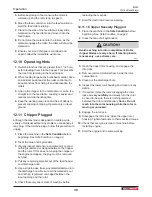
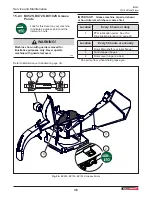
11.1 Discharge Chute
Model BX36S
The discharge chute is designed with a spring-loaded
latch handle that allows the chute to be positioned 360°
then locked into position with the latch.
1.
Lift the latch handle until the chute lock pin
disengages.
2.
Use the latch handle to position the chute as
required.
3.
Release the latch handle and lock the chute into
position at the next nearest lock point.
Latch Handle
Fig. 13 –
Adjusting discharge chute
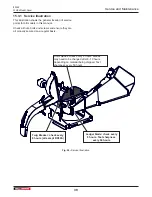
Models BX52S, BX72S, and BX102S
The discharge chute is designed with a spring-loaded
latch handle that allows the chute to be positioned 270°
then locked into position with the latch.
1.
Push down on the latch handle until the chute lock
pin disengages.
2.
Use the latch and grip handles to position the
chute as required.
3.
Release the latch handle and lock the chute into
position at the next nearest lock point.
Summary of Contents for BX36S
Page 1: ...OPERATOR S MANUAL 3PHSelf feedChipper BX36S BX52S BX72S BX102S...
Page 51: ......
Page 52: ...www wallensteinequipment com...


