background image

25

26

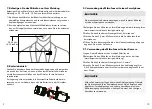
9.2.  Using the microphone with a laptop


NOTE

1)  BOYA BY-M1 Pro can only be used on laptops which feature a full 

function earphone jack with 4 poles (TRRS).

2) There is no need to install battery for the use with a laptop.

1 Attach the microphone to your clothing (see previous instructions).
2 Move the switch on the control unit to „Smartphone“.

3 Plug the 3.5 mm connector into the audio jack of your laptop.

4 Open the audio app and begin recording.

9.3.  Using the microphone with other devices

1 Install the battery with correct polarities.
2 Attach the microphone to your clothing (see previous instructions).
3 Move the switch on the control unit to „Camera“.

4  Plug the 3.5 mm connector into the audio input jack of your device 

(audio recorder, amplifier etc.), and begin recording.


NOTE

1) Make sure to install the battery with correct polarities.

2)  There is no need to install the battery when using the micro

-

phone in Smartphone mode. This mode only works with smart

-

phones, tablets and some laptops.

3)  Make sure to set the switch first, then connect the microphone 

to your equipment.

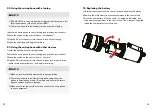
10.  Replacing the battery

1 Unscrew the two parts of the control unit and separate the pieces.
2 Remove the old battery from its compartment in the control unit.

3  Place the new battery, with the + and - oriented as indicated, into 

the battery compartment in the control unit. The + symbol is applied 

inside the compartment for reference.

Summary of Contents for Boya BY-M1pro

Page 1: ...anleitung Instruction Manual BY M1pro Universal Lavaliermikrofon Universal Lavalier Microphone by WALSER GmbH Co KG Senefelderstrasse 23 86368 Gersthofen Germany info walser de www walser de vEN Made...

Page 2: ...neuen Besitzer weiter wenn Sie das Ger t verkaufen oder anderweitig berlassen Gebrauchsanleitung 1 So verstehen Sie diese Gebrauchsanleitung richtig 1 1 Kennzeichnungen am Ger t Dieses Zeichen bedeut...

Page 3: ...parieren Halten Sie das Ger t stets so instand wie diese Gebrauchsanlei tung es vorschreibt ffnen Sie das Ger t nicht WARNUNG Erstickungsgefahr durch Kleinteile Halten Sie das Ger t und die Verpackung...

Page 4: ...DSLRs Cam cordern Audiorecordern PCs usw Hochwertiges Kondensatormikrofon ideal f r den Videoeinsatz Geringe Handhabungsger usche Inklusive Reversclip LR44 Batterie Schaumstoff Windschutz Adapter auf...

Page 5: ...keine Batterie einzulegen wenn Sie dieses Mikrofon mit einem Smartphone verwenden 1 Befestigen Sie das Mikrofon an Ihrer Kleidung oder der Kleidung Ihres Interviewpartners siehe vorherige Anleitung 2...

Page 6: ...ng 3 Stellen Sie den Schalter an der Steuereinheit auf Camera 4 Stecken Sie den 3 5 mm Stecker in die Audioeingangsbuchse Ihres Ger tes Audiorecorder Verst rker usw und beginnen Sie mit der Aufnahme H...

Page 7: ...indem Sie auf OFF umschalten um die Batterie zu schonen wenn die Aufnahme beendet ist Sie verwenden das Mikrofon bei extremer Hitze oder K lte was die Entleerung beschleunigt Zu viele Nebenger usche...

Page 8: ...ilfe oder eine kostenfreie individuelle Beratung durch unser geschultes Fachpersonal ben tigen dann freuen wir uns wenn Sie mit unserem Serviceteam Kontakt aufnehmen Wir helfen Ihnen gerne Ihr Team vo...

Page 9: ...se you should also pass on these instructions for use 1 Understanding these instructions for use correctly 1 1 Markings on the device This symbol indicates that your device meets the safety requiremen...

Page 10: ...nual for maintaining your device WARNING Danger of suffocation caused by small parts Keep the device out of the reach of children and pets 3 Unpack and check the device 3 1 Carefully unpack the scope...

Page 11: ...or Smartphones DSLRs camcorders audio recorders PCs etc High quality condenser ideal for video use Low handling noise Includes lapel clip LR44 battery foam windscreen 1 4 jack adapter Play back headph...

Page 12: ...ou don t need to install the battery when using this microphone with a smartphone 1 Attach the microphone to your clothing or the clothing of your inter view partner see previous instructions 2 Move t...

Page 13: ...tions 3 Move the switch on the control unit to Camera 4 Plug the 3 5 mm connector into the audio input jack of your device audio recorder amplifier etc and begin recording NOTE 1 Make sure to install...

Page 14: ...phone is being left on Turn o ff the microphone by switching to OFF to save battery when the recording is finished You are using the microphone in extremely hot or cold condi tions which drains it qui...

Page 15: ...e here for you If you need help or a free individual consultation from our trained specialist personnel please contact our service team We are happy to help Your WALSER Team Email homepage info walser...

Reviews: