23
24
7. Mounting the microphone to your clothing
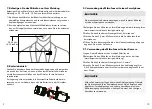
Attach the microphone to the front of your clothing with the clothing
clip, about 20 – 25 cm (8 – 10 inches) from your mouth.
1) You can attach the microphone upside down to reduce excessive
breathing noises and tonal inconsistencies due to head movements,
if necessary.
2) It is recommended to use the foam wind screen at all times to avoid
wind noise, even when recording inside.
8. Battery power
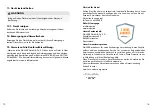
Rotate the control unit’s top end anticlockwise until it comes off. Now
remove the plastic isolator sheet inside to connect the battery and to
get the microphone ready for recording.
For storage, it is recommended to put the plastic isolator sheet back in
to prevent the battery from self-draining over time.
9. Using the microphone with a Smartphone
NOTE
You don't need to install the battery when using this microphone
with a smartphone.
1 Attach the microphone to your clothing or the clothing of your inter-
view partner (see previous instructions).
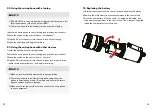
2 Move the switch on the control unit to „Smartphone“.
3 Plug the 3.5 mm connector into the audio jack of your smartphone.
4 Open your preferred audio-only or video recording app and begin
recording.
9.1. Using the microphone with a Camera
1 Install the battery with correct polarities.
2 Attach the microphone to your clothing or to that of your interview
partner (see previous instructions).
3 Move the switch on the control unit to „Camera“.
4 Plug the 3.5 mm connector into the audio input jack of your DSLR,
compact camera or camcorder, and begin filming.
NOTE
Not all cameras feature a microphone input. Verify this with your
camera manual. Many cameras have headphone, remote control,
and other ports that look similar to a microphone input. Make sure
that you are using the correct one.
(8-10 inches)
20-25cm


