Vtronix TE80SB Installation Manual Download Page 8

               Vtronix

8

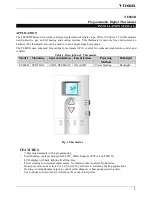
PROGRAMMING SCHEDULE

Select system switch in heat or cool mode.

Press “PROG” to enter program mode. Display
will prompt to select day.

Press ‘PROG’ and select set point

by pressing


∆ 

or


∇ 

key.

Heat or Cool depends on system
switch selection. If system switch
is in off position, use COOL mode
as default.

Press ‘PROG’ to confirm the setting.

Press ‘PROG’ again to proceed to
next program.

After P4 is programmed, press ‘PROG’ once
more to exit.  Press the ‘RUN’ button at any
time to exit program mode.

Note : Default setting can be restored to
memory by pressing HOLD and RUN buttons
at the same time for 3 seconds.

Press 

∆ 

or 

∇ 

key to select desired programming period

as below.

Press ‘PROG’ to proceed.

The thermostat will display
program ‘P1’ and prompt to
adjust time.

Press 

∆ 

or 

∇ 

key to select hour

then press ‘PROG’ to proceed.

Press 

∆ 

or 

∇ 

key to select

minute then press ‘PROG’
to proceed.

Week day

Week end

7-Day

 > Weekday > Weekend > Monday > Tuesday

Sunday < Saturday < Friday < Thursday < Wednesday

V

Table of programming period.

Default setting:

  Week Day

    Week End

          Time

Heat

Cool

 Heat

 Cool

P1

   6:00 AM    70

°

F    74

°

F

   70

°

F     74

°

F

P2

   8:00 AM

65

°

F

78

°

F

   70

°

F    74

°

F

P3 

  5:00 PM

70

°

F

74

°

F

   70

°

F    74

°

F

P4

  10:00 PM

65

°

F

78

°

F

   65

°

F    78

°

F

Summary of Contents for TE80SB

Page 1: ...le 1 Description of Thermostat Model Mounting System Selection Fan Selection Powering Method Backlight TE80SB VERTICAL COOL OFF HEAT ON AUTO Power Stealing Backlight Fig 1 Thermostat FEATURES 7 Day pr...

Page 2: ...d 1 5 Amp continuous 0 02 to 1 5 A continuous 0 02 to 1 5 A continuous 0 02 to 0 5 A continuous TEMPERATURE RATINGS Temperature setting range Ambient temperature range Shipping temperature range 40 to...

Page 3: ...as indicated will result in poor temperature control NOTE Level thermostat mounting is for appearance only and is not required for proper thermostat operation Mounting Thermostat Take out the back pl...

Page 4: ...s used may result in the overheating of the electric heater elements due to improper fan operation The set up switch is an internal switch E F located near the wiring terminals It is used to select pr...

Page 5: ...the following steps to change each of the settings Each time you press key you will advance to the next operating parameter To go back you must re enter the installer set up as described above INSTALL...

Page 6: ...l or aggressive For aggressive the system will cool down the room to setting point faster than normal algorithm However an overshoot might be occurred in some situations a Press key to show the coolin...

Page 7: ...tarts and stop with heating equipment Minimum Off Timer For cooling when the thermostat calls for operation while the minimum off timer is not expired the star symbol keeps flashing Back Lighting The...

Page 8: ...e Note Default setting can be restored to memory by pressing HOLD and RUN buttons at the same time for 3 seconds Press or key to select desired programming period as below Press PROG to proceed The th...

Page 9: ...isappeared Set point will be updated to the programmed data Note that only the HOLD button can be used to exit the HOLD temperature CLOCK ADJUSTMENT The clock needs to be adjusted when installed The c...

Page 10: ...HEAT B terminal will get energized 2 Press key until the set point is higher than room temperature The star symbol is shown on the display The heating equipment is on and terminal W is energized 3 Pre...

Page 11: ...Note that resistor has to be installed at the fan terminals and not at thermostat terminals To install the Resistor 1 Disconnect power supply 2 Connect the resistor leads to the terminals as shown in...

Reviews: