background image


46


Alarm


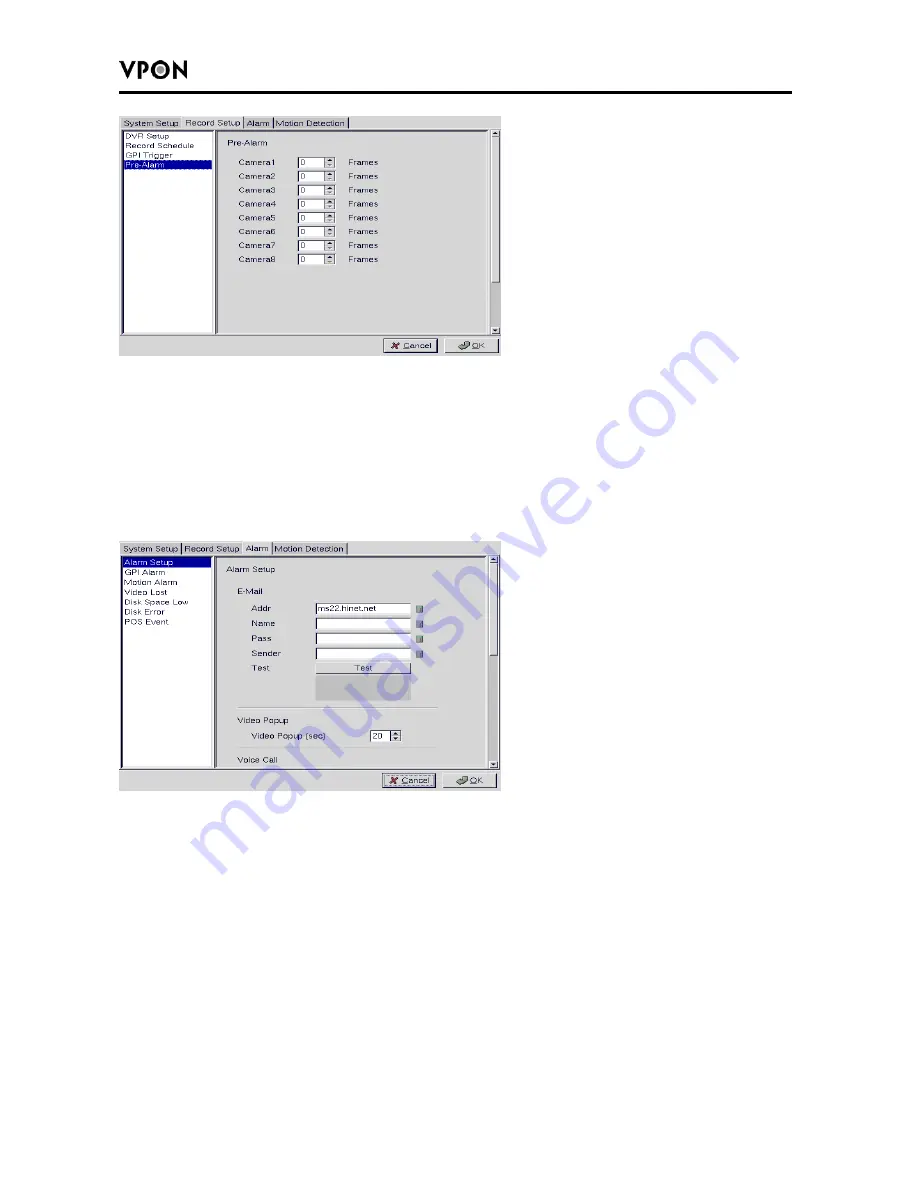
Alarm setup


Use the Alarm Setup menu under the Alarm tab to define what action is taken when an 
alarm is triggered. Through this menu, you can set up an E-mail address to which an E-mail 
is sent when the alarm is generated, or set up the device to display a video popup message 
on your monitor, or place a voice call. 


The Voice Call options enable you to set up a voice modem that will make a call when the 
selected event (such as a GPI alarm, or video lost from a camera) occurs. Set the following 
options: 

Redial - 

sets the number of times the voice modem will redial 

Voice Repeat - 

sets the number of times the voice message is repeated on the voice call 

Rec. Time - 

sets the time for which audio is recorded 

Modem Speaker - 

sets the internal or external speaker to be used 

Voice File - 

selects the voice file to be sent 

Edit File Name - 

enables you to change the file name of the voice file 

Use the keyboard or mouse (recommended) to complete all fields and click OK to save 
changes. Refer to the following sections to see how to select the voice call as the action for 
specific events such as GPI alarm and so on. 


Summary of Contents for VP-504

Page 1: ...Network DVR System Software User Manual VP 504 508 VP 504H 508H ...

Page 2: ...east 15 cm between the left and right sides of the body and the wall The lightning flash arrowhead symbol within and equilateral triangle alerts the user to the presence of a shock hazard within the product s enclosure GUARANTEE Every care has been taken in the preparation of this manual if you detect any inaccuracies or omissions please inform FORMOSA21 INC in Taiwan or your local distributor FOR...

Page 3: ...tting 13 2 6 4 Set Date and Time 14 2 6 5 Set NTP Server 14 2 6 6 System configuration 15 2 6 7 Set Serial Ports 16 2 6 8 Set POS 16 2 6 9 Alarm Remote Control 17 2 6 10 Set Name On Screen Display 18 2 6 11 Set User s Authority 18 2 6 12 DVR Setup 18 2 6 13 Record Schedule 19 2 6 14 Set Motion Detection 19 2 6 15 GPI Trigger Recording 20 2 6 16 Set Pre Alarm 20 2 6 17 Playback recorded files 21 2 ...

Page 4: ...io 37 12 Serial Ports 38 13 System Info 38 14 Date Time 39 15 ISP 39 16 Registry 40 17 Running Mode 40 18 Algorithm 41 19 NTP Setup 41 20 License 42 21 Default Settings 42 22 Revise firmware 43 23 Reboot System 43 Record Setup 1 DVR Setup 44 2 Record Setup 44 3 GPI Trigger 45 4 Pre alarm 45 Alarm 1 Alarm Setup 46 2 GPI Alarm 47 3 Motion Alarm 48 4 Video Lost 48 5 Disk Space Low 48 6 Disk Error 49 ...

Page 5: ...7 POS Key Function 51 8 Status Key Function 51 9 Video Key Function 52 10 PTZ Panel Key Function 53 11 Play Panel Key Function 54 ...

Page 6: ...Watch dog timer for automatic failure recovery Watermark Image safety verification system for protecting images from fraud Built in web server Users can do remote surveillance and function setups through IE browser to reach the belonged web server GPI O 8 in 2 out need I O box VIDEO Input VP 504 has 4 or 8 sets of Video Input port depending on the connections VGA Output TV Out 24 bit true color an...

Page 7: ...l Close NC in the software Relay output The I O box allows 2 digital relay outputs for alarm device e g buzzer divided in 2 groups NC1 NO1 COM1 and NC2 NO2 COM2 The figure below gives an example for connecting a Buzzer to the I O box DC power is an external power supply to the Buzzer If the Buzzer is a NO device you should connect it to NO 1 pin and leave the NC 1 pin unconnected If the Buzzer is ...

Page 8: ... 3 Sensor Input Relay Output 8 in 2 out need I O box Video Compression Support H 263 M JPEG JPEG MPEG4 standards Image Size 320x240 640x480 Maximum Video Recording Playback Frame Rate 60fps Maximum Live Display Frame Rate 240fps NTSC 200fps PAL Max 30fps for each channel Browser Compatibility Win 98 ME 2000 XP running MS IE 6 0 or above Communication Protocol Support TCP IP DHCP NTP HTTP FTP Power...

Page 9: ...ll motion audio video transmission to anywhere anytime All that is needed is an Internet browser and our proprietary plug ins software Attached video cameras can be remotely controlled to swivel and zoom in and out and the unit can be triggered to initiate certain events VPON is a completely plug and play device getting up and running as soon as possible without the need for ongoing maintenance or...

Page 10: ...video compression engines H 263 JPEG M JPEG MPEG4 Network Dynamic IP support for Internet access Direct Dial up available Backup Removable Hard Drives Optional CD Writer Easy to use Embedded Linux OS and firmware in flash memory Easy configuration via mouse keyboard or HTTP Standard web browser as the client application Alarm function Motion detection Event trigger Schedule Pre alarm recording Voi...

Page 11: ...rt connected to Internet and a public IP address 2 Others RS 232 Port and a serial cable for connecting to host PC 3 A VGA monitor for display PC for the configuration browsing 1 Pentium 4 CPU or better desktop PC or notebook 2 256 MB RAM or above 3 AGP VGA Card 4 Microsoft Windows 98 2000 ME XP or above 5 Internet Browser Microsoft Internet Explorer 6 0 or above ...

Page 12: ...ity 80 Compression Boost None Mirror Horizontally Unchecked Mirror Vertically Unchecked Auto Gain Control Unchecked Automatic Unchecked MAX connections for this camera 0 MAX bandwidth for this camera Bytes sec 0 MAX bandwidth of each connection for this camera Bytes sec 0 Audio Source 1 Microphone Gain 50 Speaker Volume 50 Microphone Control Timeout 0 Speaker Control Timeout 60 IP address 192 168 ...

Page 13: ...en connect it to VPON LAN port using a crossed RJ45 UTP cable This makes the PC and VPON in a small stand alone LAN has nothing to do with your existing LAN environment as Fig 2 1 1 Crossed UTP cable II Default IP address of VPON is 192 168 10 10 In order to access it IP address of the PC has to be in the same LAN as VPON It is recommended to set IP address of the PC into 192 168 10 XXX which XXX ...

Page 14: ...host PC to its original values 5 Run a web browser and connect to http 192 168 10 10 Or the IP address that you changed When it is connected you will see a login dialog box Enter the default Administrator s name webmonitor and password oyo Click OK button Then you will see the home page of VPON 6 The first time you attempt to view the VP 504 H 508 H user interface using a web browser an ActiveX in...

Page 15: ... 7 The download will begin and the following window will appear 8 Click Open to download and install the new plug in The download status is displayed and you are prompted for an installation location 9 Click OK to complete the installation The following message will appear ...

Page 16: ...ist of all the available recordings stored on the VP 504 H 508 H in a new browser window Click List All to display the entire list Search for files between particular times and dates by entering the dates in the To and From fields and clicking Query Click on a video recording to play it in a separate browser window as following picture Play a recorded video from a specific time and date by enterin...

Page 17: ...stem Information Click the System Information link to display the System Information page This picture shows hardware I O information and firmware version inside VPON 2 6 2 Camera Setting Use the camera Setting page to change the video settings for each of the connected cameras 1 Video Source Select Video Source input 2 Brightness Contrast Saturation Hue and Quality You can set Brightness Contrast...

Page 18: ...imit the maximum connections allowed to access this camera 8 Max bandwidth for this camera Bytes sec Limit the maximum bandwidth in Bytes second allocated to access this camera 9 Max bandwidth of each connection for this camera Bytes sec Limit the maximum bandwidth allocated to each connection of this camera Click the Done button to save the new settings Note Please click Write To FlashROM for per...

Page 19: ...et Date and Time Use the Set Time and Date page to set the time and date Select a time zone from the drop down menu and enter new local time and date using the keyboard Click Done when all fields are updated Click Undo to revert to original settings If you change the time zone the system will reboot 2 6 5 Set NTP Server 1 Use the Set NTP Server page to set parameters for a NTP Network Time Protoco...

Page 20: ... please refer to the chapter VPON advance networking ISP setting Sets up dial up parameters for sending E mails Account Setting Set user s and administrator s login name and password Keeping these fields empty will cause VPON skip checking the authority The Set User s Authority Page only takes effective when the user s name and password are not empty here COM1 Port Setting COM1 is default for mode...

Page 21: ...ming from the administrator After the time expired the exclusive control right will grant to the others Set IP Registry Host IP Address Path These settings are ONLY useful when the IP address assigned to VPON is NOT a static IP 2 6 7 Set Serial Ports The VP 504 H 508 H can be connected to other serial devices such as external modems GPIO General Purpose Inputs and Outputs Voice Call devices PTZ ca...

Page 22: ...u have multiple VPON on network You can also set camera names to indicate the physical location of the cameras or any identification for easy understanding 2 You can set overlay text strings in English for each camera and this string will be overlaid directly on the video like time stamp You can specify the content and position of this text 3 On this page you can also set the position of the time ...

Page 23: ... in the respective fields To restrict users from viewing particular cameras select the required cameras from camera 1 8 Enable Camera Control Audio and playback of the video recording as needed 2 6 12 DVR Setup Use the DVR Setup page to set the recording mode to either Auto stop stops when disk space runs out or Cyclic Recording overwrites oldest recordings when disk space runs out ...

Page 24: ...m of one of camera was triggered Select a Frame Rate of recording for each camera 2 6 14 Set Motion Detection a You can enable or disable the motion detection function of one camera If enabled a 8x8 red block will be displayed on the top left corner of the video window when motion detected b Set the sensitivity of camera the value of sensitivity from 5 to 100 For indoor camera sensitivity setting ...

Page 25: ...r recording the Trigger Click Done button to save the new setting 2 6 16 Set Pre Alarm On the left side of VPON main page click Pre Alarm to set pre alarm function When enable this function VPON will record camera video before triggered event happens or motion detects You can set the numbers of frames to be recorded for camera 1 to camera 8 then click Done button to save the setting values ...

Page 26: ...oad save and give a file name for it As this function downloads video through LAN or Internet it takes time if bandwidth is NOT good enough 2 320x240 You can select 320x240 640x480 800x600 or 1024x768 different resolution for play back videos 3 Camera 1 2 3 4 Users can select the video sources from Camera1 Camera2 Camera3 Camera4 or All cameras to play the recorded data 4 Scroll Bar When you moves...

Page 27: ... Motion VPON will play the recorded video from videos recorded by motion detection 11 3 GPI Trigger When selecting GPI VPON will play the recorded video from videos recorded by event trigger 2 6 18 Search Search video clips based on text POS transaction data 1 Click search button and enter the submenu 2 You can search by any keyword base on POS transaction data text 3 If you want to find out data ...

Page 28: ...ra video to be attached to the E mail by selecting cameras in the Snapshot option Under the Global Settings fill in the mail server details Fill in the details using mouse and keyboard and click Done when complete Note If you set a domain name in the mail server setting provide the DNS IP address in the System Configuration see System configuration 2 6 20 FTP Upload The VP 504 H 508 H can upload s...

Page 29: ...e with another of the same name If no file name is specified a new file will be written each time with a new filename based on the time and date Under the Global Settings fill in the FTP server account password and port number Fill in all the details using mouse and keyboard and click Done when complete 2 6 21 Back to Home Page The Back to Home Page link will redirect you back to the VP 504 H 508 ...

Page 30: ...25 You will need to enter an administrator user name and password to view without plug ins ...

Page 31: ... Call Set Surveillance Position 6 sets Zoom In Zoom Out Focal Length Adjust Movement Speed Up Down Left Right A B C D E F G 1 2 3 4 5 SET Call PTZ Control A Single Screen B QUAD C 8 Splits D Previous Page E Next Page F Sequence show G Camera 1 Brightness 2 Contrast 3 Saturation 4 Hue 5 Quality I PLAY Play back file II LIVE View live screen III IO GPIO setup IV GO TO Search recorded file V POS Supe...

Page 32: ...e this file was created by Motion Detection 4 Alarm for GPI Trigger A An A indicated this file was created by Alarm Trigger 5 File Size MB File size in MB The main function of the Play key is to playback recorded files The recorded files are created in the unit of one hour Each hour at least includes one file and is listed according to time sequence of files Time sequence allows users to access th...

Page 33: ...Sequence Show C 8 Splits G Camera Number D Previous Page The menu of the surveillance screen is located at the lower left of the screen See Figure 3 2 3 Figure 3 2 3 3 LIVE Key Function Press the Live key directly to show the live video at the camera site Users can view the live video from the surveillance screen See Figure 3 2 4 A B C D E F G Screen Segment Selection Previous Next Page and Sequen...

Page 34: ...I O box allows 8 digital inputs for sensor divided in 8 groups IN1 GND1 IN2 GND2 IN8 GND8 The following figure shows an example of one sensor connecting to the first D1 IN 1 and GND 1 of the I O box Suppose the Sensor is a normal open NO device so you configure DI 1 as NO in the software Now when IN 1 and GND 1 are short circuited I O box will send an alarm signal to the DVR You can do the same to...

Page 35: ...eview the recorded file to understand the situation at that time Function of the GPO Indicating Light The staff at site can select and click the indicating light to turn on off the GPO points directly for external devices control 5 GOTO Key Function This key provides the function for users to search recorded file by time You can search by Time by Event or by Text Enter year month date hour minute ...

Page 36: ... SET UP the system set up screen will appear Figure 3 2 8 System Setup Items in this selection are as below 1 Password Protect 2 Video 3 Video input 4 Disks 5 TV Output 6 OSD Text 7 GPIO 8 PTZ Setup 9 TCP IP 10 Account 11 Audio 12 Serial Ports 13 System Info 14 Date Time 15 ISP 16 Registry 17 Running Mode 18 Algorithm 19 NTP Setup 20 License 21 Default Settings 22 Revise firmware 23 Reboot system ...

Page 37: ...d The auto lock function locks the system after a given time and a password is required to unlock it Click Lock Now to lock the system immediately Note If you do not have a keyboard connected to the system you can use the on screen keyboard to enter your passwords All the fields that can be edited using the on screen keyboard are indicated by the on screen keyboard icon Double click the field to d...

Page 38: ...higher the compression boost the lower the video data rate For a significantly lower data rate we recommend you use the H 263 algorithm Auto Gain Control enables automatic gain control to adjust the video signal strength Mirror Horizontal flips the video signal from the selected camera along the horizontal axis Mirror Vertical flips the video signal from the selected camera along the vertical axis...

Page 39: ...he Disk Device field TV output Use the TV Output menu to configure the video output for the VP 504 H 508 H The VP 504 H 508 H can support standard VGA computer monitors or TV type screens Set the Camera From and Camera To options to specify the range of cameras that are displayed in the cyclic display mode Note The video could be displayed by the VGA computer monitors and TV type screens at the sa...

Page 40: ... on the image using the X and Y parameters A value of X 0 and Y 0 would result in the text appearing at the top left corner of the camera image Increasing the value of Y moves the text down the screen Increasing the value of X moves the test to the right Enter the text to be displayed in the Text field 4 Use the mouse to complete the fields and click OK to save changes GPIO The GPIO general purpos...

Page 41: ...ces to On or Off as required Change the GPO status as needed Make sure that the devices are working by checking the actual physical status of the inputs and outputs after making changes in this menu NOTE Enable GPIO function may cause system efficiency drop down PTZ Setup Use the PTZ Pan Tilt Zoom Setup menu to set the type of PTZ camera Select the type of PTZ cameras used and set each camera that...

Page 42: ...the cameras that you want the user to have access to and set them to Yes Note It is important that you set up the super user name and password The super user is different from the administrator and has access to only live videos and playback files Use the More Users field to change the authorities of Internet users Use the keyboard or mouse recommended to complete all the fields and click OK to sa...

Page 43: ...cables external modems or Data Capture to the VP 504 H 508 H Use the Serial Port menu to set parameters for the serial ports System info Use the System Info menu to display the system information such as disk parameters TCP IP properties firmware information and so on on the screen ...

Page 44: ...the Date Time menu to set the precise time and date on the system You can also set the local time zone in the T Zone field ISP If you are using dial up access to the Internet use the ISP menu to enter details of your Internet Service Provider Use the mouse to complete all fields and click OK to save changes ...

Page 45: ...ss for the VP 504 H 508 H you can set up the device to post its IP address to the VPON registry server You can then look up your IP from the MAC address or server name You can use the registry server to give a name to the VP 504 H 508 H also Running mode Use the Running Mode menu to switch between Network Mode and ISP Mode ...

Page 46: ...resolution setting is 320x240 Use the Algorithm option to set compression standard of the video H 263 MPEG4 JPEG or M JPEG The default compression is MPEG4 NTP setup Use the NTP Setup menu to enter details of the Network Time Protocol NTP server used to synchronize the time of the device with the network ...

Page 47: ... Note The license in the following is an example only Each DVR should have different license number Please contact us for get a license Default settings Use the Default Settings menu to reset all configurable parameters to their factory default settings Click Restore Defaults Yes No to restore defaults Click Cancel or No to retain the current settings ...

Page 48: ... Firmware menu to upgrade the VP 504 H 508 H firmware Click Revise Firmware Yes No to start the firmware upgrade process Click Cancel or No to abort the attempt Reboot system Use the Reboot System menu to reboot or shutdown the system ...

Page 49: ...t Cyclic Recording continues to record until disk space runs out and then overwrites the oldest records Click OK to save changes Record schedule Use the Record Schedule menu under the Record Setup tab to set up automatic recording schedules for each camera and audio You can set up to 16 record schedules that automatically record at given times and days even frame rate just remember to close auto s...

Page 50: ...t to record video from a camera installed at your front door when the door lock is opened In this case connect an alarm module not provided to lock and set the front door camera to start recording Pre alarm recording Use the pre alarm menu under the record setup tab to determine how many frames are record before an alarm event occurs Each camera can be set separately and you can record up to 300 f...

Page 51: ...video lost from a camera occurs Set the following options Redial sets the number of times the voice modem will redial Voice Repeat sets the number of times the voice message is repeated on the voice call Rec Time sets the time for which audio is recorded Modem Speaker sets the internal or external speaker to be used Voice File selects the voice file to be sent Edit File Name enables you to change ...

Page 52: ...h an automatic answering machine the VP 504 H 508 H will behave as if the phone has been answered The VP 504 H 508 H does not support non standard ringing tones If the VP 504 H 508 H calls a phone and an unexpected tone is received an error message will be generated GPI alarm Use the GPI Alarm menu under the Alarm tab to set what actions are taken when a GPI alarm is generated You can set up the a...

Page 53: ...ken when video signal from a camera is not available You can set up the alarm through a message a beep a voice call or E mail Use the keyboard or mouse recommended to select the required camera for video lost from the Camera drop down box and complete all fields as described in GPI alarm Click OK to save changes Disk space low Use the Disk Space Low menu under the Alarm tab to set what actions are...

Page 54: ... Alarm tab to set what actions are taken when there is an error while accessing the disk You can set up the alarm through a message a beep a voice call or E mail POS event Select the POS event function and start to sep up reaction when receiving the text data from POS machine You can set up the alarm through a beep a voice call or E mail ...

Page 55: ...p Procedure 1 Camera Select the camera for setting motion detection 2 Enable Yes No Turn On Off the motion detection 3 Sensitivity Select motion sensitivity level 4 Directly drag the square on the screen to a desired size location for Motion Detection Each small square on the displayed grid can be set to detect motion Use the left mouse 1 2 3 4 ...

Page 56: ... 11 After the POS key is pressed the POS screen will appear at the lower right of the screen Record and associate POS transaction data with video Figure 3 2 11 8 Status Key Function The Status key provides the status of the recorded data motion detection remote control and recording progress to users Please see Figure 3 2 12 After the Status key is pressed the Status screen will appear at the lowe...

Page 57: ...d during the recording period GPI shows the location of triggered GPI during the recording period Progress displays current playing progress 9 Video Key Function The Video keys are used to adjust brightness contrast saturation hue and quality of video Drag the adjusting bar Up and Down to change the corresponding values of each item Please see Figure 3 2 13 After the Video key is pressed the Video...

Page 58: ...t is a remote camera control Users can control the surveillance screen through the remote camera PTZ lens aiming at the preset monitoring position of the PTZ camera or the monitoring angle of the camera for adjustments such as Zoom in out Focus in out and moving UP DOWN Left Right to adjust and determine the monitor setup PTZ Panel is located at the right side of the screen as shown in Figure 3 2 ...

Page 59: ... middle position This means when click The Up Down Left Right keys under it the camera movement will be in middle speed If the dot lights at right hand side the speed will be fast If at left hand side it will be slow movement Camera Position control This is done by click the Up Down Left Right arrow keys to make the camera moves to the desired position 11 Play Panel Key Function The Play Panel key...

Page 60: ...st forward Click hold to proceed fast forward 8 Stop Stop the playback The playback will re start from beginning if it is Stopped then play again 9 Play Click to playback 10 Fast reverse Click hold to proceed fast reverse 11 Current playback position indicator Indicates the position in the file that current video screen relates to 12 GPI Trigger indicator Indicates the position that received GPI t...

Reviews: