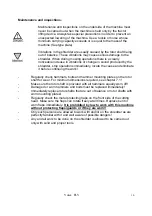
-
After bumping into an obstacle, check the shredder for any damage.
-
Immediately repair any damage before resuming working with the machine!
Stay outside the link-motion range of moving parts!
-
Make sure to avoid toppling over! Work only on sufficiently solid ground!
-
The following measures must be taken when leaving the tractor and/or
when work is to be done on the machine or PTO shaft:
- Switch off the PTO shaft.
- Put the gear lever of the tractor into neutral.
- Pull the parking brake of the tractor.
- Set the machine entirely down.
- Stop the tractor motor and remove the key from the ignition lock.
- Always wait for the rotor shaft to stop completely before approaching the
machine!
Machine is still coming to a standstill! Stay away from rotating parts until
they have stopped completely!
-
Make sure the supporting leg is in the lower locked position when coupling
or uncoupling the shredder!
-
Proceed very carefully when coupling and uncoupling the shredder. Be
particularly alert to the danger of getting trapped due to accidental operation
of the lifting device. Secure the machine laterally by sufficiently tightening
the stabilizers.
PTO shaft:
-
Only use the PTO shaft with freewheel specified by the manufacturer.
-
Protecting tubes and guards at the PTO shaft and the guards on tractor and
machine must be properly fixed and in good condition!
-
Ensure the specified overlapping of PTO shaft halves and protecting tubes,
both in the transport and operating position (see user's manual of PTO
shaft manufacturer).
-
The PTO shaft may be coupled and uncoupled only when the tractor engine
has stopped, the ignition key has been removed, and the machine rests on
the ground.
-
Always ensure that the PTO shaft is properly mounted and blocked!
-
Secure the guard of the PTO shaft against turning with the shaft by
fastening both chains to a fixed point on the tractor and machine sides!
Votex FLV
8
Summary of Contents for FLV 125
Page 1: ...FLV Shredder...
Page 2: ......
Page 4: ......
Page 6: ...Votex FLV 2...
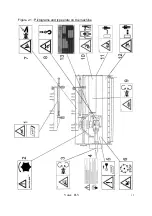
Page 16: ...Figure 2 1 Pictograms and type plate on the machine Votex FLV 12...
Page 32: ......
Page 33: ......
Page 35: ...HK001 onderdelen FLV hk002 xls...
Page 37: ...HK001 onderdelen FLV hk002 xls...
Page 39: ...HK001 onderdelen FLV hk002 xls...
Page 41: ...HK001 onderdelen FLV hk002 xls...
Page 43: ...HK001 onderdelen FLV hk002 xls...
Page 45: ...HK001 onderdelen FLV hk002 xls...
Page 47: ...HK001 onderdelen FLV hk002 xls...
Page 49: ...HK001 onderdelen FLV hk002 xls...
Page 51: ...HK001 onderdelen FLV hk002 xls...
Page 52: ...Opties Options Options Options HK001 onderdelen FLV hk002 xls...
Page 53: ...HK001 onderdelen FLV hk002 xls...


