background image

4/8/16-CH DVR Quick Start Guide 

11


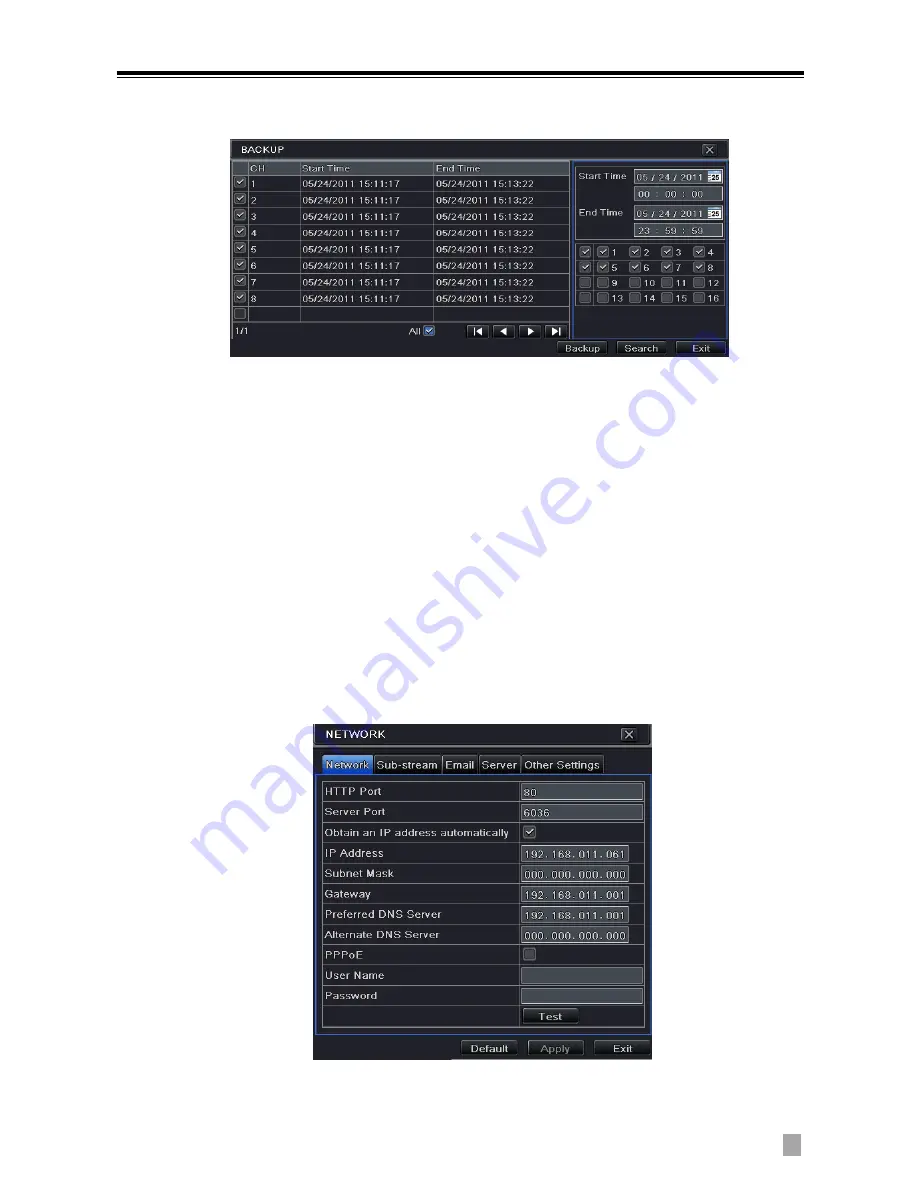
This unit supports backup by USB flash. 

Step 1

Enter into Menu

Backup tab.   


Step 2: Set the start & end time, select channels and click Search button to display the 
searched data in the data backup list box 
Step 3: Select a required file or checkmark “All” to select all data files. Click Backup 
button to pop up Backup information window. 
Step 4: In the backup information interface, user can check the relevant options for 
backing up files. These options include storage Media, backup player and save file 
type. Then click Start button to start backup. 
 

10.


Remote Surveillance 

In order to view the DVR from a network it must be connected to a LAN/WAN or 
internet. The network setup should be done accordingly.   

10.1


  Access DVR on LAN 


  Please enter into Menu

Setup 

Network Setup as shown below: 


  Input IP address, Subnet, Gateway. If using DHCP, please enable DHCP in both 

the DVR and the router. Enter into Menu 

 Information 

 Network, and user can 

VOOK

Summary of Contents for VDT23xxME-BH

Page 1: ...QUICK START GUIDE VDT23xxME BH VOOK...

Page 2: ...VOOK...

Page 3: ...ice 1 For the convenience to install please connect the power and data cables firstly and then screw to fix 2 Rear Panel Instruction Rear Panel Instruction for 4 CH 1 Grounding 8 Connect USB mouse or...

Page 4: ...utput 7 Network port 14 Connect to monitor as an AUX output channel by channel Video would be displayed without OSD Rear Panel Instruction for 16 CH 1 Grounding 8 Connect USB mouse or connect external...

Page 5: ...p a shutdown window The unit will shut down by clicking OK button Step 2 Disconnect the power By mouse Step 1 Enter into Menu and select Shut Down icon This will take you to a shutdown window Step 2 C...

Page 6: ...er the value is the clearer the recorded picture is Of course more space of HDD will be taken up Click Next button This will take you to the HDD management window You can check your HDD information th...

Page 7: ...ace as shown below Basic configuration Users can set video system menu language audio time and authorization check Live configuration Users can set name time display picture color and hide cameras Rec...

Page 8: ...k REC button on the tool bar with mouse Click it again to stop 7 2 Schedule Recording To Setup Schedule Recording Step 1 Enter into Menu Setup Schedule tab Refer to the following picture Step 2 Click...

Page 9: ...Area to set Sensitivity and Detection area Left click the grid and drag to delete the area Drag again to add area You can drag slide bar to set the sensitivity value 1 8 The higher the value is the mo...

Page 10: ...nu Setup Alarm Sensor Basic tab as shown below Step 3 Enable sensor alarm Please specify to channel select senor type and click Apply to save settings Step 4 Enter into Menu Setup Alarm Sensor Schedul...

Page 11: ...side and press Search button A date with highlighted borderline indicates presence of data Step 3 Set the start time by clicking a particular grid or by entering the specific value in the start time f...

Page 12: ...item to play the record 8 4 Playback by Image Search Step 1 Enter into Menu Search Image tab Step 2 Select data and channels on the right hand side Step 3 Press Search button to search for a recorded...

Page 13: ...ackup information interface user can check the relevant options for backing up files These options include storage Media backup player and save file type Then click Start button to start backup 10 Rem...

Page 14: ...router he can skip this step Please refer to the relevant chapter for more details Open IE browser input IP address or dynamic domain name and enter If HTTP port is not 80 add the port number after IP...

Reviews: