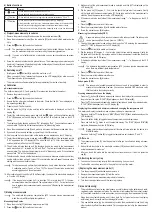
b) Button functions
Button
Function
1
button
1. Press this button to switch the device on or off.
2. Press and hold this button to select calibration mode.
2
button
1. Press and hold this button to toggle the temperature unit between °C and °F.
3
button
1. Press this button to freeze a measured value on the LCD display (6).
2. Hold this button to switch to the maximum/minimum values in the display mode.
Press this button briefly to toggle between the maximum and minimum values.
3. Press and hold this button to delete the measured value so you can take a new
measurement.
c) Pre/post-measurement procedures
1. Remove the protective cap
(2)
and unscrew the electrolyte container
(10)
.
2. Rinse the measurement probe
(1)
on the probe tip
(11)
with clean, distilled water and wipe
it dry.
3. Press the button
(4)
to switch on the device.
The measurement probe is a consumable part with a limited lifespan. For this rea-
son, the measurement probe is not covered by the warranty/guarantee.
If you run out of buffer solution or electrolyte, you can purchase more as an acces-
sory.
4. Screw the electrolyte holder back in place after use. The measuring probe must always be
kept moist. If necessary, fill electrolyte up to the bottom edge of the inner thread. Use a cloth
to wipe off any leaking electrolyte.
d) Switching on/off
•
Briefly press the
button
(4)
to switch the meter on or off.
• When you switch it on, all elements will appear on the LCD display
(6)
for a few seconds.
The measured value is then displayed.
• The meter switches off automatically after approximately 10 minutes of inactivity.
e) Calibration
pH measurement probe
The buffer solutions (pH 4, 7, and possibly 10) are required to calibrate the product.
1. Remove the protective cap
(2)
.
2. Press the button
(4)
to switch on the device.
3. Ensure that the pH probe is attached to the meter. Check that the "pH" icon is displayed in
the operating modes
(D)
.
4. Prepare the pH 7 buffer solution.
5. Use the probe tip
(11)
to stir the solution until a stable value is displayed on the LCD
display
(6)
.
6. To start the calibration process, press and hold the button until the calibration symbol
"CAL"
(G)
appears on the LCD display. The pH value 7.00 will start to flash on the LCD
display.
7.
The display will stop flashing and show "SA" followed by "End". The calibration process is
now complete. The device will automatically revert to "Measuring" mode.
8. Rinse the measurement probe
(1)
and probe tip with clean, distilled water and wipe it dry.
9. If you need to test an acid solution, prepare the pH 4 buffer solution.
10. Use the probe tip to stir the solution until a stable value is displayed on the LCD display .
11. To start the calibration process, press and hold the button
(4)
until the calibration symbol
"CAL" appears on the LCD display
(6)
. The pH value 4.00 (or 10.00 for the alkaline buffer
solution) will start to flash on the LCD display.
12.
The pH value will stop flashing and the display will show the slope of the measurement
probe electrodes in %, followed by "SA" and "End". The two-point calibration process is
now complete. The device will automatically revert to "Measuring" mode. If the calibration
process fails, "SA" will not be displayed.
13. To determine the slope in an alkaline direction (if you want to measure an alkaline solution),
use the buffer solution with a pH value of 10 to calibrate the device. Repeat the above steps
starting with the neutral buffer solution.
This device can only perform 2-point calibrations. It only stores the values of the last
2 calibration points (7 and 4 or 7 and 10). The slope of the electrode is calculated
accordingly based on these two values.
14. After calibration with the pH4 or pH10 buffer solution, the slope of the electrode is displayed
in % on the LCD display.
If the slope of an electrode (in %) is less than 70 % or more than 130 %, the mea-
surement probe must be replaced. The optimal slope is 100 %. For instructions on
how to replace the measurement probe, see section "i) Replacing the measurement
probe
(1)
".
f) Making measurements
The automatic temperature compensation (ATC) ensures precise measurements
when there are different liquid temperatures.
Measuring the pH value
1. Rinse the probe tip
(11)
with clean water and wipe it dry.
2. Press the button
(4)
to switch on the meter.
3. Make sure that the pH measurement mode is selected and that "pH" is displayed on the
LCD display
(6)
.
4. Dip the probe tip
(11)
approx. 2 - 3 cm into the liquid that you want to measure. Gently
stir the liquid with the measurement probe
(1)
. It may take a while for the measurement to
stabilize. Read the measurement on the LCD display
(6)
.
5. If the measured value is outside of the measurement range, "----" will appear on the LCD
display.
6. Press the button to switch off the meter.
7. Rinse the measurement probe
(1)
with distilled water after use.
8. Screw the protective cap
(2)
into place.
Measuring the redox potential (ORP)
A separate redox probe is required to measure the redox potential. The redox probe
can be purchased from Conrad (item no. 1275914).
1. Change the measurement probe as described in section "i) Replacing the measurement
probe
(7)
". "ORP" will appear on the LCD display
(6)
.
2. Press the button
(4)
to switch on the meter.
3. Dip the probe tip
(11)
approx. 2 - 3 cm into the liquid that you want to measure. Gently stir
the liquid with the meter
(1)
. It may take a while for the measurement to stabilize. Read the
measurement on the LCD display.
4. If the measured value is outside of the measurement range, "----" will appear on the LCD
display.
The automatic temperature compensation (ATC) ensures precise measurements
when there are different liquid temperatures.
5. Press the button to switch off the meter.
6. Rinse the meter with distilled water after use.
7. Screw the protective cap
(2)
into place.
Redox probe (ORP)
The redox probe (available separately) does not need to be calibrated in order to
measure the conductance. However, you can use a standard ORP solution to verify
that the meter is functioning correctly.
Freezing a measured value on the display
• Press the button
(5)
to freeze a measured value on the display after you have removed
the probe from the liquid. "HOLD"
(K)
will appear on the LCD display
(6)
.
• Press the button again to disable the data hold function and delete the measured value.
"HOLD"
(K)
will disappear from the LCD display
(6)
.
Displaying the maximum and minimum values and changing the temperature unit
The meter can display the maximum and minimum values of a measurement.
• Press and hold the button
(5)
until "MAX"
(D)
and "MIN"
(F)
flash simultaneously on the
LCD display
(6)
.
•
Press this button briefly to toggle between the maximum and minimum values.
• Press and hold the button to exit the max/min display. The "MAX"
(A)
and "MIN"
(B)
symbols will disappear from the LCD display.
Please note that the automatic power-off function will not work when the device is in
MAX/MIN mode.
• Press and hold the button
(9)
to toggle the temperature unit between °C and °F.
g) After use
1. The measurement probe
(1)
must be kept moist after you have finished taking a measu
-
rement.
2.
Add sufficient electrolyte to the electrolyte container
(10)
as described in section "c) Pre/
post-measurement procedures".
3. After use, insert the probe into the electrolyte container and cover it with the protective
cap
(2)
.
h) Attaching the carry strap
1. You can use the carry strap to carry the meter and hang it on your neck.
2. To attach the carry strap, secure it to the eyelet on the top of the meter.
i) Replacing the measurement probe (1)
1. Turn the screw cap
(3)
anticlockwise and remove it.
2. Remove the measurement probe
(1)
from the meter.
3. Carefully insert the new measurement probe into the meter.
4. Turn the screw cap clockwise until it is securely in place.
Care and cleaning
• This product does not require any maintenance, except for changing the batteries and repla-
cing/cleaning the measurement probe. Do not attempt to disassemble the product (except
for the actions described in these instructions, such as changing the measurement probe).
• Clean the product carefully using a soft, clean cloth. Do not press too hard on the display,
as this may result in scratch marks or damage its function.
• Only use distilled water (e.g. deionized water) to clean the measurement probe tips. Using
other liquids may affect the measurements. Only use paper towels to dry the measurement
probes.


