Instacut
™
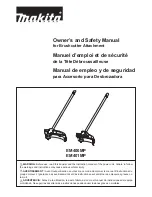
5.0 Slicer, Dicer, Wedger and Corer Operator’s Manual
3
CLEANING
NOTICE: Food acids will dull the blades and corrode the metal.
Always clean this food preparation equipment immediately
after every use.
NOTICE: Do not put this equipment in a dishwasher or dish machine
with soaps, detergents, or other alkaline chemicals that
can harm the equipment.Handwash only.
NOTICE: Do not use abrasive materials, scratching cleansers or
scouring pads to clean this equipment. These can damage
the finish.
Disassemble
1. Slide the pusher head assembly up and off of the guide rods.
2. Remove the two thumbscrews and
separate the pusher block from the
pusher head.
3. Raise the bumpers approximately
2" (5.0 cm).
4. Loosen the thumbscrew and carefully remove the blade assembly.
Wash
1. Wipe, rinse or spray off equipment, pusher head and blade assembly
thoroughly with HOT water.
2. Do not wipe across the blades.
NOTICE: Wiping across the sharp edge of the blade can cause
injury and will dull the blades.
3. Clean the blade assembly by forcing water under pressure, through
the blades from the unsharpened side. If necessary, use a nylon
bristle cleaning brush to push food particles out from the
unsharpened side of the blade assembly.
4. Let the equipment air dry.
Reassemble
1. Install the cutting blade assembly into the base. Tighten the
thumbscrew to push blade securely against the other side.
2. Lubricate the guide bar with mineral oil or Petro-Gel.
NOTICE: Do not use cooking oil as it will become sticky and may
permanently damage the equipment.
3. Slide the bumpers into place.
4. Reassemble the pusher head assembly.
PREVENTATIVE MAINTENANCE
1. Clean the equipment after every use.
2. Use for intended purposes only.
3. Change the blades regularly – based on usage.
REPLACE THE BLADE ASSEMBLY
Wash new blades with warm, soapy water and rinse thoroughly to
remove the thin protective oil film. Keep the sharp edge away from you
when handling blades.
1. Familiarize yourself with the parts diagram for your equipment.
2. Remove the pusher head assembly by sliding the pusher head off
the guide rods.
3. Raise the bumpers approximately 2" (5.0 cm).
4. Loosen the thumbscrew and carefully remove the blade assembly.
Remove the cutting blade assembly by pressing upwards on the
bottom of the side of the blade holder, where the thumbscrew is
located. Discard the old blade assembly.
5. Install the new cutting blade assembly by inserting the tab on the
blade holder into the groove in the base, then lowering the blade
holder into the seated and flush position in the base. Tighten the
thumbscrew.
6. Slide bumpers down guide rods to contact base. Position pusher
head assembly onto the guide rods, slowly lower pusher head
assembly, and check pusher head block to blade alignment.
7. Lubricate the guide rod with mineral oil or Petro-Gel after each use.
Do not use cooking oil as it will become sticky and may permanently
damage the equipment.
WARNING
Sharp Blade Hazard
Blades are sharp and can cause cuts. To avoid injury from
sharp blades, handle with caution.
WARNING
Sharp Blade Hazard
Blades are sharp and can cause cuts. To avoid injury from
sharp blades, handle with caution.