EN-9
English
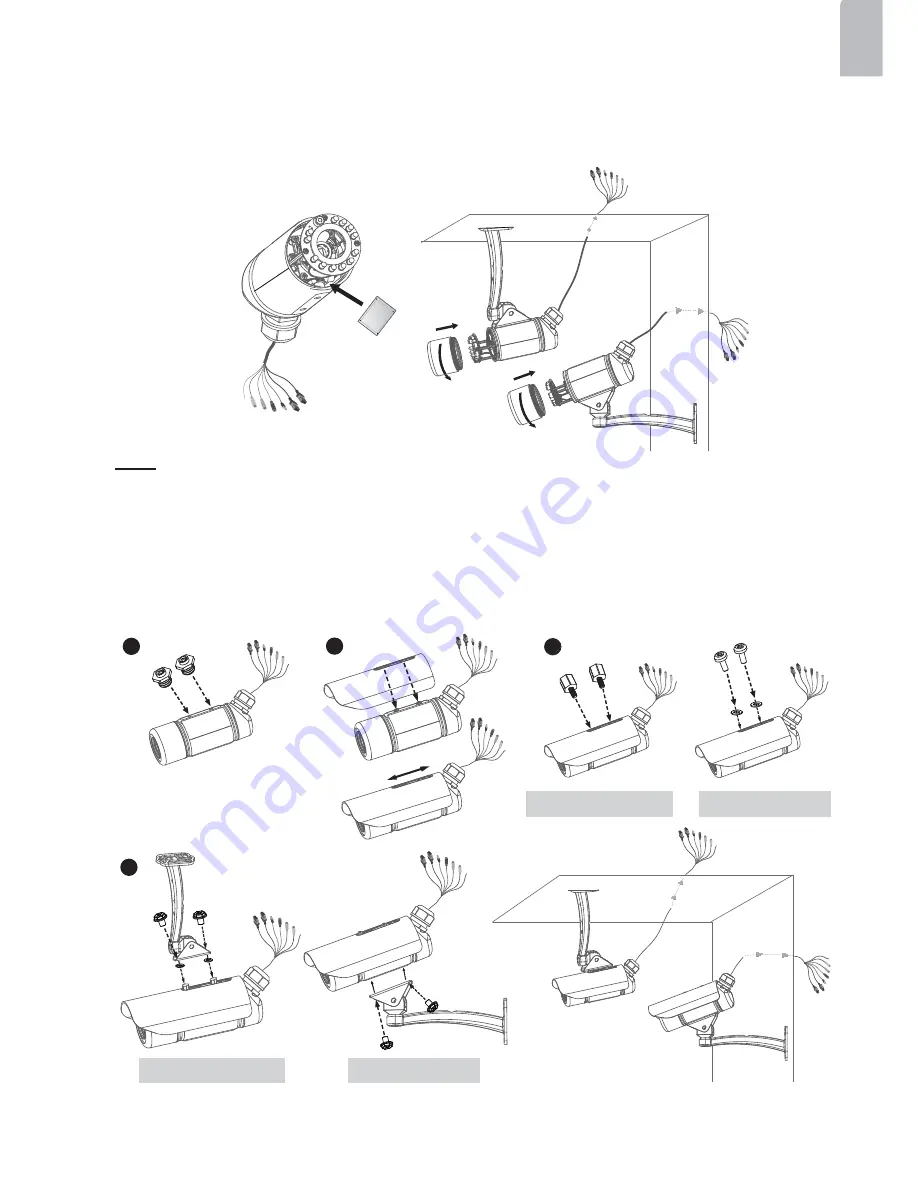
5. Tear down the aluminum foil vacuum bag and take out the silica gel. Attach the silica
gel to the inner side of the Network Camera, then tighten the lens cover. (Please
replace the silica gel with a new one if you open the back cover after installation.)
Note
If you want to use the supplied sun shield for outdoor environments, please follow the steps below to
install:
1. Tighten the supplied two screws.
2. Attach the supplied sun shield to the Network Camera and slide it to the desired position.
3. Fix the sun shield with the supplied two screws. (Please use different screws for ceiling mount.)
4. Secure the Network Camera to the wall/ceiling by the supplied camera stand.
1
2
3
4
Wall Mount
Ceiling Mount
Wall Mount
Ceiling Mount


