30
H9090 Home Theater Projector - User Manual
Saturation (Color):
Available only for Standard Definition (SD) signals (480i, 576i) in
Video, S-Video, and Component inputs.
To adjust the overall color intensity, select Color from the Main menu. Decrease this setting
if colors are overly saturated; increase it if colors appear muted
.
Hue (Tint):
Available only for Standard Definition (SD) signals (480i, 576i) in Video, S-Video,
and Component inputs
Hue “Tint” is the ratio of red to green in the color portion of the image. To adjust the tint,
select Color Tint from the Main menu. Decrease this setting to shift the hue toward red;
increase it to shift the hue toward green.
Note:
Like the Brightness and Contrast controls, the color and tint controls are
interactive. A change to one may require a subtle change to the other in order to
achieve the optimum setting.
Sharpness:
The adjustment of sharpness primarily changes the value of high frequency
detail. To adjust, select Sharpness from the Main menu and press Enter. Use
◄
►
to
adjust it.
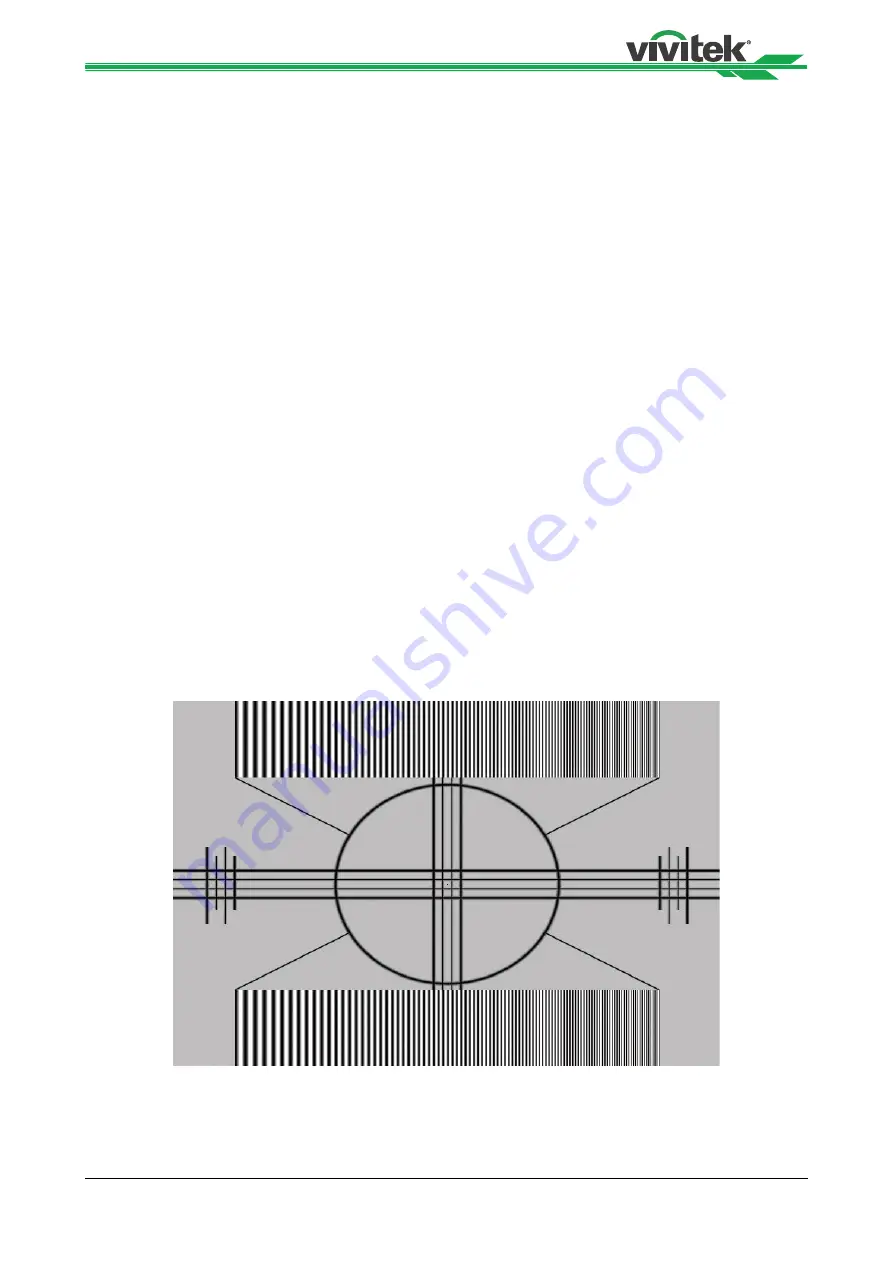
On your external test pattern source, select a similar pattern as below and adjust as
needed. Look for white edges around the transitions from black to gray and differently-
sized lines in the “sweep” patterns at the top and bottom. Lower the sharpness setting to
eliminate them.
Typical Test Pattern for Adjusting Sharpness
Noise Reduction:
Use
◄
►
to adjust the noise of the projected image. This function is
suitable for the elimination of image noise from interlaced SD input. Keep in mind reducing
image noise will lower the value of high frequencies may also soften the image.
Overscan:
Some television programs are produced based on the assumption that older
television sets may not display the outer edges of the broadcast picture area. Overscan
effectively hides these inactive, outer edges of the image. Choose one of the following:
•
Off: This setting leaves the image as-is.
•
Crop: This setting adds a mask all around edges of the source active image equal to
2.5%.
•
Zoom: This setting adds a factor to the scaling of the source active image so that the
vertical and horizontal resolutions are 105% of the size determined by the aspect ratio
function. Anything outside of the original image area is removed.
Input Select:
This function is same as the hotkey which on Remote controller. You can use
Remote controller or this function to select the correct input source
To select a video source, from Main Menu use
▲
or
▼
to highlight Input Select, then press
Enter, use
▲
or
▼
to highlight the desired source, then press ENTER.
Resync:
If the projected image becomes unstable or degraded, press
▲
or
▼
to highlight
Resync, then press ENTER. It also changes any Fine Sync setting for this timing to the
default setting.
Summary of Contents for H9090
Page 1: ...H9090 User s Manual ...


