background image

14

V

ISIONEER

 O

NE

T

OUCH

 7600 S

CANNER

 I

NSTALLATION

 G

UIDE

C

HECKING

 I

T

 O

UT

This section of the manual applies to both models of the Visioneer 
OneTouch scanner—the 7600 USB scanner and the 7600 Parallel 
scanner.

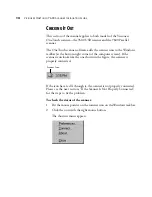
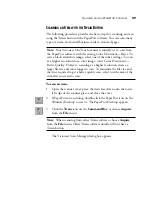
The OneTouch scanner software adds the scanner icon to the Windows 
taskbar (at the bottom right corner of the computer screen). If the 
scanner icon looks like the one shown in the figure, the scanner is 
properly connected. 

If the icon has a red X through it, the scanner is not properly connected. 
Please see the next section, “If the Scanner Is Not Properly Connected,” 
for the steps to fix the problem.

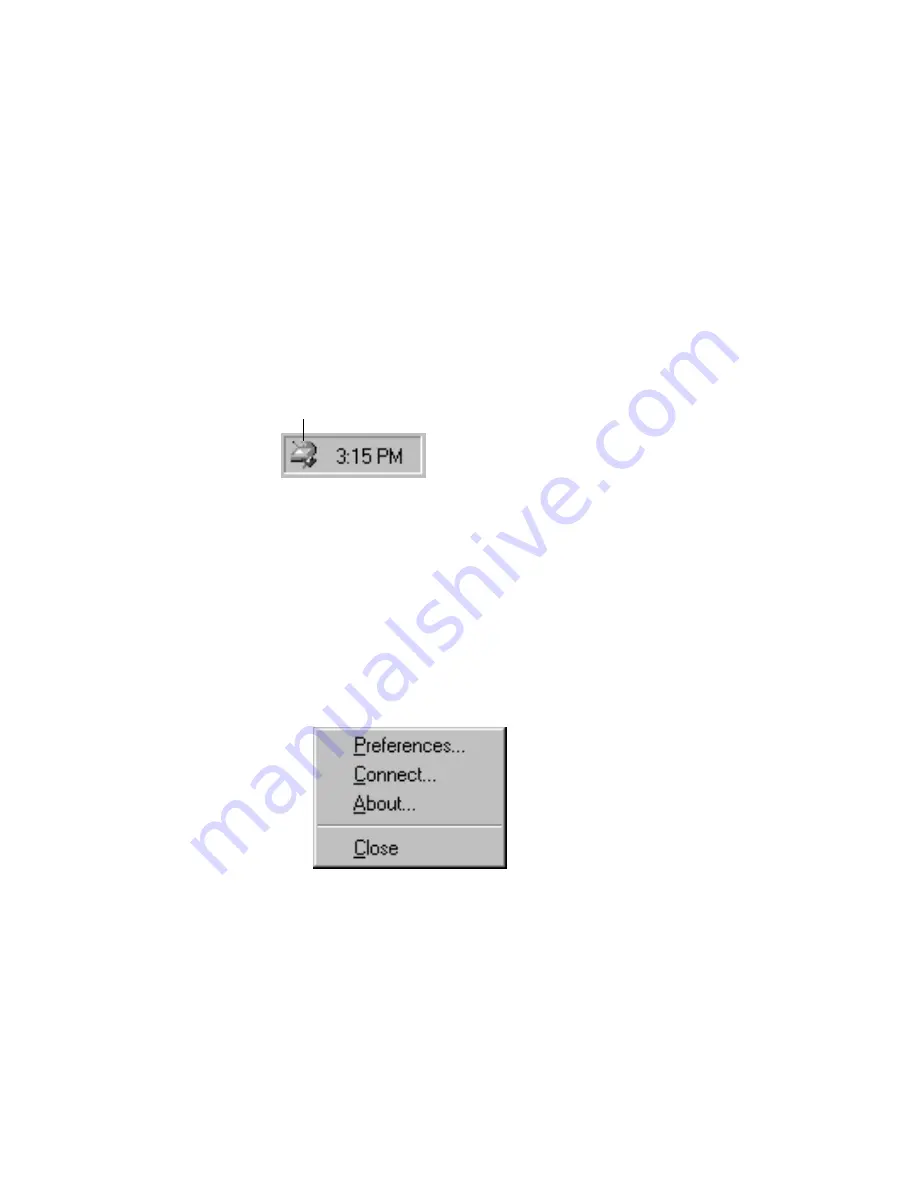
To check the status of the scanner:
1. Put the mouse pointer on the scanner icon on the Windows taskbar.

2. Click the icon with the right mouse button.

The shortcut menu appears.

Scanner Icon

Summary of Contents for OneTouch 7600

Page 1: ...Visioneer OneTouch 7600 Series for USB and Parallel Installation Guide...

Page 2: ...provided you return it postage prepaid with proof of your purchase from the original reseller during the 12 month period after the date of your original purchase of the product THIS IS VISIONEER S ON...

Page 3: ...erPort Software 4 STEP 2 Connecting the Scanner to the Computer 6 Installing the 7600 Parallel Scanner 8 What You Need 8 Getting the PaperPort Software User s Guide 8 The OneTouch 7600 Parallel Scanne...

Page 4: ...the Buttons 23 Adjusting Scan Settings and Page Settings 24 Scanning from the PaperPort Software 28 Scanning an Item with the Twain Button 29 The Predefined Scan Settings 32 Adjusting the Brightness a...

Page 5: ...r both models of the OneTouch 7600 scanner the 7600 USB scanner and the 7600 Parallel scanner Please make sure that you refer to the proper set of instructions for your scanner model WHAT S IN THE BOX...

Page 6: ...tes MB or more of available internal memory RAM 35 MB of free hard disk space A VGA or SVGA monitor Recommended settings for your monitor are as many colors as possible High Color 16 bit True Color 24...

Page 7: ...t corner Reference frame Place items face down within this frame Both inches and centimeter markings appear along the border of the frame Five Button panel Press a OneTouch button to scan print copy f...

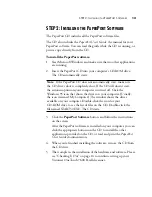
Page 8: ...anual for the PaperPort software You can read the guide while the CD is running or print a copy directly from the CD to your printer To install the PaperPort software 1 Start Microsoft Windows 98 and...

Page 9: ...to connect the scanner When you re finished click OK in the dialog box above Note If the PaperPort CD does not automatically start make sure the CD drive s door is completely shut If the CD still does...

Page 10: ...to the keyboard instead of the USB port on the computer 2 Plug the other end of the USB cable into the USB port on the back of the scanner If the plug does not attach easily make sure that you are plu...

Page 11: ...t your scanner to the computer 5 When the software installation is finished remove the CD from the computer and store it in a safe place 6 Please turn to Checking It Out on page 14 to continue setting...

Page 12: ...memory RAM 35 MB of free hard disk space A VGA or SVGA monitor Recommended monitor setting for color is as many colors as possible High Color 16 bit True Color 24 bit or 32 bit if your monitor has tha...

Page 13: ...er next to the buttons Reference frame Place items face down within this frame Both inches and centimeter markings appear along the border of the frame Five Button panel Press a OneTouch button to sca...

Page 14: ...OneTouch 7600 Parallel scanner connects to any available parallel LPT port on the back of your computer To connect the 7600 Parallel scanner 1 Save any open files and then shut down Windows 2 Turn off...

Page 15: ...d of the scanner cable into the parallel port on the back of your computer On some older computers the serial port and parallel port both have 25 pin connectors that fit the scanner cable Please make...

Page 16: ...on indicating that the scanner is receiving power The light remains amber until the scanner and computer are communicating properly Then the light turns green 9 Turn on your computer You re now ready...

Page 17: ...the appropriate buttons on the CD to install the other applications provided on the CD or read and print the PaperPort User s Guide documentation 4 When you re finished installing the software remove...

Page 18: ...m right corner of the computer screen If the scanner icon looks like the one shown in the figure the scanner is properly connected If the icon has a red X through it the scanner is not properly connec...

Page 19: ...heck the following possible problems Is a cable loose or not plugged in securely Inspect all cable connections Make sure all the cables are plugged in securely Is the scanner s power light on If it is...

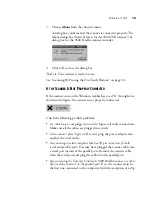
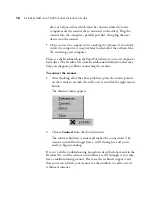
Page 20: ...nal information that may help you diagnose problems connecting the scanner To connect the scanner 1 After checking all of the above problems place the mouse pointer on the scanner icon with the red X...

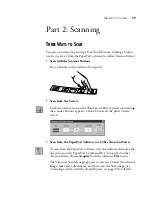
Page 21: ...bar A panel representing the scanner buttons appears Click a button on the panel on the screen Scan from the PaperPort Software or Other Twain Software To scan from the PaperPort software start the so...

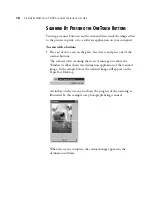
Page 22: ...scan on the glass face down and press one of the scanner buttons The scanner starts scanning the item A message just above the Windows taskbar shows the destination application of the scanned image I...

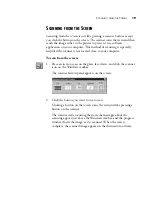
Page 23: ...ose to your computer To scan from the screen 1 Place an item to scan on the glass face down and click the scanner icon on the Windows taskbar The scanner button panel appears on the screen 2 Click the...

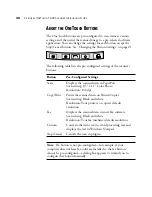
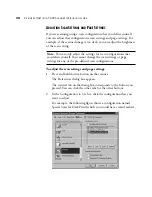
Page 24: ...PaperPort Scan setting 8 5 x 11 Color Photo Resolution 100 dpi Copy Print Prints the scanned item on Printer Copier Scan setting Black and white Resolution Your printer s or copier s default resoluti...

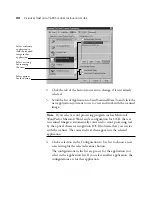
Page 25: ...The tabs on the dialog box correspond to the buttons except Properties The selections on the dialog box show the current settings for the button For example the following figure shows a sample of cur...

Page 26: ...pre set for the application you select in the application list If you select another application the configurations are for that application Select a software application to send the scanned image to...

Page 27: ...on of the Properties GETTING HELP WITH THE BUTTONS The software for scanning with the buttons includes Help information That information describes each feature of the software and answers questions ab...

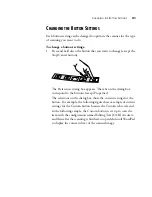
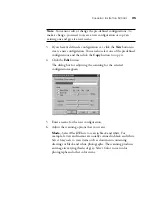
Page 28: ...hold down a button on the scanner The Preferences dialog box appears The selected tab on the dialog box corresponds to the button you pressed You can click the other tabs for the other buttons 2 In th...

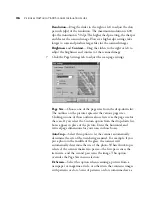
Page 29: ...onfiguration 6 Adjust the scanning options that you want Mode Select Black White to scan in black and white For example letters and memos are usually scanned in black and white Select Grayscale to sca...

Page 30: ...rious page sizes Clicking on one of those outlines also selects it as the page size for the scan If you select the Custom option from the drop down list boxes appear in place of the picture Enter the...

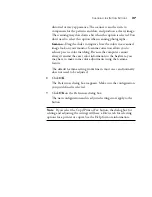
Page 31: ...cannot always transmit the exact color information to the hardware you may have to make some color adjustments using the Gamma feature The default Gamma setting works fine in most cases and normally...

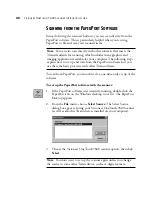
Page 32: ...perPort Desktop appears 2 From the File menu choose Select Source The Select Source dialog box appears listing your Visioneer OneTouch 7600 scanner as well as all other Twain devices installed on your...

Page 33: ...n icon on the Command Bar or choose Acquire from the File menu The Visioneer Scan Manager dialog box appears Note Your Visioneer OneTouch scanner is initially set to scan from the PaperPort software w...

Page 34: ...option You can also create your own custom configurations See the Help information for details Scan Configuration Use this section of the dialog box to manually select scan options for the image Mode...

Page 35: ...enter the vertical and horizontal sizes in those two number boxes AutoCrop Select this option to let the scanner automatically determine the size of the item being scanned For example if you put a ph...

Page 36: ...e PaperPort Getting Started Guide and PaperPort User s Guide on the CD for more information about using the PaperPort software THE PREDEFINED SCAN SETTINGS Selecting the proper scan setting before fin...

Page 37: ...xt to editable text Provides higher quality and a larger file size than the Faxing Filing or Copying scan setting Black White Photo Grayscale 100 dpi Black and white photos Provides the best setting f...

Page 38: ...an item is currently displayed in the preview area the changes you make using the Brightness and Contrast control bars are reflected in the preview item To adjust brightness and contrast 1 Click the T...

Page 39: ...contrast See the Help information for more details about the Advanced Settings dialog box CLEANING THE SCANNER GLASS Scanning items that have excessive amounts of dirt or dust may dirty the glass To...

Page 40: ...21 6 x 29 7 cm Scanner dimensions Height 3 4 inches 8 5 cm Width 11 4 inches 29 0 cm Length 17 3 inches 44 0 cm Weight 5 7 pounds 2 6 kg Operating temperature 50 104 F 5 35 C without condensation Rela...

Reviews: