


© 2010 Viking Preferred Service
39
WARNING
To avoid risk of electrical shock, personal injury, or death, disconnect electrical power to unit using power
switch before servicing. Wires removed during disassembly must be replaced on proper terminals to insure
correct earth ground and polarization. After servicing, reconnect power using power switch.
Service Diagnostics and Procedures–Disassembly
Ice Maker (cont.)
If no heat is detected, replace mold assembly. Next
ensure water is supplied to the Ice maker. When the
ejector blade gets to the 11:00 position, the water
valve is energized for 7.5 seconds.
Verify the water valve has 120VAC between test
points V and N and approximately 4.75 ounces of
water is dispensed. If voltage is present and water
is not dispensed, verify water supply and fill rate.
Poor water quality can cause ice maker to fail or
produce unacceptable cubes. Install a water filter to
eliminate bad taste, odor, and visible contaminates.
Mineral content or sand can restrict screen in water
fill valve or particles of sand can keep valve from
seating properly.
To access the ice maker:
1. Open
door
2.
Open ice maker door and remove 1/4” securing
screws.
3. Remove
door
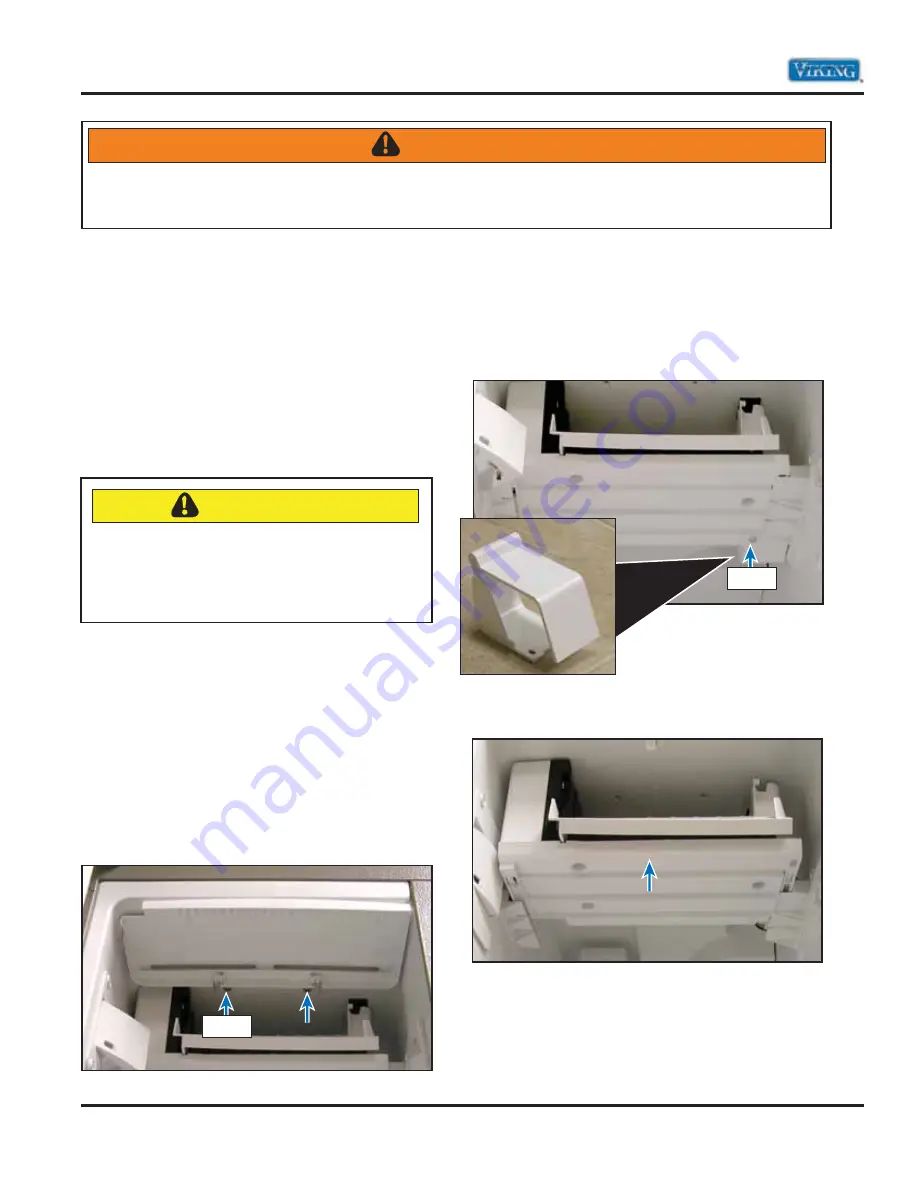
4.
Remove 1/4” screw and harness cover by
sliding cover toward rear of unit.
5.
Depress tabs on left and right toe release and
slide ice maker tray out
CAUTION
Do not use a Reverse Osmosis Water
Filtration System. It reduces the water
pressure below 20 psi and the ice maker will
not fill. Use of a Reverse Osmosis system will
void the warranty.
Screw
Screw


