background image

28

Note

Edge protectors 

A

 are supplied in pack 2 of the ther-

mal insulation.

2.

1.

A

3.

Fig. 22


Fitting the control unit to the top back panel

5833291

Summary of Contents for Vitocrossal CRU Series

Page 1: ...Installation instructions for contractors VIESMANN Vitocrossal Type CRU 800 to 1000 kW Gas condensing boiler VITOCROSSAL 5833291 GB 6 2018 Dispose after installation...

Page 2: ...egulations to be observed National installation regulations Statutory regulations for the prevention of accidents Statutory regulations for environmental protection Codes of practice of the relevant t...

Page 3: ...7 Mounting the burner 18 Fitting the intake extension to the burner 19 Attaching the top and bottom rails 20 Routing electric cables along the rails 21 Fitting the crossbars 22 Burner electrical conne...

Page 4: ...it new component or In conjunction with a tool Clean the sur face Dispose of component correctly Dispose of component at a suitable collec tion point Do not dispose of component in domestic waste Inte...

Page 5: ...e also includes the adherence to mainte nance and inspection intervals Product information Vitocrossal type CRU Gas condensing boiler 800 kW and 1000 kW rated heating output with modulating MatriX Dis...

Page 6: ...at the burner door opens to the left Vertical flue gas pipework 500 300 Fig 2 Note If routing the flue gas vertically allow space for work ing on the control unit Dimension a b Clearance Minimum clear...

Page 7: ...oiler back mm 100 e Spring elements unloa ded mm 41 Spring elements loa ded mm 38 39 Thermal insulation components The thermal insulation and casing are supplied in 2 packs The following is a list of...

Page 8: ...al insulation mat heat exchanger mod ule 0019 Side panel front left 0027 Front panel 0028 Control unit panel 0029 Top panel front 0030 Top panel left 0031 Top panel right Pos Part 0032 Top panel centr...

Page 9: ...ham ber module 0005 Fixing strut 0006 Gas spring 0007 Joint long 0008 Joint short 0009 Rail short top left 0010 Rail short top right 0011 Rail top left 0012 Rail top right Pos Part 0013 Crossbar 0014...

Page 10: ...side panel 1 right 0025 Centre side panel 2 right 0026 Side panel back right 0040 Fixings Spring hooks edge protectors vari ous screws and washers ball studs links and gas springs Thermal insulation...

Page 11: ...he floor 1 Lift the combustion chamber module by the lifting eyes 2 Position the anti vibration boiler supports centrally under the base rails 3 When setting the boiler down less than square on a boil...

Page 12: ...e tools or other objects inside the combustion chamber 1 Lift the heat exchanger module by the lifting eyes C B A 2 C A B C C D D D D 3 10x 110 Nm 4x 60 Nm 4 Fig 7 A Combustion chamber module B Heat e...

Page 13: ...13 Fitting the supplied foot supports to the heat exchanger module 2 1 2x 3 Fig 8 Fitting the heat exchanger module to the cont 5833291...

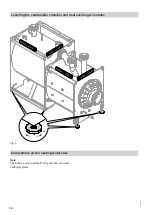
Page 14: ...14 6x Fig 9 Connections on the heating water side Note The boiler is only suitable for fully pumped hot water heating systems Levelling the combustion chamber and heat exchanger modules 5833291...

Page 15: ...ell for boiler water temperature sensor C Female connection for pressure limiter R D Safety connection safety valve R 2 E Boiler return 2 PN 6 DN 100 F Boiler return 1 PN 6 DN 100 G Drain outlet R 1 H...

Page 16: ...ad to leaks vibrations and appliance dam age Connect on site lines so that they are free of load and torque stress 3 Seal any unused connections Note Never connect a heat consumer to connector D safet...

Page 17: ...17 A 1 2 3 5 4 8x 4x 8x 8x Fig 11 A Black side outwards Note If required secure the spring hooks to the boiler base Fitting the thermal insulation 5833291...

Page 18: ...rner with suitable auxiliary equip ment e g a crane Use the lifting eye on the burner Please note Mechanical damage to delicate components will impair the burner function Carefully insert the burner i...

Page 19: ...the burner A 2 1 3 Fig 13 A Retaining bracket Please note Mechanically loaded ventilation air pipework can lead to leaks and appliance damage Secure the intake extension free of load and tor que stres...

Page 20: ...20 A C D B 4 1 3 M 6 x 10 2 Fig 14 A Rail top long B Rail top short C Rail bottom long D Rail bottom short Attaching the top and bottom rails 5833291...

Page 21: ...e Damage to the connecting cables and sensor leads capillaries causes malfunction The connecting cables and sensor leads must not come into contact with hot components Never kink the capillary tubes P...

Page 22: ...22 1 3 4 8 2 4x 3 5 2x 4 8 Fig 16 Fitting the crossbars 5833291...

Page 23: ...from electrical current and result in appliance dam age Route LV leads and power cables 230 V 400 V separately Secure with cable ties Please note Damage to the cables leads causes malfunction The cab...

Page 24: ...24 1 2 1 4 8 4 8 4 3 4 Fig 18 Fitting the side panels 5833291...

Page 25: ...2 2x 4 8 4 8 Fig 19 Fitting the top front panel Note Links A ball studs B and gas springs C are sup plied in pack 2 of the thermal insulation Attaching the control unit panel to the front top panel 5...

Page 26: ...26 4 A C M 6 x 20 B 2x 3 2x 1 2x 2 Fig 20 Fitting the top front panel cont 5833291...

Page 27: ...27 D F E D F E Fig 21 D LAN cable E Data cable to the control unit F Programming unit power supply 230 V Connecting the programming unit 5833291...

Page 28: ...28 Note Edge protectors A are supplied in pack 2 of the ther mal insulation 2 1 A 3 Fig 22 Fitting the control unit to the top back panel 5833291...

Page 29: ...29 2 3 4 6 5 A A B C D 1 7 3 5 Fig 23 A Plugs for the flue gas dampers B Flue gas temperature sensor C LAN socket D Cable ties for on site cables Attaching the back panels 5833291...

Page 30: ...rrect wiring can lead to serious injury from electrical current and result in appliance dam age Route LV leads and power cables 230 V 400 V separately Secure with cable ties Please note Damage to the...

Page 31: ...2x 8 8 1 2 2 Fig 25 A Cables with moulded strain relief B On site cables strip up to 100 mm insulation On site connections at the Vitotronic control unit Vitotronic control unit installation and servi...

Page 32: ...nit F Servomotor for rotary damper or 2 2 way solenoid valve G Flue gas damper H Ignition unit K Fuel valve BV1 L Fuel valve BV2 M Display and programming unit N Gas pressure switch GDW2 O Air pressur...

Page 33: ...ne with installation requirements We additionally recommend installing an AC DC sensitive RCD RCD class B for DC fault currents that can occur with energy efficient equip ment If the mains connection...

Page 34: ...E PE L1 L1 L2 L3 4 N N N 400V 100A 100 4 100A L N L 156 40 Base I L1 L2 L3 A Fig 27 f Mains connection to Vitotronic control unit a Fan motor a A PWM switching fan motor aBH Mains connection accessori...

Page 35: ...e absence of system component earthing can lead to serious injury from electric current if an electrical fault occurs The appliance and pipework must be connected to the equipotential bonding of the b...

Page 36: ...neutralising system either behind or adja cent to the boiler 2 Trim the condensate hose supplied to the required length Connect the condensate hose to the trap Connect the condensate hose to the neutr...

Page 37: ...ntaining a slight rise to the chimney Avoid sharp kinks Flue system installation instructions Danger Leaking or blocked flue systems or an inade quate supply of combustion air can cause life threateni...

Page 38: ...38 3 4x 4 2x 5 M6 x 10 2 1 4x Fig 32 Fitting the front side panels 5833291...

Page 39: ...ff equipment must be installed in the gas line If the gas line is contami nated e g old pipes with corrosion products we recommend installing a gas filter in the supply line 2 Check for leaks Please n...

Page 40: ...40 4 2 5 1 2x 3 M 5 x 25 M 5 x 25 2x A Fig 34 A Type plate Fitting the front panel 5833291...

Page 41: ...41 Vitocrossal type CRU service instructions Commissioning 5833291...

Page 42: ...42 S System examples 5 Keyword index 5833291...

Page 43: ...43 5833291...

Page 44: ...Shropshire TF1 7YP GB Telephone 44 1952 675000 Fax 44 1952 675040 E mail info uk viessmann com Viessmann Werke GmbH Co KG D 35107 Allendorf Telephone 49 6452 70 0 Fax 49 6452 70 2780 www viessmann com...

Reviews: