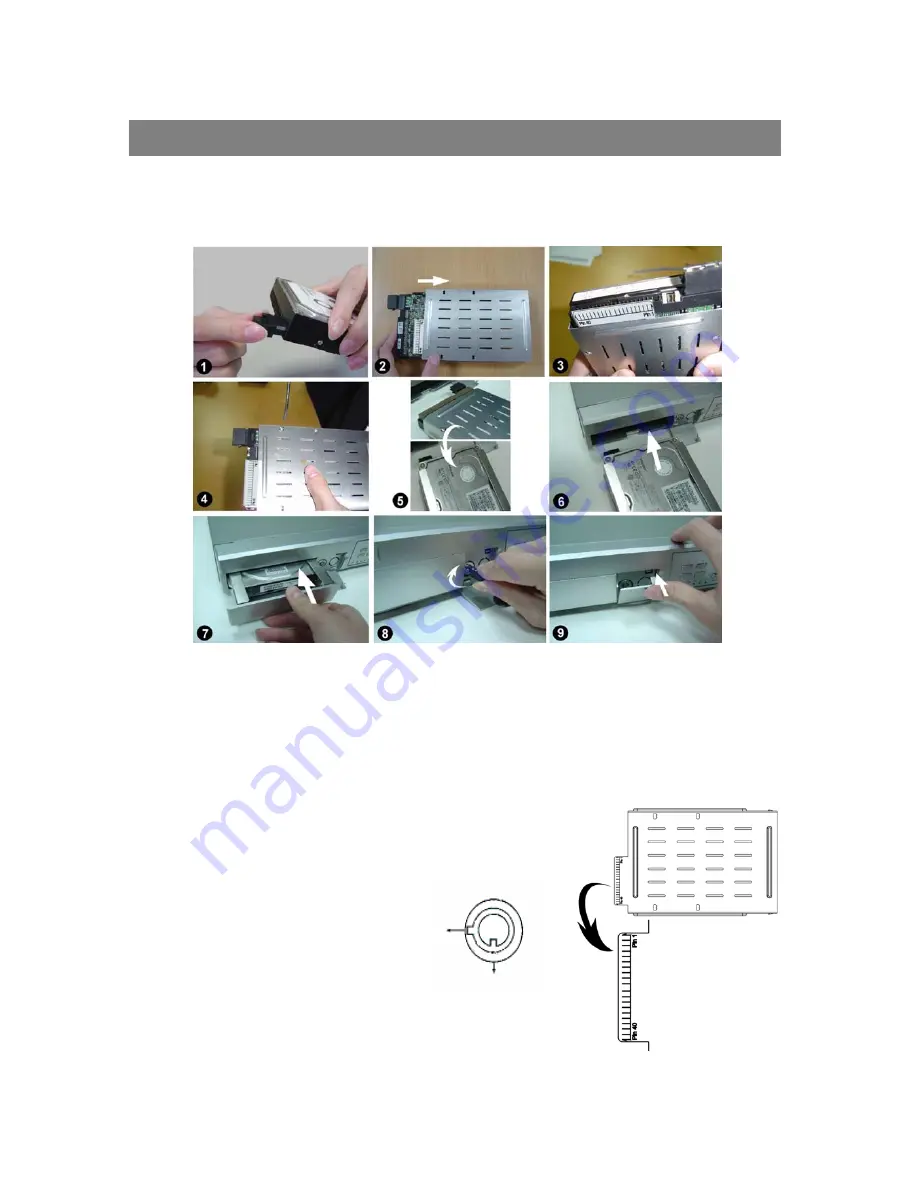
Follow the steps carefully in order to ensure correct installation.
The compartment located on the front panel of the DVR is the removable Cartridge, in which you insert the HDD. The various
parts of the Cartridge are labeled for your reference.
21
APPENDIX #1 – INSTALL THE HDD
Step 2 Put HDD into the HDD cartridge. Please notice the bottom side is power side as chart shows
(refer to Picture 2).
Step 3 Screw the HDD to the cartridge. Before you screw the HDD, please be aware that you must to level
pin 1 of the HDD at pin 1 mark, because the screw hole is different from different HDD brands.
Then screw the HDD correctly (refer to Picture 3 and 4). You must precisely align the
hard disk to the pin connect to ensure correct installation.
Step 1 Connect the connector with the HDD (refer to Picture 1).
Step 4 Reverse the HDD and put it into DVR (refer to Picture 5 and 6).
Step 5 Connect the HDD with DVR (refer to Picture 7).
A (locked)
B
(unlocked)
Note : If you do not lock the cabinet, the DVR system will not function properly.
Step 7 Close the cap (refer to Picture 9).
Note:
Do not try to retrieve the HDD data by PC. The video file cannot be read
by PC, operation on PC would damage the FAT table of the hard disk.
Step 6 Lock the cabinet by turning the key clockwise (refer to Picture 8).


