EN - English - I
nstruc
tions manual
6
Crimp the various connectors onto the cables.
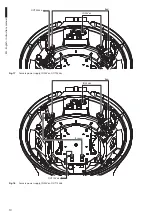
Fig. 7
6.3 Universal adapter
Dismantle the adapter by loosening the
three screws M3x12mm and then taking it
off the ring by turning it anti-clockwise.
Fig. 8
Prepare the camera adapter to the exact
length as given in table then fasten the
speed dome using the supplied screws.
Remove the universal adapter for the
speed dome from the aluminium ring,
by undoing the three screws.
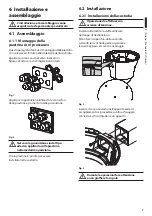
Attach the adapter ring inside the housing
using the 4 M4 screws supplied.
h
Take great care not to pinch or
damage the cables there.
Fig. 5
Pass the various wires and cables through the bracket
into the inside of the housing; these cables should
be locked by the cable glands on the plate supplied
with the housing. Then close the plate using the four
self-tapping triangular M3 slotted screws supplied.
Fig. 6
h
The stretch of cable that is left
inside the housing must be long
enough to reach and connect with
the speed dome being installed.
Summary of Contents for MEDUSA
Page 2: ......
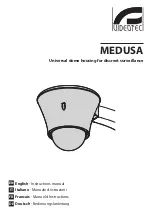
Page 3: ...EN English Instructions manual MEDUSA Universal dome housing for discreet surveillance ...
Page 16: ...VIDEOTEC S p A www videotec com Printed in Italy MNVCDBH18B_1511_EN ...
Page 30: ...VIDEOTEC S p A www videotec com Printed in Italy MNVCDBH18B_1511_IT ...
Page 31: ...FR Français Manuel d instructions MEDUSA Caisson dôme universel pour surveillance discrète ...
Page 44: ...VIDEOTEC S p A www videotec com Printed in Italy MNVCDBH18B_1511_FR ...
Page 45: ...DE Deutsch Bedienungslanleitung MEDUSA Universalkugelgehäuse für diskrete Videoüberwachung ...
Page 58: ...VIDEOTEC S p A www videotec com Printed in Italy MNVCDBH18B_1511_DE ...
Page 59: ...RU Русский Учебник инструкции MEDUSA Универсальная кожухи сфера для видеонаблюдения ...
Page 72: ...VIDEOTEC S p A www videotec com Printed in Italy MNVCDBH18B_1511_RU ...
Page 73: ......

