background image


2   

WARNINGS   


To   reduce   the   risk   of   fire   or   electric   shock,   do   not   expose   this   appliance   to   rain   or   moisture.   


To    reduce    the    risk    of    electric    shock,    do    not    open    the    cabinet.        No    user    serviceable    parts    are    inside.        Refer    servicing    to   
qualified   personnel.   


This   product   should   not   be   exposed   to   excessive   heat   such   as   direct   sunlight,   fire,   or   other   heat   sources.   


Caution:   Do   not   expose   this   appliance   to   dripping   or   splashing   liquids.      Do   not   put   objects   filled   with   liquid,   such   as   vases   
on   or   near   the   appliance.   


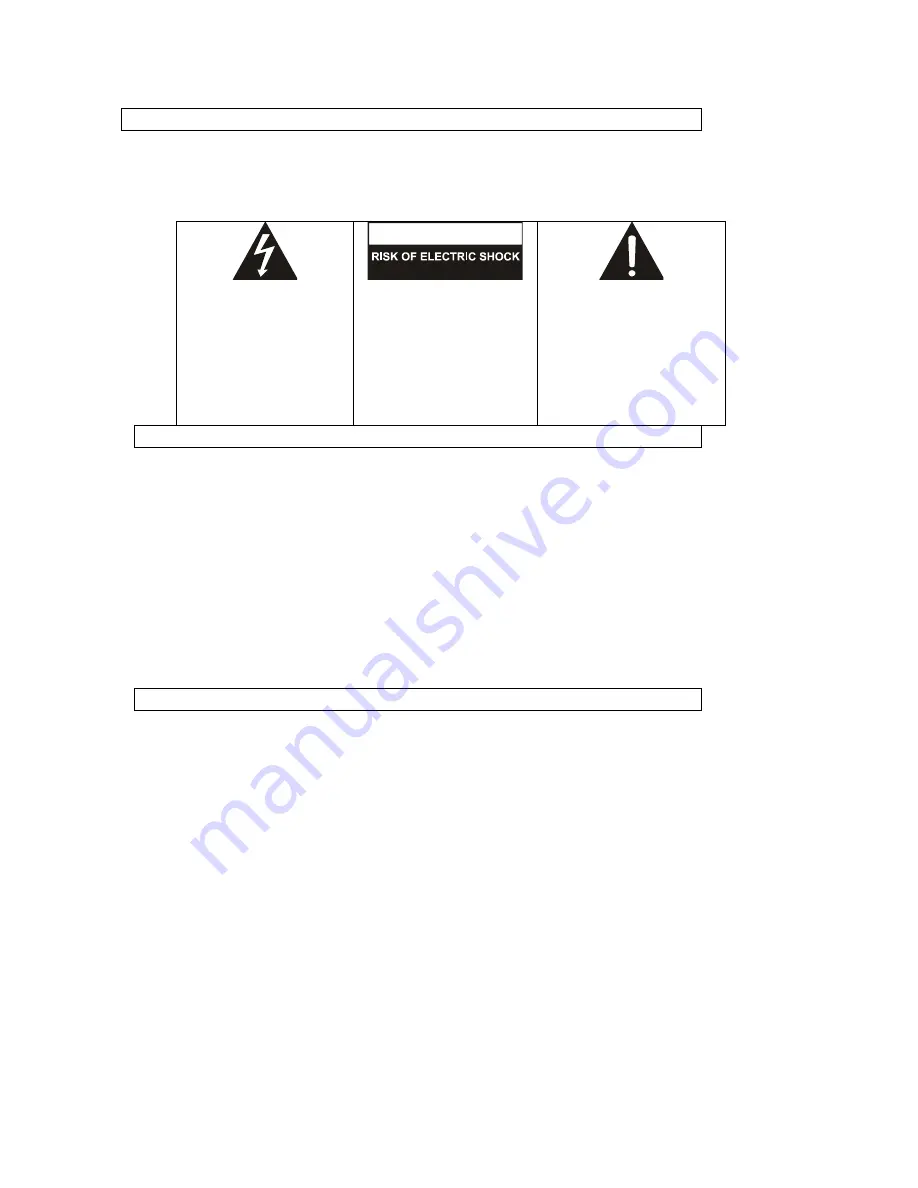
THE   LIGHTNING   FLASH   WITH   

ARROWHEAD   SYMBOL,   WITHIN   

AN   EQUILATERAL   TRIANGLE,   IS   

INTENDED   TO   ALERT   THE   USER   

TO   THE   PRESENCE   OF   NON-­‐

INSULATED   "DANGEROUS   

VOLTAGE"   WITHIN   THE   

PRODUCT'S   ENCLOSURE   THAT   

MAY   BE   OF   SUFFICIENT   

MAGNITUDE   TO   CONSTITUTE   A   

RISK   OF   ELECTRIC   SHOCK   TO   

PERSONS.   

CAUTION

DO NOT OPEN


WARNING:

   TO   REDUCE   THE   RISK   OF   

ELECTRIC   SHOCK,   DO   NOT   REMOVE   

THE   FRONT   OR   REAR   COVER.   NO   

USER   SERVICEABLE   PARTS   ARE   

INSIDE.   REFER   SERVICING   TO   

QUALIFIED   SERVICE   PERSONNEL.   


THE   EXCLAMATION   POINT   WITHIN   

AN   EQUILATERAL   TRIANGLE   IS   

INTENDED   TO   ALERT   THE   USER   TO   

THE   PRESENCE   OF   IMPORTANT   

OPERATING   AND   MAINTENANCE   

(SERVICING)   INSTRUCTIONS   IN   THE   

LITERATURE   ACCOMPANYING   THE   

APPLIANCE.   

FCC   WARNINGS   

WARNING

:   Changes   or   modifications   to   this   unit   not   expressly   approved   in   this   manual   could   void   

the   user’s   authority   to   operate   the   equipment.   

NOTE

:   This   equipment   has   been   tested   and   found   to   comply   with   the   limits   for   a   Class   B   digital   

device,   pursuant   to   Part   15   of   the   FCC   Rules.   These   limits   are   designed   to   provide   reasonable   

protection   against   harmful   interference   in   a   residential   installation.   This   equipment   generates,   uses,   

and   can   radiate   radio   frequency   energy   and,   if   not   installed   and   used   in   accordance   with   the   

instructions,   may   cause   harmful   interference   to   radio   communications.   However,   there   is   no   

guarantee   that   interference   will   not   occur   in   a   particular   installation.   If   this   equipment   does   cause   

harmful   interference   to   radio   or   television   reception,   which   can   be   determined   by   turning   the   

equipment   off   and   on,   the   user   is   encouraged   to   try   to   correct   the   interference   by   one   or   more   of   the   

following   measures:   


Reorient   or   relocate   the   receiving   antenna.   


Increase   the   separation   between   the   equipment   and   receiver.   


Connect   the   equipment   into   an   outlet   on   a   circuit   different   from   that   to   which   the   receiver   is   

connected.   


Consult   the   dealer   or   an   experienced   radio/TV   technician   for   help.   

IMPORTANT   SAFETY   INSTRUCTIONS   

1.


Read   these   instructions.   

2.


Keep   these   instructions.   

3.


Heed   all   warnings.   

4.


Follow   all   instructions.   

5.


Do   not   use   this   apparatus   near   water.   

6.


Clean   only   with   dry   cloth.   

7.


Do   not   block   any   ventilation   openings.   Install   in   accordance   with   the   manufacturer's   instructions.   

8.


Do   not   place   near   any   heat   sources   such   as   radiators,   heat   registers,   stoves,   or   other   apparatus   

(including   amplifiers)   that   produce   heat.   

9.


Do   not   defeat   the   safety   purpose   of   the   polarized   or   grounding-­‐type   plug.   A   polarized   plug   has   

two   blades   with   one   wider   than   the   other.   A   grounding   type   plug   has   two   blades   and   a   third   

grounding   prong.   The   wide   blade   and/or   the   third   prong   are   provided   for   your   safety.   If   the   

provided   plug   does   not   fit   into   your   outlet,   consult   an   electrician   for   replacement   of   the   obsolete   

outlet.   

10.


Protect   the   POWER   cord   from   being   walked   on   or   pinched   particularly   at   plugs,   convenience   

receptacles,   and   the   point   where   they   exit   from   the   apparatus.   

11.


Only   use   attachments/accessories   specified   by   the   manufacturer.   

12.


Unplug   this   apparatus   during   lightning   storms   or   when   unused   for   long   periods   of   time.   

13.


Refer   all   servicing   to   qualified   service   personnel.   Servicing   is   required   when   the   apparatus   has   

been   damaged   in   any   way,   such   as   POWER-­‐supply   cord   or   plug   is   damaged,   liquid   has   been   

spilled   or   objects   have   fallen   into   the   apparatus,   the   apparatus   has   been   exposed   to   rain   or   

moisture,   does   not   operate   normally,   or   has   been   dropped.   

14.


Do   not   use   this   device   while   operating   a   motor   vehicle.   


Summary of Contents for V7TAB16BT

Page 1: ...ustomer Help icon on the lower right side of the home screen to immediately be directed to our Technical Support website For Technical Support by Phone please call 855 998 4326 Monday to Saturday 10 0...

Page 2: ...installation If this equipment does cause harmful interference to radio or television reception which can be determined by turning the equipment off and on the user is encouraged to try to correct th...

Page 3: ...A built in webcam allows you to capture still images record videos chat online and capture panorama pictures 3 Charge Indicator A Red indicator light will appear while the device is charging After the...

Page 4: ...s and more that use a Full size USB connection 5 Mini USB port Connects peripherals such as mice digital cameras MP3 players and more that use a Mini USB connection Use to charge your tablet from a Co...

Page 5: ...D card may cause data loss or unpredictable system issues For safe removal tap Settings Storage Unmount microSD card 1 3 Charging Battery When you first receive your device the battery will only be pa...

Page 6: ...so you don t drag something instead For example to slide the Home screen left or right to view the 4 alternative screens just touch the home screen and move your finger left or right to rotate throug...

Page 7: ...ll 855 998 4326 Monday to Saturday 10 00 AM to 7 00PM 2 Setting up your device for the first time Note For proper setup make sure you have access to a wireless network and your device is fully charged...

Page 8: ...ting to your Wi Fi network contact our Customer Support Team o After your network is successfully connected tap the NEXT icon Step 4 Got Google A Google Account lets you organize and access your perso...

Page 9: ...Google Mail Gmail as your email provider you can use a different email account from almost any provider with this tablet This is explained fully in the E mail section of this manual o If you don t wa...

Page 10: ...ep 8 Backup and restore You can easily and automatically backup your apps settings music photos videos books website bookmarks and other data to your Google account o Check the options you would like...

Page 11: ...e Home Screen consists of 5 areas which can be customized to include different Apps and Widgets The image above shows the layout of the Main Screen of the tablet This image is labeled with many of the...

Page 12: ...s Notification Area The Quick Settings Notification popups allow you to view or change your device settings quickly right from your home screen by tapping on the Quick Settings Notification Area 11 To...

Page 13: ...large to fully fit on your tablet screen you can pan up down left or right by dragging your finger on the touch screen just like scrolling 5 To Zoom IN touch and hold two fingers on the screen and mov...

Page 14: ...Provider ISP and even your work E mail if allowed Note Before you setup your E Mail account you will need several key pieces of information If you are setting up email from your work you may need to c...

Page 15: ...rage You are now safe to remove your USB drive or microSD card 5 7 Adding music photos and video to your device from a Windows PC 1 Connect your device to your PC using the included USB cable 2 Once y...

Page 16: ...d left with your finger on the touchscreen to view them all 6 To view a video tap the Play icon To pause a video tap the video again 7 To delete or edit a photo or video simply tap the photo and then...

Page 17: ...Drawer To move an App from your App drawer to your Home Screen o Open the Application drawer o Tap and hold down the App icon you would like to move o The App icon will appear to float Continue to ho...

Page 18: ...the Apps settings 5 Make sure you are viewing the Running apps by swiping the screen until Running is shown at the top of the screen 6 Tap the app you would like to close 7 Tap the Stop icon To delet...

Page 19: ...on one of the blue blocks and dragging o When you have the Widget the size you want just tap the Widget to finish To move a Widget on Home Screen o Tap and hold down the Widget you would like to move...

Page 20: ...rite Bar If you try to add too many Apps on the Favorite Bar the last app on the bar will move back to the Application Drawer o Once you have selected where you want it to be on the Favorite Bar simpl...

Page 21: ...pp To take pictures and videos first touch the Camera app icon located in the Application Drawer Taking Still Images o With the Camera app open point the camera lens at the object to be photographed u...

Page 22: ...et will automatically connect to the new Bluetooth device o To stop using the connected Bluetooth device with your tablet tap on the name of your device in the Bluetooth Settings page and a popup box...

Page 23: ...device by turning the Power OFF and then ON again If the device will not respond to the Power button insert a thin straight object such as a paper clip in the manual reset hole to perform a soft reset...

Page 24: ...iately be directed to our Technical Support website For Technical Support by Phone please call 855 998 4326 Monday to Saturday 10 00 AM to 7 00PM BATTERY WARNINGS This product uses a rechargeable Lith...

Page 25: ...o a trav s de Internet y nos complacer ayudarlo a resolver sus problemas Para obtener soporte t cnico a trav s de Internet simplemente pulse el icono Customer Help soporte al cliente en la parte derec...

Page 26: ...incorporada le permite capturar im genes est ticas grabar videos chatear en l nea y capturar im genes panor micas 3 Indicador de carga La luz indicadora roja se encender mientras el dispositivo se est...

Page 27: ...xi n HDMI 4 Puerto USB Conexiones perif ricos como ratones c maras digitales reproductores MP3 y m s que utilizan una conexi n USB de tama o completo 5 Puerto mini USB Conecta perif ricos como ratones...

Page 28: ...croSD suavemente dentro de la ranura 2 hasta que encaje en su posici n o Para retirar la tarjeta microSD o Empuje levemente la tarjeta microSD hacia adentro y sta se eyectar parcialmente de la ranura...

Page 29: ...do 1 5 Gestos comunes o Pulsar Para seleccionar o activar algo toque su selecci n suavemente una sola vez o Tipear Para tipear algo como un nombre una contrase a o un t rmino de b squeda simplemente t...

Page 30: ...bot n Power encendido apagado para encender la tablet o para sacarla del modo de suspensi n 1 6 2 Pulse y mantenga presionado el icono y desl celo hasta el s mbolo a la derecha de la pantalla para de...

Page 31: ...aparecer una lista de las redes inal mbricas disponibles o Seleccione el nombre de su red inal mbrica Wi Fi desde la lista puls ndola o Si su red inal mbrica est protegida por contrase a necesitar ing...

Page 32: ...qu computadora o dispositivo m vil est usando Use otros servicios de Google Su cuenta de Google tambi n le permite provechar cualquier otra aplicaci n o servicio de Google que quiera usar como Gmail...

Page 33: ...do de inmediato a nuestro sitio de soporte t cnico Para obtener soporte t cnico por tel fono llame al 855 998 4326 de lunes a s bados de 10am a 7pm Paso 6 Inicie sesi n o Ingrese la direcci n de corre...

Page 34: ...para continuar Paso 9 Use los servicios de ubicaci n de Google Puede usar los servicios de ubicaci n de Google para utilizar los datos de ubicaci n de su red Wi Fi a fin de ayudar a las aplicaciones...

Page 35: ...a pantalla de Inicio que se acceden deslizando su dedo a la izquierda o la derecha 2 Widget Un Widget es una aplicaci n que se puede ubicar en cualquiera de las pantallas de inicio para un f cil y r p...

Page 36: ...los ajustes r pidos y rea de notificaci n 11 Para ver sus notificaciones toque en la Configuraci n r pida y rea de notificaci n 11 una vez y el cuadro emergente Notificaciones aparecer Para ver los a...

Page 37: ...il para mover la p gina web 4 Si la p gina web es muy grande para caber completamente en la pantalla de su tablet podr hacer un paneo hacia arriba abajo izquierda o derecha arrastrando su dedo sobre l...

Page 38: ...e correo electr nico Una aplicaci n de correo electr nico b sica llamada Email y la aplicaci n de correo electr nica propia de Google llamada Gmail Para obtener la mejor experiencia usando este dispos...

Page 39: ...s pendientes en su cuenta Dependiendo de cuantos nuevos correos electr nico tenga la sincronizaci n puede demorar unas cuantos minutos 5 5 Agregar m s cuentas de correo electr nico La aplicaci n de co...

Page 40: ...para ver los archivos 4 Su dispositivo se mostrar en su PC como un icono de unidad de disco montada 5 Haga doble clic sobre el icono de la unidad de disco montada y simplemente arrastre y suelte las...

Page 41: ...r o editar una foto o v deo simplemente pulse el elemento y luego pulse el icono de configuraci n que aparecer en la esquina superior derecha 8 A continuaci n aparecer una serie de opciones de edici n...

Page 42: ...la parte inferior de su pantalla Esto lo llevara de vuelta a la pantalla de inicio Home y abrir el App Drawer Para mover una App de su App Drawer a su pantalla de inicio o Abra el Application Drawer...

Page 43: ...algunas seguir n ejecut ndose en segundo plano en alguna medida 3 Para asegurarse de que la aplicaci n se cierre completamente deber abrir la aplicaci n de configuraciones Settings de su dispositivo 4...

Page 44: ...parecer un di logo titulado Agregar a la pantalla de inicio Add to Home Screen o Pulse el icono Widgets o Aparecer un di logo titulado Choose Widgets seleccionar Widgets o Pulse el nuevo Widget que de...

Page 45: ...ara su Widget en su pantalla simplemente su ltelo Eliminaci n de Widgets o Pulse y mantenga presionado el icono del Widget que desea eliminar o El icono del Widget parecer flotar Una papelera aparecer...

Page 46: ...iones 6 4 Configuraci n del fondo de pantalla Para cambiar el fondo de pantalla en su pantalla de inicio Home o Pulse y mantenga su dedo sobre la pantalla de inicio Aseg rese de no tocar una aplicaci...

Page 47: ...c mara para cambiar al modo de grabaci n de v deos o Luego de enfocar el lente de la c mara al objeto que desea grabar pulse el c rculo rojo a la derecha de la pantalla para comenzar a grabar NOTA Mie...

Page 48: ...y cambie la entrada a la entrada HDMI o Encienda y desbloquear el dispositivo o La pantalla de su dispositivo ahora se mostrar en el televisor 10 Actualizaci n del Firmware Esta tablet puede recibir a...

Page 49: ...ci n 1 2 o Transfiera o elimine los archivos que no est usando utilizando la aplicaci n File Manager gestor de aplicaciones Secci n 6 La recepci n Wi Fi es d bil o Aseg rese de no estar demasiado lejo...

Page 50: ...PU Allwinner A13 ARM Cortex A8 at 1 6GHz 512KB L2 Cache GPU Mali400 HD Video Decoding GPU Mali400 RAM 1 GB Wi Fi 802 11 b g n Removable Memory Storage microSD Card max 64 GB not included Connectivity...

Page 51: ...ing To contact us please call 1 855 998 4326 This warranty applies only under conditions of normal use There are no consumer serviceable parts contained in this product and any attempt by the owner to...

Page 52: ...52 Schoenfeld International VIDAO PN V7TAB16BT Version 1 0 January 2014...

Reviews: