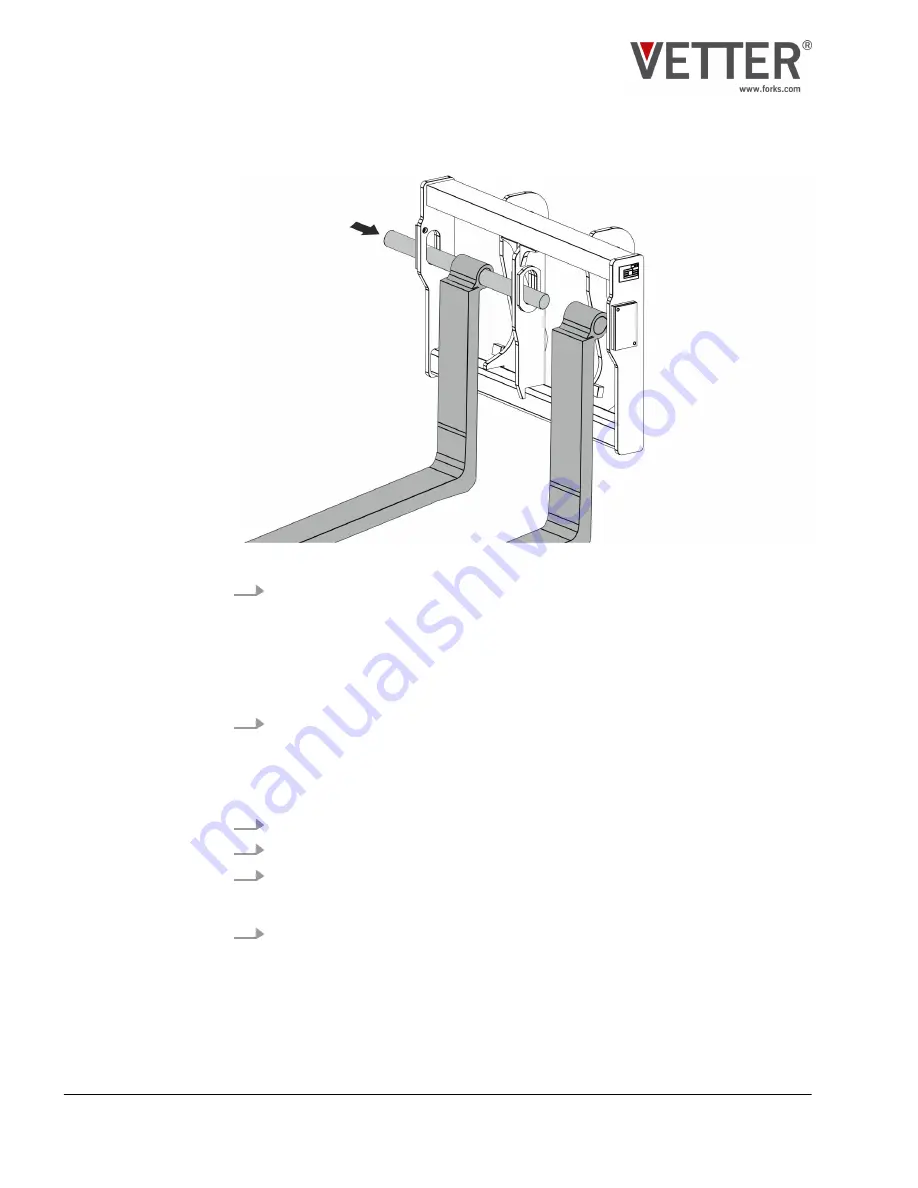
Fig. 9: Installing the shaft forks
6.
L
WARNING! Risk of hands and other body parts being crushed when
aligning and pushing on!
Push the shaft through the outer elongated hole, the socket of the fork arm, and
the middle elongated hole from the side. (Fig. 9). While doing so, push the
adjusting rings for locking the fork arms (present in the scope of delivery
depending on the configuration, not shown here) onto the shaft on both sides of
the fork arm.
7.
L
WARNING! Risk of hands and other body parts being crushed when
aligning and pushing on!
Position the second fork arm and adjusting rings (if present, not shown here) and
push the shaft through the socket of the second fork arm and the outer elongated
hole.
8.
Re-install the safeguarding device from the outside.
9.
Align both fork arms evenly to the center of the fork carrier at the required width.
10.
If the position is to be fixed, fix both fork arms in place on the shaft horizontally by
tightening the screw connection at the adjusting rings or by using the locking
screws (available depending on the delivery state).
11.
Lower the fork carrier to the base position.
Assembly
Fork arms with shaft suspension
Fork carrier with fork arms
26
Summary of Contents for ManuTel
Page 2: ...Fork carrier with fork arms 2 ...
Page 52: ......


