46
Veritas
®
Mk.II Power Sharpening System
CARVING TOOLS
If you learn to sharpen carving tools well, you should
be able to sharpen anything. Virtually every hand-tool
shape considered in the rest of the book is included in
the standard range of carving tools. The wide variety of
shapes requires versatile grinding and honing systems.
At the same time, the diversity often precludes the use
of honing guides and demands the development of
freehand sharpening skills in any would-be carver.
To complicate the carver’s life, only a very few
carving tools can be purchased in a ready-to-use state.
Historically, carving tools were supplied with a basic
grind only. In Britain, until recently, a sharp tool was
considered to be a used tool. Since the supplier could
not know how the tool was going to be used or on what
woods, honing the tool would have required assumptions
in both areas. There was a higher probability of being
wrong than being right, so the tool was supplied with a
basic grind only.
Today, some carving tools can be purchased in a ready-
to-use state, which is a mixed blessing. On the positive
side, it indicates to the buyer the degree of sharpness
that can be attained, but on the negative side, it implies
that the provided shape is the correct one.
As with all tools, edge shape has to be married to
technique and the material to be worked; nowhere is
this more important than with carving tools. Whether or
not tools come from the store sharp or dull, you know
that they will eventually become dull anyway, so good
sharpening technique has to be developed by every
carver. Fortunately, modern technology has provided a
vast array of effective and fl exible sharpening materials
and systems, so the primary problem becomes one of
determining what shape you want, not so much how to
arrive at it.
Sharpening Gouges
The constant refrain of business consultants is to look
at products from the customer’s viewpoint to determine
whether or not the products are appropriate. While this
may sound a bit childlike, it is useful to do just that if
you want to understand exactly why you should shape
certain tools certain ways. You should look at them from
the viewpoint of the wood about to be cut.
Consider the standard carving gouge that you might buy
in an unsharpened state. You can almost be certain that
this tool is incorrectly shaped, so whether or not it has a
sharp edge is incidental.
Choosing a Bevel Angle
One of the fi rst things to be decided is a suitable bevel
angle. For light cuts in cedar, pine or basswood, a 15°
bevel angle would probably be adequate. For a bit
heavier work you would beef this up to 20°, and for very
hard woods you might want to make it 25°. If you are
going to be using a mallet on the gouge you may want
a 30° bevel or even 35° depending upon the nature of
the steel in the tool. As usual, you want the lowest bevel
angle consistent with edge retention, so let’s assume an
angle for general-purpose use of 25°.
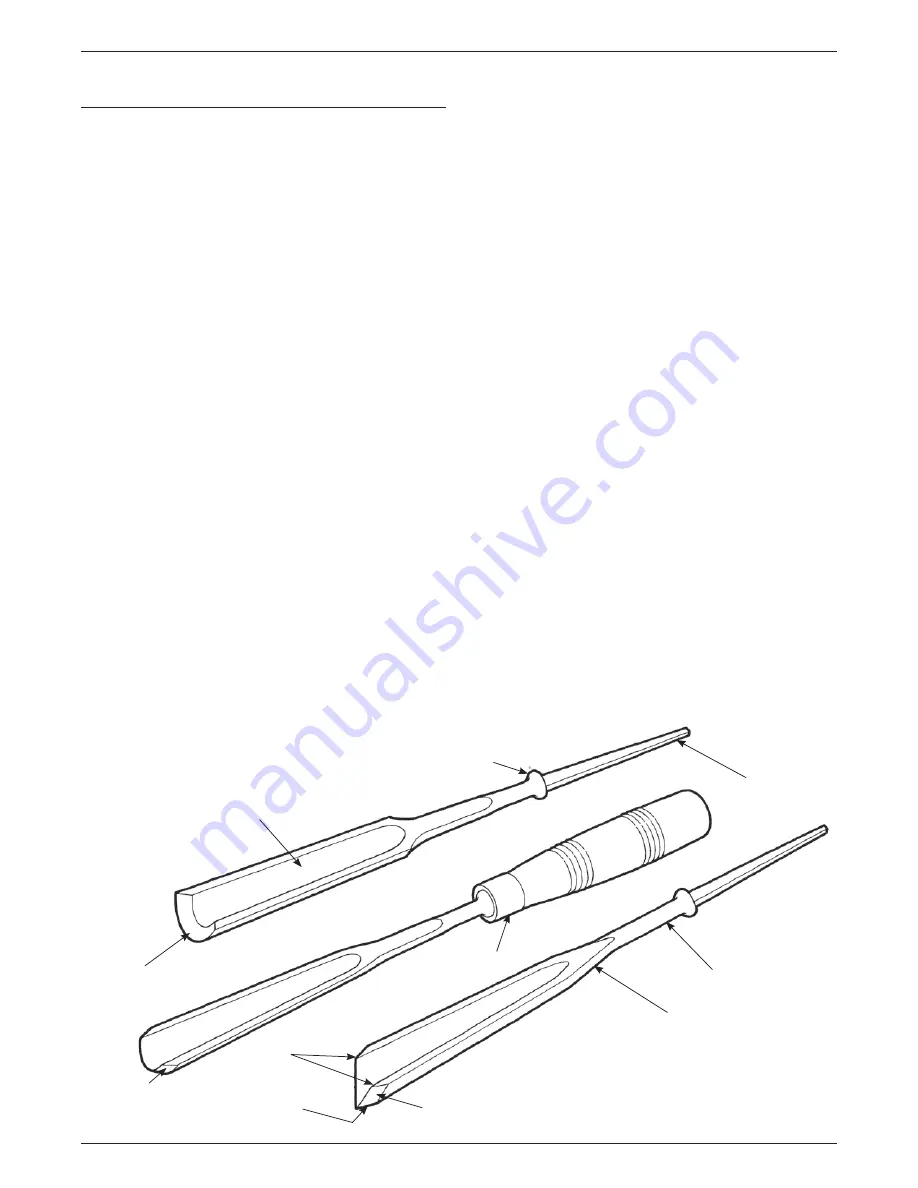
The Anatomy of a Gouge
Tang
Bolster
Flute
Wings
Heel
Bevel
Shoulder
Parting or ‘V’ Tool
Gouges
Neck
In-cannel bevel
Out-cannel bevel
Ferrule
Summary of Contents for Mk.II
Page 6: ...vi Veritas Mk II Power Sharpening System ...
Page 14: ...8 Veritas Mk II Power Sharpening System ...
Page 20: ...14 Veritas Mk II Power Sharpening System ...
Page 33: ...27 Exploded Assemblies Master Parts List 5 3 13 9 7 2 14 24 21 1 6 22 20 19 18 17 16 15 23 4 ...


