Velleman COMP1 User Manual Download Page 3

COMP1_v2


VELLEMAN 

COMP1 – ELECTRONIC / DIGITAL COMPASS 


1. Introduction 


To all residents of the European Union 

Important environmental information about this product 

This symbol on the device or the package indicates that disposal of the device after its lifecycle could harm 
the environment. 
Do not dispose of the unit (or batteries) as unsorted municipal waste; it should be taken to a specialized 

company for recycling. 
This device should be returned to your distributor or to a local recycling service. 
Respect the local environmental rules. 

If in doubt, contact your local waste disposal authorities. 


Thank you for buying the 

COMP1

! If the device was damaged in transit, don't install or use it and contact your dealer. 


2. Safety Instructions 


Damage caused by disregard of certain guidelines in this manual is not covered by the warranty and the dealer will 
not accept responsibility for any ensuing defects or problems. 


Avoid exposing the 

COMP1

 to water, severe shock or extreme temperatures: <0°C (32°F) or >60°C (140°F). 


Avoid contact with corrosive materials such as perfume, alcohol or cleaning agents. 


Only use the device for its intended purpose. Using the device in an unauthorised way will void the warranty. 


Do not use the 

COMP1

 in or near places or objects with a lot of metal/steel (vehicles, buildings…) or that contain 

high voltage (power plants, any electrical appliance) as they generate a magnetic field that may affect the 

COMP1

.  


Note that damage caused by user modifications to the device is not covered by the warranty. 


Keep the device away from children and unauthorised users. 


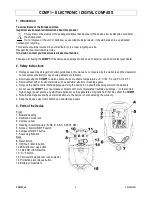
3. Parts of the Device 


Front 
1. Numeric heading 
2. Calibration mode icon 
3. Compass arrow 
4. Heading in cardinal points (N, NE, E, SE, S, SW, W, NW) 
5. Snooze / Alarm ON/OFF switch 
6. Compass ON/OFF button 
7. Snooze/Light button 
Back 
8. Reset button 
9. HR (hour) / Month button 
10. MIN (minute) / Day button 
11. 12/24 HR / YEAR button 
12. °C/°F button 
13. Time/alarm/calendar set / Lock selector 
14. Protection plate release button 
15. Battery compartment 
 

Summary of Contents for COMP1

Page 1: ...TAL COMPASS ELEKTRONISCH DIGITAAL KOMPAS BOUSSOLE LECTRONIQUE NUM RIQUE BR JULA ELECTR NICA DIGITAL ELEKTRONISCHER DIGITALER KOMPASS USER MANUAL GEBRUIKERSHANDLEIDING NOTICE D EMPLOI MANUAL DEL USUARI...

Page 2: ...COMP1_v2 VELLEMAN 2...

Page 3: ...efects or problems Avoid exposing the COMP1 to water severe shock or extreme temperatures 0 C 32 F or 60 C 140 F Avoid contact with corrosive materials such as perfume alcohol or cleaning agents Only...

Page 4: ...vice versa b Compass Keep the compass completely horizontal to get a precise readout The COMP1 is held horizontally when the air bubble in the level at the bottom of the device is located in the middl...

Page 5: ...u informatie betreffende dit product Dit symbool op het toestel of de verpakking geeft aan dat als het na zijn levenscyclus wordt weggeworpen dit toestel schade kan toebrengen aan het milieu Gooi dit...

Page 6: ...op de C F toets 13 om de temperatuuruitlezing te wijzigen van C naar F en vice versa b Kompas Hou het kompas volledig vlak om een nauwkeurige uitlezing te krijgen U houdt de COMP1 horizontaal wanneer...

Page 7: ...un appareil lectrique ou lectronique et des piles ventuelles parmi les d chets municipaux non sujets au tri s lectif une d ch terie traitera l appareil en question Renvoyer les quipements usag s votre...

Page 8: ...n F et vice versa b Boussole Tenez la boussole tout fait horizontalement pour obtenir un r sultat correct Le COMP1 est positionn horizontalement quand la bulle d air dans le niveau en bas de l apparei...

Page 9: ...eciclaje local Respete las leyes locales en relaci n con el medio ambiente Si tiene dudas contacte con las autoridades locales para residuos Gracias por haber comprado la COMP1 Lea atentamente las ins...

Page 10: ...lizaci n num rica del rumbo 1 y el icono de calibraci n 7 empezar n a parpadear 2 Mantenga la COMP1 de forma horizontal y pulse Snooze Light 7 para empezar con la calibraci n Si quiere introducir la d...

Page 11: ...rpr fen Sie ob Transportsch den vorliegen Sollte dies der Fall sein verwenden Sie das Ger t nicht und wenden Sie sich an Ihren H ndler 2 Sicherheitsvorschriften Bei Sch den die durch Nichtbeachtung de...

Page 12: ...nt Die numerische Anzeige 1 und das Kalibrierungssymbol 7 werden blinken Halten Sie den COMP1 waagerecht und dr cken Sie Snooze Light 7 um mit dem Kalibrieren anzufangen Drehen Sie den Kompass 180 hor...

Page 13: ...nd stellen Sie den Alarm mit den Tasten f r Stunden 10 und Minuten ein 11 Stellen Sie den Schiebeschalter 5 auf Alm on um den Alarm zu aktivieren das Alarmsymbol erscheint auf dem Schirm oder setzen S...

Reviews: