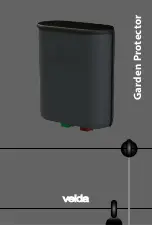
background image

GB

  USER INSTRUCTIONS  

Garden Protector

The Garden Protector is a complete set for an electric fence. Once 
installed around your garden or aviary, it keeps out unwanted cats, dogs 
and other intruders. The energizer sends a harmless electrical pulse 
through the conductive electric wire. When they touch it, animals feel 
a shock that keeps them away from the fence in the future. Apart from 
the shock response, this method is safe for all animals and humans.

INSTALLATION

This set is suitable for an electric fence of up to 40 metres. Decide 
where you want to install the electric fence and where to position the 
insulators. Ensure that the area is accessible and free of vegetation.

STEP 1: 

placing insulators


(A+B)


Install 2 electric fence wires above 

each other by fixing the short and long insulators a maximum of 4 metres 
from each other with the eyes at right angles to the direction of the wires.

STEP 2: 

connect the earth pin (D)

 Decide where to locate the metal 

earth pin near the fence and watch out for roots and pipes in the ground. 
Push the earth pin into the ground until the eye is no more than 3 cm 
above the ground. Empty at least one bucket of water around the earth 
pin. Attach the eye end of the green earth wire (F) to the eye of the earth 
pin with the bolt and washers. 

STEP 3: 

installing electric wire

 (C) 

Pass the first wire through the lower 

insulators, then tie a knot and fasten the same wire to the earth pin. Cut 
the wire. Stretch a second wire through the upper insulators and tie it up 
at the end. Make sure the wires cannot come into contact with objects and 
vegetation in any weather conditions.

STEP 4: 

electric fence unit (E)


Always place the energizer in the holder, 

in a dry place within 4 metres of the fence. Fasten the holder with the 
screws.
Use one of the black clips to connect the electric fence to the red pulse 
wire (G). Close the clip around the upper electric wire with the wire in the 
recess. Place the end of the red wire in the other recess and close the clip. 
Use pliers when necessary.
Attach the other end of the red wire (G) to the red connector of the ener-
gizer. Attach the green earth wire (F) to the green connector of the energizer 
in the same way. The red and green wire can be shortened, if necessarry. 
The installation is now ready for use. Activate the energizer by connecting 
the cable to the power supply. The LED lights up when the unit is working 
and blinks with every electric pulse. The pulses can also be noticed by the 
ticking sound.

SAFETY

Other than the shock response, the Garden Protector is safe for humans and 
animals. Make sure that people in your area 

(especially children!)

 are aware 

of the electric fence and advise them to stay away from it. Shut down the 
system temporarily if there are activities or people working near the fence. 
Do not dispose of electrical appliances as unsorted municipal waste, use 
separate collection facilities. Contact you local government for informa-
tion regarding the collection systems available. If electrical appliances are 
disposed of in landfills or dumps, hazardous substances can leak into the 
groundwater and get into the food chain, damaging health and well-being.

GUARANTEE

Velda guarantees the correct functioning of this apparatus for a period of 36 
months after purchase. The warranty expires in case of repairs or changes to 
this product that are performed  by others than Velda. If a claim to guarantee 
can be laid, a dated receipt should be presented. Visit 

www.velda.com/

service

 for the warranty procedure and terms.

Velda cannot guarantee that device has been correctly installed and is operating 
correctly and we cannot be therefore be held liable for any damage that may 
occur.

Summary of Contents for Garden Protector

Page 1: ...Garden Protector velda ...

Page 2: ...hte A B C D E F G A B E D F C GB Always place the energizer in the holder in a dry place Take the device out of the holder using a screwdriver NL Plaats het schrikdraadapparaat in de houder op een droge plaats Haal het apparaat uit de houder met behulp van een schroevendraaier DE Stellen Sie das Schutzzaungerät in den Behälter an einem trockenen Ort Nehmen Sie das Gerät mit einem Schraubendreher a...

Page 3: ...zijn dan wat hieronder wordt aangegeven Minimale afstand tussen stroomleidingen en elektrische afrasteringen Spanning stroomleiding V Afstand m 1000 V 3 m 1000 en 33 000 V 4 m 33 000 V 8 m Indien aansluitkabels en schrikdraden van een elektrische afrastering in de buurt van bovengrondse stroomleidingen worden geïnstalleerd mag de bovengrondse hoogte niet groter zijn dan 3 m Deze hoogte geldt aan b...

Page 4: ...liert werden sollten folgende Mindestabstände eingehalten werden Minimal Abstände von Elektrozäunen zu Hochspannungsleitungen Stromspannung V Abstand m 1000 V 3 m 1000 und 33 000 V 4 m 33 000 V 8 m Wenn Zaunzuleitungs und Zaundrähte in der Nähe einer Freileitung installiert werden sollten sie sich nicht mehr als 3 m über dem Boden befinden Diese Höhe gilt an all den Stellen die ausgehend von der O...

Page 5: ...ux indiqués ci après Dégagements minimaux sous les lignes aériennes de transport d électricité Tension sur la ligne électrique Dégagement en mètres 1000 V 3 m 1000 et 33 000 V 4 m 33 000 V 8 m Si les fils de raccordement et les fils de la clôture électrique sont installés près d une ligne d alimentation électrique aérienne leur hauteur par rapport au sol ne doit pas dépasser 3 m Cette hauteur est ...

Page 6: ...rances shall not be less than those shown in the table below Minimum clearances from power lines for electric animal fences Power line voltage V Clearance m 1000 V 3 m 1000 and 33 000 V 4 m 33 000 V 8 m If connecting leads and electric animal fence wires are installed near an over head power line their height above the ground shall not exceed 3 m This height applies either side of the orthogonal p...

Page 7: ...orrect functioneren van dit apparaat Deze garantie vervalt bij reparaties of veran deringen aan het product die zijn verricht door anderen dan Velda Bij aan spraak op garantie dient de gedateerde aankoopbon te worden overhandigd Ga naar www velda com service voor de garantieprocedure en voorwaarden Daar Velda geen invloed kan uitoefenen op de juiste installatie en werking van dit apparaatkunnenwij...

Page 8: ...stigen Sie den Halter mit den mitgelieferten Schrauben Verwenden Sie einen der schwarzen Clips um den Elektrozaundraht mit dem roten Pulskabel G zu verbinden Schließen Sie den Clip um den oberen Zaundraht mit dem Draht in der Aussparung Legen Sie das Ende des roten Kabels in die andere Aussparung und schließen den Clip Verwenden eine Zange falls erfördlich Befestigen Sie das andere Ende des roten ...

Page 9: ...sonnes que Velda Toute mise en jeu de la garantie doit s accompagner de la présentation du bon d achat daté Visitez à www velda com service pour la procédure et les conditions Étant donné que Velda n a aucune in fluence sur l installation appropriée et le bon fonctionnement de cet appareil nous déclinons toute responsabilité en cas de dommages F MODE D EMPLOI Garden Protector Le Garden Protector e...

Page 10: ...the holder with the screws Use one of the black clips to connect the electric fence to the red pulse wire G Close the clip around the upper electric wire with the wire in the recess Place the end of the red wire in the other recess and close the clip Use pliers when necessary Attach the other end of the red wire G to the red connector of the ener gizer Attach the green earth wire F to the green co...

Page 11: ... energizer with fence wire for pond use The product and its accessories have been tested to comply with the following European directives 2014 30 EU Electromagnetic Compatibility Directive EMC The product compliance with the directives is proven by being tested upon the following standards EN 61000 6 1 2007 EN 61000 6 3 2007 A1 2011 EN 61000 3 2 2014 EN 61000 3 3 2013 Product is also tested on the...

Reviews: