Vectra Fitness H1 Quick Reference Manual Download Page 1

VECTRA H1 Tethered Capture 

Q U I C K  R E F E R E N C E  G U I D E


1

QUICK REFERENCE GUIDE 

Capturing Images with H1 Tethered to Computer

(VECTRA H1 camera connected to the computer)

1.  START THE VECTRA SYSTEM & SOFTWARE

Turn on the computer.

Double-click the 

VECTRA icon on the Windows 

desktop to open the software.

 3

  Connect the VECTRA H1 camera to the computer 

with the supplied USB cable.

4

  Rotate the power switch  


(top of the camera) to 

ON

.

5

  The mode dial should  

be set to 

M

 when the  

camera is on. 

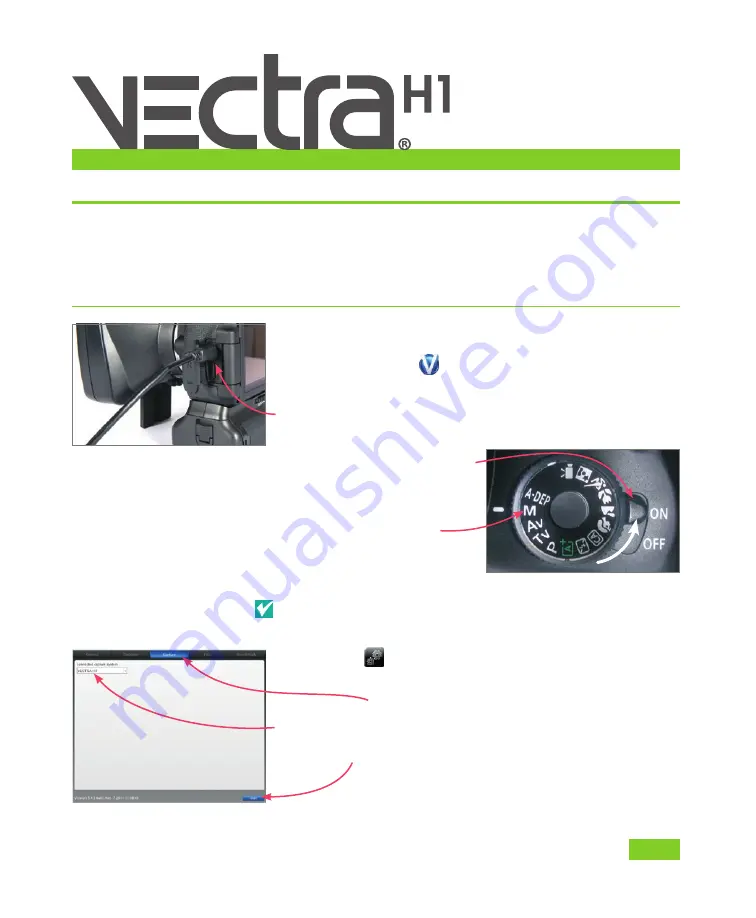
 The first time you use the VECTRA software, check to 

make sure H1 is selected as the capture system: 

 1

  Click the 

set up

 button in the lower right corner 

of the screen.

2

  Select the 

Capture 

tab and make sure 

VECTRA H1

 is 

displayed. 

3

 Click 

close

.

Summary of Contents for H1

Page 1: ...indows desktop to open the software 3 Connect the VECTRA H1 camera to the computer with the supplied USB cable 4 Rotate the power switch top of the camera to ON 5 The mode dial should be set to M when...

Page 2: ...e matching record is displayed first click to select the correct patient then click new capture If the correct chart is not found click new patient to create a new patient chart creating a new VECTRA...

Page 3: ...ore positioning the patient in front of the VECTRA Make sure the tab is selected Remove all jewelry near the area of interest Remove sweat oils or anything shiny from the skin Remove all make up for f...

Page 4: ...ing distance approximately 14 inches 35cm The flashes should recharge as you move into place for the next capture For follow up images Review the baseline image before initiating image capture to assi...

Page 5: ...middle of the patient s face 3 Aim the green dots at the middle of the patient s cheek intersection of imaginary lines from the lateral canthus and the upper lip 4 Converge the green dots to a single...

Page 6: ...Hold the camera level with the patient s nose 3 Aim the green dots between the upper lip and nose at the mid line of the patient s face 4 Converge the green dots to a single point by adjusting camera...

Page 7: ...le of the patient s face 3 Aim the green dots at the middle of the patient s cheek intersection of imaginary lines from the lateral canthus and the upper lip 4 Converge the green dots to a single poin...

Page 8: ...are automatically processes the images and stitches them together into a single 3D image The individual captures are displayed while they are being processed If you wish to interrupt the processing an...

Page 9: ...ether the poses are correct eyes are open and mouth is closed for all three images If not click discard retake and recapture the images If images appear to be properly captured click OK in the error m...

Page 10: ...ion the tip of the cursor arrow over it The cursor changes to an open hand when it s close enough to the landmark Click and drag the cursor changes to a grabbing hand Release the mouse button when the...

Page 11: ...FACIAL IMAGING ANALYSIS IMAGING SOFTWARE PHOTOGRAPHY RESEARCH SYSTEMS SERVICES TRAINING VECTRA and Mirror are registered trademarks of Canfield Scientific Inc technical support phone USA 1 800 815 43...

Reviews: