3
2
SAFETY GUIDELINES /
DEFINITIONS
DANGER:
Indicates an imminently hazardous situation which, if not
avoided, will result in death or serious injury.
WARNING:
Indicates a potentially hazardous situation which, if not
avoided, could result in death or serious injury.
CAUTION:
Indicates a potentially hazardous situation which, if not
avoided, may result in minor or moderate injury.
CAUTION:
Used without the safety alert symbol indicates potentially
hazardous situation which, if not avoided, may result in property damage.
RISK OF UNSAFE OPERATION.
When using tools or equipment,
basic safety precautions should always be followed to reduce the risk of
personal injury. Improper operation, maintenance or modification of tools
or equipment could result in serious injury and property damage. There
are certain applications for which tools and equipment are designed.
Manufacturer strongly recommends that this product NOT be modified
and/or used for any application other than for which it was designed. Read
and understand all warnings and operating instructions before using any
tool or equipment.
READ ALL
INSTRUCTIONS
WARNING:
Read and understand this instruction manual before
using this unit. Failure to follow all instructions listed below may result
in electric shock, fire and/or serious injury.
IMPORTANT SAFETY
INSTRUCTIONS
•
This unit was designed for household use only.
WARNING –
To reduce the risk of fire, electric shock, burst
hazard, or injury to persons or property:
•
Avoid dangerous environments.
Don’t use appliances in damp or wet
locations. Don’t use appliances in the rain.
•
Keep children away.
All visitors should be kept at a distance from work
area.
•
Dress properly.
Do not wear loose clothing or jewelry. They can be
caught in moving parts. Rubber gloves and substantial, non-skid footwear
are recommended when working outdoors. Wear protective hair covering
to contain long hair.
•
Use safety glasses and other safety equipment.
Use safety goggles
or safety glasses with side shields, complying with applicable safety
standards. Safety glasses or the like are available at extra cost at your
local dealer.
•
Store idle appliance indoors.
When not in use, appliances should be
stored indoors in dry, and high or locked-up place – out of reach of
children.
•
Don’t abuse cord.
Never carry appliance by cord or yank it to disconnect
from receptacle. Keep cord from heat, oil, and sharp edges.
•
Disconnect appliances.
Disconnect the appliance from the power supply
when not in use, before servicing, and when changing accessories.
•
Ground Fault Circuit Interrupter (GFCI) protection
should be provided
on the circuits or outlets to be used. Receptacles are available having built
in GFCI protection and may be used for this measure of safety.
•
Use of accessories and attachments.
The use of any accessory or
attachment not recommended for use with this appliance could be
hazardous. Refer to the accessory section of this manual for further
details.
•
Stay alert.
Use common sense. Do not operate appliance when you are
tired or impaired.
•
Check for damaged parts.
Any part that is damaged should be replaced
by the manufacturer before further use. Contact the manufacturer at (877)
571-2391 for more information.
•
Do not operate this appliance near flammable liquids or in gaseous
or explosive atmospheres.
Motors in these tools normally spark, and the
sparks might ignite fumes.
•
Never submerge this unit or the 120 volt AC charger in water.
Do not
expose the unit or the 120 volt AC charger to rain or snow, or use them
when wet.
•
To reduce risk of electric shock,
disconnect the unit from any power
source before attempting maintenance or cleaning. Turning off controls
without disconnecting will not reduce this risk.
•
This equipment employs parts (switches, relays, etc.) that produce
arcs or sparks.
Therefore, if used in a garage or enclosed area, the unit
MUST be placed not less than 18 inches above the floor.
SPECIFIC SAFETY INSTRUCTIONS FOR
CHARGING THIS UNIT
•
IMPORTANT:
This unit is delivered in a partially charged state. Fully
charge unit with the supplied 120 volt AC charger for a full 24 hours
before using for the first time.
• To recharge this unit, use only the supplied charging adapters. Plug in
the charging adapter at the jump starter first, then plug into the charging
source.
• After charging/recharging, disconnect charging adapter and wait 5 minutes
before use.
• Do not crush, cut, pull or expose charging adapter cords to extreme heat.
• Pull by plug rather than cord when unplugging the charger.
• Position charging adapter cords so they do not become entangled or
become a safety hazard. Keep charging adapter cords away from sharp
edges.
• Use in a dry location only.
• All ON/OFF switches should be in the OFF position when the unit is
charging or not in use. Make sure all switches are in the OFF position
before connection to a power source or load.
• Do not attempt to charge the unit if the charger is damaged – return the
charger to manufacturer for repair or replacement.
WARNING:
Shock hazard
•
Outdoor use extension cords.
When appliance is charged outdoors, use
only extension cords intended for use outdoors and so marked.
•
Make sure your extension cord is in good condition
. When using an
extension cord, be sure to use one heavy enough to carry the current your
product will draw. An undersized cord will cause a drop in line voltage
resulting in loss of power and overheating. The following table shows
the correct size to use depending on cord length and nameplate ampere
rating. If in doubt, use the next heavier gauge. The smaller the gauge
number, the heavier the cord.
MINIMUM GAUGE FOR CORD SETS
Volts
Total Length of Cord in Feet
120V
0-25 26-50 51-100 101-150
(0-7.6m) (7.6-15.2m) (15.2-30.4m) (30.4-45.7m)
240V
0-50
51-100
101-200
201-300
(0-15.2m) (15.2-30.4m) (30.4-60.9m) (60.9-91.4m)
Ampere Rating
Extension Cord Length
More Not more
0'-25'
26'-50'
51'-100' 101' -150'
Than
Than
American Wire Gauge (AWG)
0 -
6
18
16
16
14
6 -
10
18
16
14
12
10 -
12
16
16
14
12
12 -
16
14
12
Not Recommended
When an extension cord is used,
make sure that:
– the pins of extension cord are the same number, size and shape as
those in the charger,
– the extension cord is properly wired and in good electrical condition,
– the wire size is large enough for the AC rating of the charger.
CAUTION –
To reduce the risk of injury or property damage:
Pull
by connector rather than cord when disconnecting the extension cord
from the unit; and by plug when disconnecting the extension cord from
an AC outlet.
FEATURES
This device complies with part 15 of the FCC rules. Operation is subject to the following two conditions: (1) this device may not cause harmful interference, and (2) this device must accept any interference
received, including interference that may cause undesired operation.
This equipment has been tested and found to comply with the limits for a Class B digital device, pursuant to part 15 of the FCC Rules. These limits are designed to provide reasonable protection against harmful
interference in a residential installation. This equipment generates, uses and can radiate radio frequency energy and, if not installed and used in accordance with the instructions, may cause harmful interference
to radio communications. However, there is no guarantee that interference will not occur in a particular installation. If equipment does cause harmful interference to radio or television reception, which can be
determined by turning the equipment off and on, the user is encouraged to try to correct the interference by one or more of the following measures:
• Reorient or relocate the receiving antenna.
• Increase the separation between equipment and receiver.
• Connect the equipment into an outlet on a circuit different from that to which the receiver is connected.
• Consult the dealer or an experienced radio/TV technician for help.
Changes or modifications not approved by the party responsible for compliance could void user’s authority to operate the equipment.
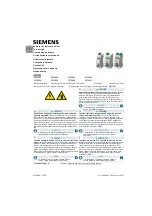
3
4
5
6
9
8
7
2
1
10
11
12
13
14
15
16
17
FEATURES
1. USB Power button
2. USB Charging/Power Ports
3. USB Power Indicator
4. Battery Status LED Indicators
5. Reverse Polarity Indicator
6. Jump-Starter Power Switch
7. Area Light Power Button
8. Pivoting LED Area Light
9. Battery Power Level Button
10. 12 Volt DC Charging Port (for use with 120 Volt AC Charger)
11. Air Pressure Gauge
12. Positive (+) Red Clamp
13. Air Hose and Sure Fit
®
Nozzle Connector
14. Compressor Power Switch
15. Negative (–) Black Clamp
16. 120 Volt AC Charging Adapter
17. Nozzle Adapter
J7CV_ManualENSP_051220.indd 2-3
J7CV_ManualENSP_051220.indd 2-3
5/12/2020 11:07:57 AM
5/12/2020 11:07:57 AM