background image

Page 2 / 5

221031

Installation Steps

Turn off the power at fuse or circuit box.

Turn on the power at  fuse or circuit box.

Adjusting the Sensor Head:

1. Aim sensor head toward desired detection area, maintaining a 

    5° - 40° downward angle to allow moisture to drain.

    Note: Make sure sensor head is positioned with controls facing 

    toward the ground.

2. You can move the sensor head up and down to change the coverage 

    area. (See Fig. 1) 


Note: Range set too high may increase false triggering.


    (See Fig. 2 and Fig. 3 on Page 3)


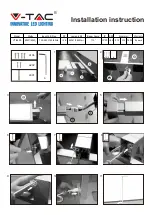
1. Install the mounting strap to the outlet box with the stamped word “FRONT” facing away from the outlet box, using 

    two mounting screws that best fit the outlet box. Back plate should sit flush against wall surface when secured.

    (Choose one matching pair of suitable mounting screws from the 3 pairs provided)

2. Fixture wires thread through gasket, then attach the gasket into back plate.

3. Pull out the source wires from the outlet box. Make wire connections using wire connector as follows:

     ---Connect the black wire from the fixture to the “hot” wire from the power source. (black)

     ---Connect the white wire from the fixture to the neutral wire from the power source. (white)

    Carefully tuck the wires back into the outlet box.

4. Attach the back plate of the light fixture to the mounting strap, secure it with the fixture mounting screw.

5. Push the decorative cover firmly into the fixture mounting screw hole on the light.

6. Install bulbs (not included). See relamping label at socket area or packaging for maximum allowed wattage.

7. With silicone caulking compound, caulk completely around where the back plate meets the wall surface.

  CAUTION: Be sure to caulk completely where the back plate meets the wall surface to prevent water from 

    seeping into the outlet box.

Sensor

Mounting Strap 

Outlet Box

Wire Connector

Backplate

Mounting Screw

Fixture Mounting Screw 

Light Head

FRONT

Decorative Cover 

Gasket

PAR 38 Bulb Max.150W

(not included)

sensor

Fig. 1

Summary of Contents for T0692

Page 1: ...ted as shown above when installed depending upon type of installation Before installing the light fixture under an eave the sensor head must be rotated as shown in the next two steps for proper operat...

Page 2: ...ket into back plate 3 Pull out the source wires from the outlet box Make wire connections using wire connector as follows Connect the black wire from the fixture to the hot wire from the power source...

Page 3: ...position The light turns to high level brightness when motion is detected and stays on as long as the motion continues Then it reverts back to low level 30 brightness about 5 seconds after motion is...

Page 4: ...turn on at full brightness at dusk and remains on until dawn 5 3 HOURS 3H MODE nighttime operation only In 3H mode the light turns to high level brightness at dusk and stays on for 3 hours then it tur...

Page 5: ...o control the light fixture Replace the dimmer or timer with a standard on off wall switch The light flashes on and off 1 Reposition the bulb away from the motion sensor 2 Reposition the motion sensor...

Page 6: ...ba cuando se instalen dependiendo del tipo de instalaci n Antes de instalar el artefacto de iluminaci n debajo de un alero el cabezal sensor debe girarse como se muestra en los siguientes dos pasos pa...

Page 7: ...hacia afuera los cables de alimentaci n de la caja de toma de corriente Haga las conexiones de los cables usando los conectores de cable de la siguiente manera Conecte el cable negro del artefacto al...

Page 8: ...recho del cabezal sensor a la posici n de prueba test La luz se enciende al brillo de nivel alto cuando se detecta movimiento y permanece encendida mientras contin e el movimiento Luego vuelve al bril...

Page 9: ...O de 3 HORAS 3H solo funcionamiento nocturno En el modo de 3H la luz pasa al brillo de nivel alto al anochecer y permanece encendida durante 3 horas luego pasa al brillo de nivel bajo Se enciende al b...

Page 10: ...uz Reemplace el regulador de intensidad o temporizador con un interruptor de pared de encendido apagado est ndar La luz destella 1 Reubique la bombilla alejada del sensor de movimiento 2 Reubique el s...

Reviews: