57
Installation
Install Traditional Logs (1150 models)
Material required
• Log set included with the appliance, which contains:
•
8 logs
• Gloves, if desired
Installation
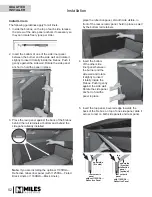
Unpack the ceramic logs very carefully to avoid
damaging them. Each log has keys to help you locate
them on the ceramic burner platform. Install the logs
as shown below. Please note that
the position of the
logs is critical to insure proper performance of the
appliance.
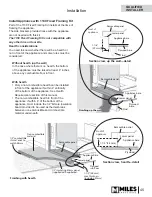
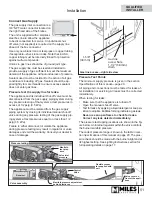
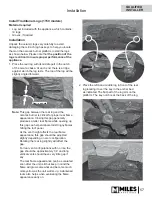
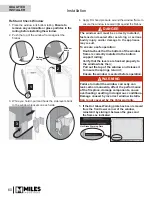
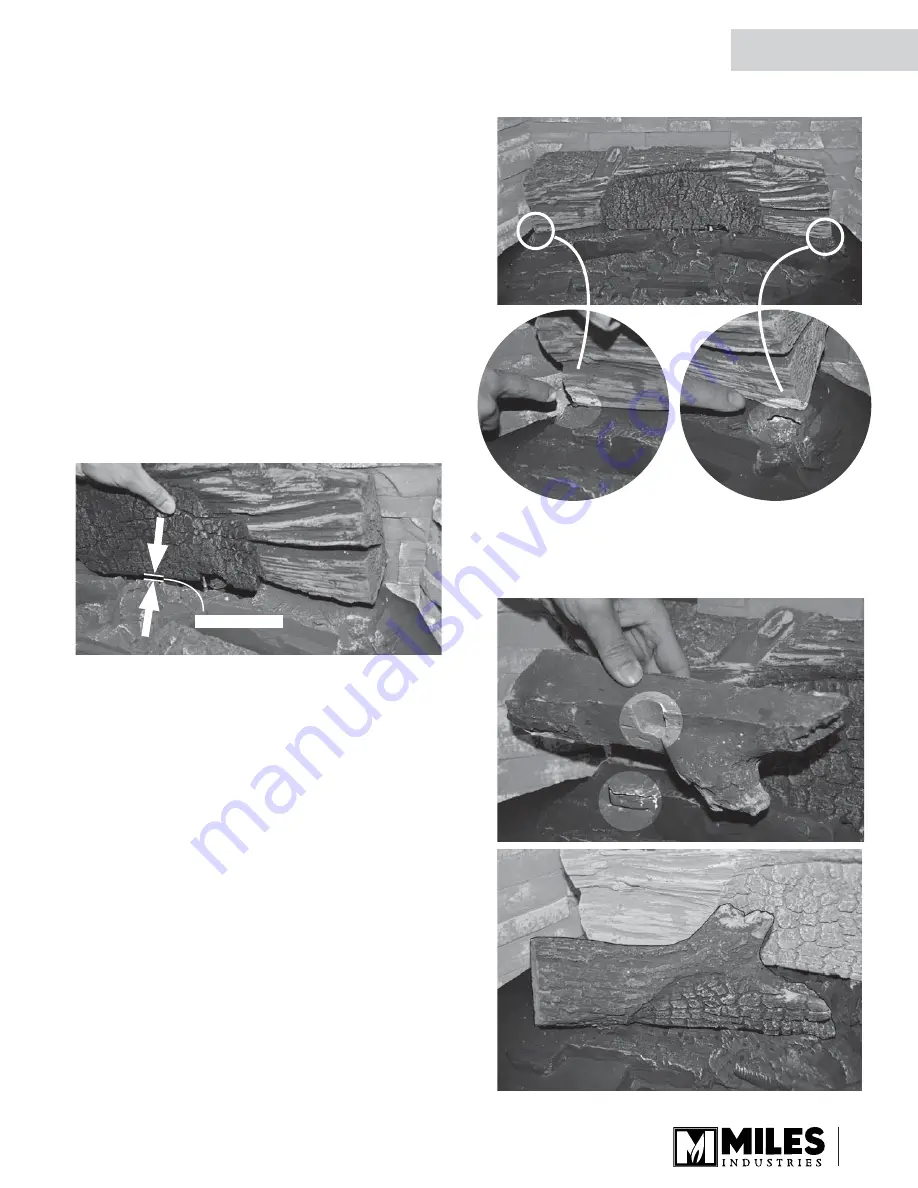
1. Place the rear log with its middle part in the notch
of the ceramic base. At each end, there is a ridge
against which the log rests. The top of the log will be
slightly angled forward.
Note:
This gap between the rear log and the
ceramic burner is critical for proper rear fl ame
appearance. Closing this gap generallly
produces a taller rear fl ame while opening up
this gap can help eliminate tall stringny fl ames
hitting the roof panel.
As the vent height affects the rear fl ame
appearance, this gap should be adjusted
slightly depending on vent confi guration.
Rotating the rear log slightly will affect the
gap.
For rear vent confi gurations with no rise, the
gap should be approximately 1/4” and long
vertical vents should have very little gap if
any.
The rear fl ame appearrance can be evaluated
soon after the unit is lit but keep in mind the
fl ame will grow somewhat and become much
more yellow as the unit warms up. A darkened
room also helps when evaluating the fl ame
appearance early on.
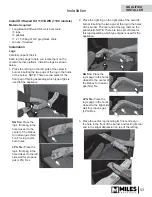
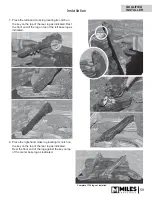
2. Place the left-hand middle log in front of the rear
log locating it over the key in the ember bed
as indicated. The fl at part of the log sits on the
platform. The key notch is at the back of the log.
Gap—see note
QUALIFIED
INSTALLER

