background image

Thermo DC 200

Control elements

21

Recalling/erasing preset times

Repeatedly press the 

 button until the desired memory location is 

displayed.
To erase the preset time, press the 

 button several times until the 

time of the day is displayed instead of the memory location.

Programming duration of operating time

The heater must be switched off. Press the 

 button for 3 seconds - 

operating time is flashing - and set the desired operating time (10 to 120 
minutes) using the 

 and 

 buttons.

Setting the remaining operating time

Set the desired remaining operating time (1 to 120 minutes) using the  

 and 

 buttons. The remaining operating time refers to the time the  

heater still continues to remain in operation. It can only be changed 
while the heater is in operation and the ignition switched off.

Setting the wake-up time

A wake-up time can only be programmed on the standard digital timer. 
The wake-up time is not bound to a specific day of the week. Repeatedly 
press the 

 button until the bell symbol 

 appears on the display.

Set the desired wake-up time using the 

 and 

 buttons. The alarm 

clock turns off after 5 minutes or when one of the buttons is pressed.

Recalling/erasing the wake-up time

Repeatedly press the 

 button until the bell symbol 

 appears on 

the display - read off wake-up time.  To erase the wake-up time: press 
the 

 button until the bell symbol 

 is no longer visible on the 

display.

Remote control

Possible by means of an optional external "instant heating" button

Vehicles with ADR equipment

On ADR vehicles it is not possible to program a preset starting time.  The 
remaining time is shown on the display while the heater is in operation. 
The clock can be set.  The alarm clock function can be programmed on 
the standard digital timer.

8.3. Activation via mains power

If you bridge the contacts of the control line, the heating system is acti-
vated when mains power is applied.

8.4. Operation indicator

For monitoring there should be an operation indicator provided at the 
vehicle, which displays the status of the switching signal/heating 
system.

If the operation indicator is integrated into the power circuit for external 
control, it may require a current of max. 250mA. Only suitable lamps for 
the voltage range of 18 - 30V are to be used (ref. also para. 8.1, Fig. 11 
and 12).

Summary of Contents for THERMO DC 200

Page 1: ...Rev 01 2017 Id No 11118910A THERMO DC 200 HEATING SYSTEMS Installation and operating instructions Bus...

Page 2: ...ndicate possible severe injuries or fatal accidents if instructions or procedures are car ried out incorrectly or entirely disregarded This caption is used to indicate possible minor injuries if instr...

Page 3: ...vercurrent protection insulation monitoring device 11 5 4 External power supply hook up 12 5 5 Testing 12 6 Maintenance 13 7 Faults troubleshooting repairs 14 8 Control elements 15 8 1 Switch or relay...

Page 4: ...IV Thermo DC 200...

Page 5: ...tion Heaters and Electrical Heaters into Vehicles 5 3 1 Scope 5 3 1 1 Subject to paragraph 5 3 1 2 heaters shall be installed according to the requirements of paragraph 5 3 5 3 2 Positioning of combus...

Page 6: ...ability being refused by Spheros The same applies if repairs are carried out incorrectly or with the use of parts other than genuine spare parts This results to the invalida tion of the type approval...

Page 7: ...hbouring parts under voltage Electrical cables and operating elements of the heater must be ar ranged in the vehicle in such a way that their functioning is fault less under normal operating condition...

Page 8: ...Directive 94 55 EC ADR TRS General Information Safety Check the information given on your heaters rating plate and compare this with your mains voltage In addition to the statutory regulations the sp...

Page 9: ...tion example for the heater 1 Wall heater with blower 2 Heat exchanger at entry 3 Heater 4 Circulating pump 5 Roof heat exchanger 6 Vehicle engine 7 Driver s seat heating system 8 Control panel Water...

Page 10: ...hicle systems for war ming up water They must not be operated in the depot unattended for a longer period The pump operation the water cycle and the water tem perature of the vehicle should be monitor...

Page 11: ...m Spheros since these are part of the electrical equipment and they ensure proper grounding 5 2 690 VDC supply line The connection line must have a cross section of at least 2 x 4mm Cu The cable cross...

Page 12: ...3 GKW 12545290 4mm GR 180mm SW BL BR RT 1 1 2 2 3 4 68 75 C 125 C M12x1 5 1 7 2 8 3 9 4 10 5 11 6 12 14 14 16 13 17 18 19 20 13 13 DC OK 15 N L1 L2 L3 GND 2 T1 4 T2 A2 24 4mm RT 4mm SW 1 L1 3 L2 A1 2...

Page 13: ...2548127 1 2 3 4 RD BR BU BK 1 2 10 11 12 6mm GR 180mm Radox 3 GKW 12548127 L 0 75mm BK 2 1 DC M12x1 5 0 75mm BN 13 14 7 8 9 1 2 3 4 5 6 17 19 20 18 6mm RT 6mm BL Cable colors SW black BL blue BR brown...

Page 14: ...ons Stripping length 11 13 mm Kind of wire single wire or wire strand or wire strand with cable end sleeves Cable cross section 4 6 mm2 Torque 3 4 5 Nm 250 Cable ends with end sleeves Cord grip Cable...

Page 15: ...otection devices with another as specified load ability is not permitted and will result in loss of the operating approval The heater must be protected on the vehicle side with all poles by an insulat...

Page 16: ...checked by a qualified electrician for operational safety and function Before the mains power is applied close the appliance fit the hood A current measurement ensures that all cartridge heaters are f...

Page 17: ...parable test specifications Independently of this the mandatory local regulations must be observed ATTENTION Under no circumstances may the heaters be operated dry to the air since the internal constr...

Page 18: ...be carried out by a qualified electrician In all cases the hea ting appliance must be disconnected from the mains NOTE Damaged or defective components should only be replaced with identi cal componen...

Page 19: ...connector Manufacturer FEP Manufacturer No 42064100 Spheros ID 11123027_ to continue the wiring Kinds of control switch para 8 1 relay para 8 1 or via pre selection timer para 8 2 8 1 Switch or relay...

Page 20: ...ch 2 pole Figure 11 Wiring diagram with switch 4 pole 1 2 max 10m RD Spheros Thermo DC RD 690V DC 24V DC 1 5A 5A External control input Switch Consider prescribed protection Overcurrent protection dev...

Page 21: ...A 1 10 11 12 4 5A 5A 2 0 75mm 0 75mm 0 75mm External control input T 58 T 15 T 30 T 31 max max 10m at least 2 5mm2 2 1 RD Spheros Thermo DC 24V RD 690V DC 24V DC 1 5 A 5A 0 4A Consider prescribed prot...

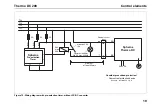
Page 22: ...10 11 12 4 5A 5A 2 0 75mm 0 75mm 0 75mm max 10m 690V DC Spheros Thermo DC T 58 T 15 T 30 T 31 max 24V 0 4A 24V DC 1 5A Operation indicator 24V DC max 250mA 5A 5A Consider prescribed protection Overcu...

Page 23: ...5A 5A 2 8 0 75mm 0 75mm 0 75mm BN 2 1 BK T 58 T 15 T 30 T 31 max Spheros Thermo DC 24V 690V DC at least 30V DC 0 4A 1 5 A max 10m 24V DC max 250mA Consider prescribed protection Overcurrent protectio...

Page 24: ...s switched off while the heater is operating in the continuous mode the remaining operating time of 15 minutes is displayed and the heater continues to operate for this period of time Switching the he...

Page 25: ...up time using the and buttons The alarm clock turns off after 5 minutes or when one of the buttons is pressed Recalling erasing the wake up time Repeatedly press the button until the bell symbol appe...

Page 26: ...ation Pumps Further information on the Spheros circulation pumps and their installation can be found at www spheros eu Products Pumps html The water flow rate through the heat exchanger of the Thermo...

Page 27: ...mperatures Water carrying parts are to be routed and fastened in such a manner that no temperature risk to humans animals or material sensitive to temperature due to radiation contact occurs Before wo...

Page 28: ...mportant assemblies Thermo DC 200 24 Figure 17 Dimensions of the heating appliance Thermo DC 1 2 3 4 1 Coolant Inlet 2 Coolant Outlet 3 Space required for removal of the electric components and the ca...

Page 29: ...of important assemblies 25 Figure 18 Installation position and hole pattern Thermo DC 10 8 Welded nut M8 DIN 929 1 Attachment variant 1 4x screw M8 15Nm 5Nm 2 Attachment variant 2 4x screw M8 through...

Page 30: ...issioning of the heating appliance or after the coolant fluid has been replaced For that the additional venting option via the vent screw item 4 figure 17 is to be used after the system has been fille...

Page 31: ...TE The pump ports and connection lines from the water intake and water outlet must be flush no stress ATTENTION If the pump is not controlled by the heater its operation is to be en sured by all means...

Page 32: ...of important assemblies Thermo DC 200 28 11 4 Tightening torques Figure 19 Tightening torques Grounding screw Cable gland Cable gland control power supply cable M12x1 5 M10x1 Bleed screw 20 1 Nm 1 5 0...

Page 33: ...heater Nominal heating flow max Nominal heating flow at 540 VDC kW kW 20 12 6 Rated voltage V 690 Rated power consumption Rated power consumption at 540 VDC kW kW 20 12 6 Frequency Rated current Hz A...

Page 34: ...Technical data Thermo DC 200 30 For notes...

Page 35: ...memos...

Page 36: ...HEATING SYSTEMS Valeo Thermal Commercial Vehicles Germany GmbH Postfach 1371 82198 Gilching Germany Tel 49 0 8105 7721 0 Fax 49 0 8105 7721 889 www valeo thermalbus com service valeobus valeo com...

Reviews: