background image


13   


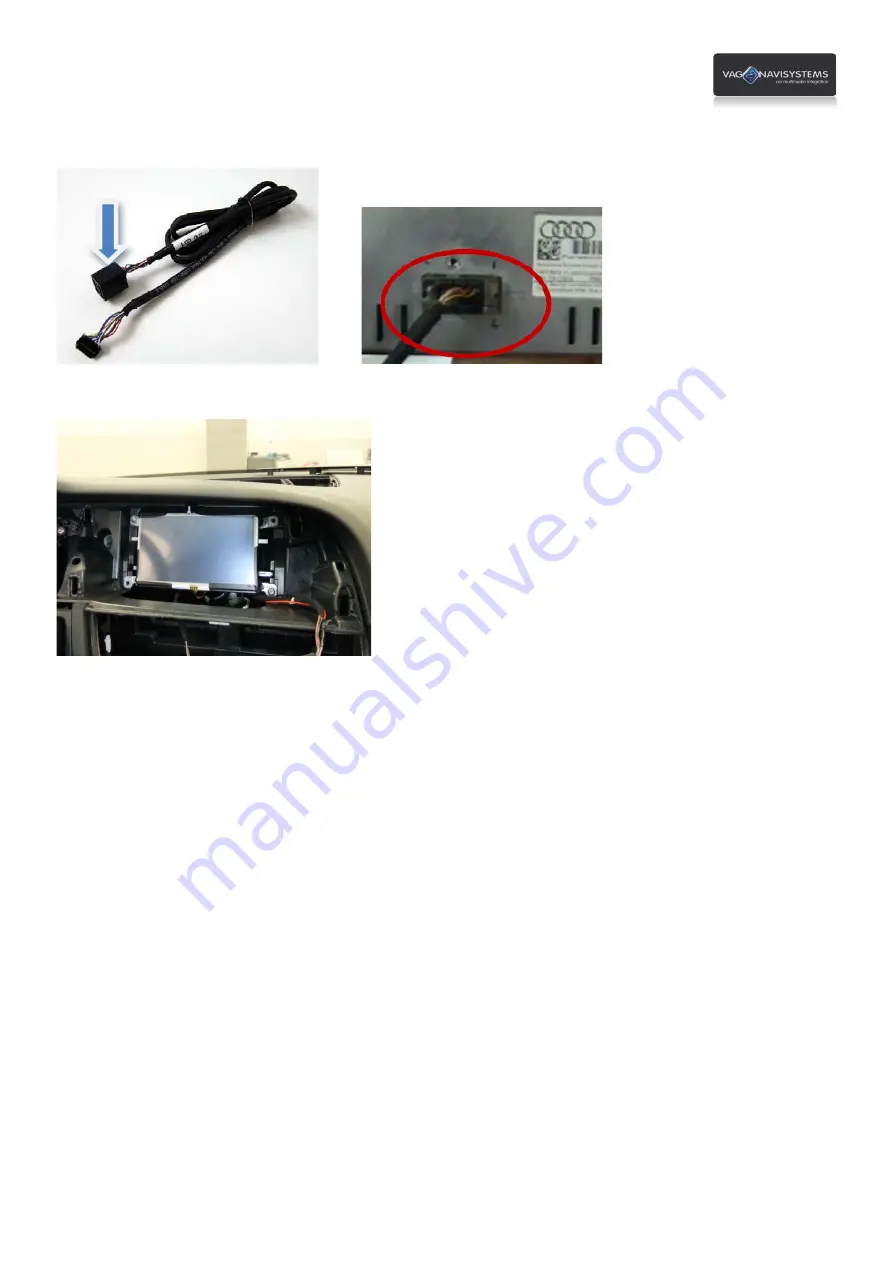
Now,   connect   the   

“LCD   cable”

   (LCD   cable   *1ea)   big   connector   to   the   connection   port   that   you   can   find   behind   the   

original   vehicle   screen.      


Now   place   the   additional   module   (SUB   BOARD)   behind   the   screen’s   hole   and   fix   the   screen   to   the   dashboard.   


Now,   we   are   going   to   connect   the   

“LVDS   cable”

   (LVDS   cable   *1ea)   that   we   have   connected   to   the   additional   module   

(SUB   BOARD)   port   

“FROM   I/F”   

to   the   multimedia   interface   port

      “LCD   OUT”.


Summary of Contents for Navegador Multimedia NaviTOUCH

Page 1: ...Installation and configuration manual Compatibility with Audi A4 A5 Q5 with Concert Symphony radio which includes a 6 5 colour display...

Page 2: ...and connections Page 7 2 4 POWER connector cables and connections Page 13 2 5 Aftermarket rear camera connection Page 14 2 6 GPS Box installation and connections Page 16 2 7 Voice module installation...

Page 3: ...uct losses his warranty if you dismantle it or if you try to fix it without the manufacturer permission If you break up product security stickers warranty will be lost too Check that you have received...

Page 4: ...ace components 1ea 1 unity Multimedia interface Additional module SUB BOARD IR cable 4P 1ea MODE cable 1ea POWER cable 24P 1ea AV cable 1ea TOUCH OUT cable 1ea REAR CAMERA POWER cable 1ea LVDS cable 1...

Page 5: ...components GPS Box Touch screen GPS Box POWER cable GPS antenna Hidden microphone Specific for overhead courtesy lights panel Speaker Optional installation USB extension cable Voice module Voice modu...

Page 6: ...ULTIMEDIA VIDEO INTERFACE SUB BOARD Navigation GPS Box Touch cable LVDS cable LCD cable Touch cable Monitor Touch Screen Control Box Original LCD cable CAM RCA POWER NOTE The not identified connection...

Page 7: ...ter change between sources Dip 1 is used for navigation source RGB connection See the next sample image VERY IMPORTANT DIP Switch UP Enable DIP Switch DOWN Disable Ignore ON inscription Like this in t...

Page 8: ...w the 4 screws that hold the radio now remove the frame using a removal tool Remove the radio and disconnect all its connectors Attention Vehicles with Audi Sound System manufactured after 2013 It cou...

Page 9: ...screen and disconnect the screen connector Now remove the auto glove compartment to be able to place the multimedia interface and the GPS Box unscrew the 3 screws from inside Unscrew the 4 screws of...

Page 10: ...connections between the multimedia interface the additional module and the vehicle s screen and you will have too space to place the multimedia interface Now connect the connector that you have disco...

Page 11: ...n connect any of the 2 connectors of LVDS cable to the FROM I F connector port of the additional module SUB BOARD Then connect the 4 pin connector of the TOUCH cable TOUCH cable 1ea to the TOUCH conne...

Page 12: ...e original screen Now connect to the multimedia interface connection port LCD OUT the LVDS cable LVDS cable 1ea that we had connected before to the FROM I F connection port of the additional module SU...

Page 13: ...he central pressure Center it and make the connection cable of the touch screen pass under the frame NOTE Some of the touch screen incorporate a protection film remove it before Now join the touch scr...

Page 14: ...d the original vehicle screen Now place the additional module SUB BOARD behind the screen s hole and fix the screen to the dashboard Now we are going to connect the LVDS cable LVDS cable 1ea that we h...

Page 15: ...OFF IR NAVI No function IR AV1 DVD Connection cable to the IR control cable from the multimedia device connected to the RCA AV1 entry of the multimedia interface to enable his own controls using the...

Page 16: ...om the rear light the CAM connector won t supply power to the camera so the camera won t work Don t forget to adjust the DIP Switch 7 of the multimedia interface once all connections have been done DI...

Page 17: ...V Switcher to switch between video modes RGB or composite video PWR LED light that indicates if GPS Box is working CA No function SD SD card connection port Maps Multimedia GPS antenna Connect to the...

Page 18: ...f the voice module Green Conector Green MIC jack 3 5mm connection for microphone if it s going to be used Yellow Conector VIDEO OUT GPS Box video out connection if RGB OUT is not being used Black Cone...

Page 19: ...ction from the GPS Box TOUCH SCREEN cable to the multimedia interface Touch cable TOUCH OUT cable 1ea POWER cables speaker and mute NOTE The POWER connection always must be the last step in installati...

Page 20: ...A connectors to the RCA AUDIO L OUT and AUDIO R OUT connectors from the GPS Box POWER wiring harness red to red white to white Voice module Quadlock Plug and Play harness Connect the female Quadlock c...

Page 21: ...connect all the power cables of the different component and devices that will be used always with the vehicle stopped and with the ignition key out of its port then connect again the connectors that...

Page 22: ...ill have calibrated successfully the touch screen gps function if it doesn t appears OK message you must repeat this process again Once you have done the calibration process it will appear this messag...

Page 23: ...uccessfully the touch screen if while you are doing the calibration process appears the message FAIL you must repeat the process again At this way you have configured the interface multimedia to be ab...

Page 24: ...button of the multimedia interface remote control for 5 seconds to enter to the advanced settings menu this image will be shown Use or buttons of the remote control to select IMAGE in the menu and pu...

Page 25: ...then follow the steps described before to adjust the system again 3 3 Maps SD card and GPS signal Once you have insert the Maps SD card we have to setup the route of the executable file exe follow th...

Page 26: ...that the problem is the interface GPS Box If you receive GPS signal with the antenna connected after doing the previous steps follow the next steps Go back to the GPS Box Main Menu Enter to Navigation...

Page 27: ...interface and check that these devices are working properly Check that the GPS Box RGB cables are correctly connected 3 Why do I can t see the rear s camera image Check the position of the DIP Switch...

Reviews: