


Installation
vacon •
11
24-hour s358 (0)40 837 1150 • Email: [email protected]
1
Step 3.
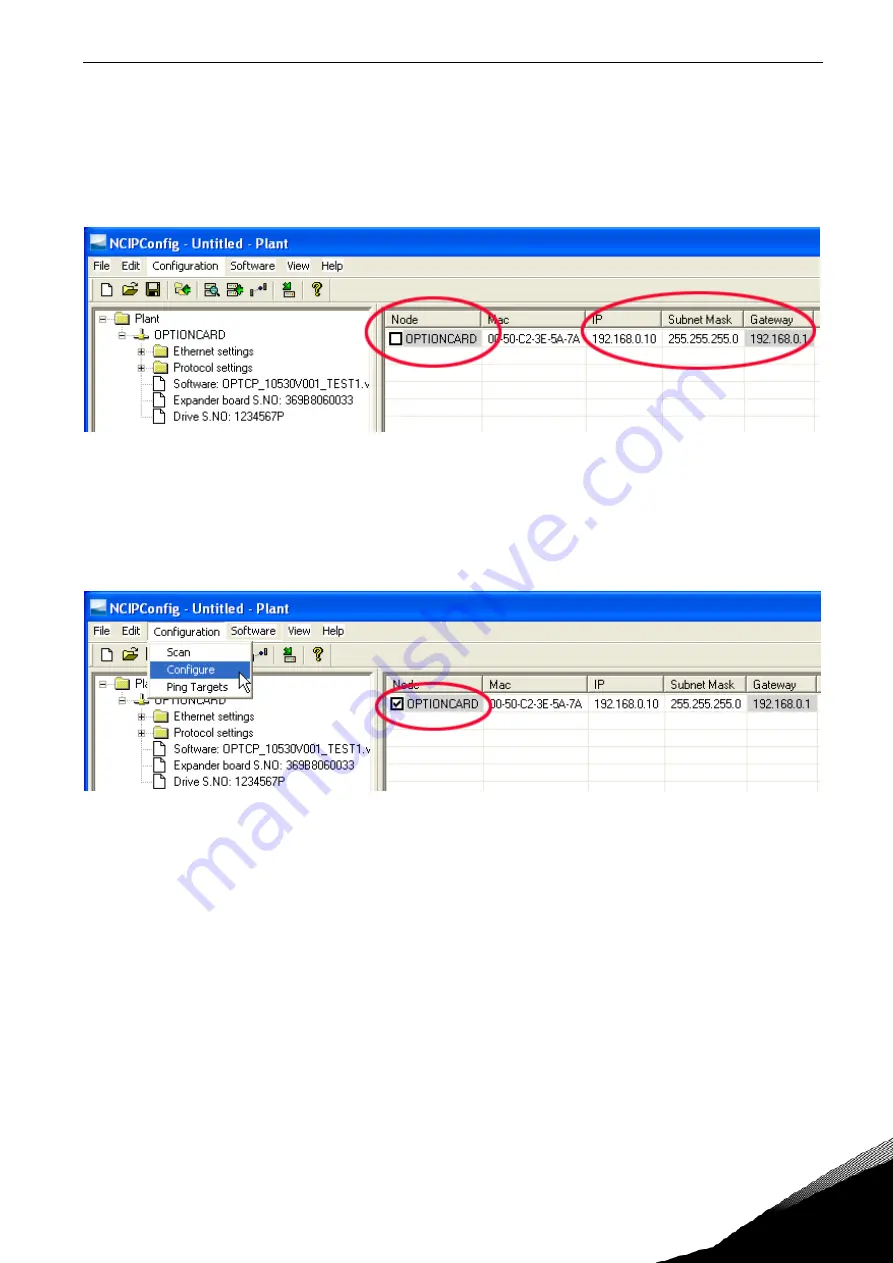
Set names. Select the cell in column ‘Node’ and enter the name of the node.
Step 4.
Set IP addresses. Change the node’s IP settings according to the network IP settings. The
program will report conflicts with a red color in a table cell.
Step 5.
Send configuration to boards. In the table view, check the boxes for boards whose configu-
ration you want to send and select Configuration, then Configure. Your changes are sent to the net-
work and will be valid immediately.
NOTE! Only A-Z, a-z and 0-9 symbols can be used in the drive name, no special characters, or
Scandinavian letters (ä, ö, etc.)! The drive name can be freely formed using the allowed characters.
3.3.1.
Update OPTCP Option Board program with the NCIPConfig Tool
In some cases it may be necessary to update the option board's firmware. Differing from other Vacon
option boards, the Ethernet option board's firmware is updated with the NCIPConfig tool.
To start the firmware update, scan the nodes in the network according to the instructions in section
3.2. Once you can see all nodes in the view, you can update the new firmware by clicking the VCN
packet field in NCIPCONFIG 's table view on the right.
NOTE! The PC’s IP address must be chosen in the same IP address space as the Ethernet board’s.
Summary of Contents for NX OPTCP
Page 1: ...vacon nx ac drives optcp profinet option board user manual ...
Page 43: ......
Page 44: ...Document ID Rev A ...


