32
GALILEO 2 TEK (G2TEK) USER MANUAL
A press-and-hold of the right button
from the compass display returns to the
computer display. This also happens after
the set auto-off time defined in chapter
Auto-off time
.
F
NOTE: If you are in compass mode
when the G2TEK is about to end
the no-stop phase, the screen will
revert to the regular computer display
regardless of the set auto-off time.
Press and hold the right button again
if you wish to return to the compass
display.
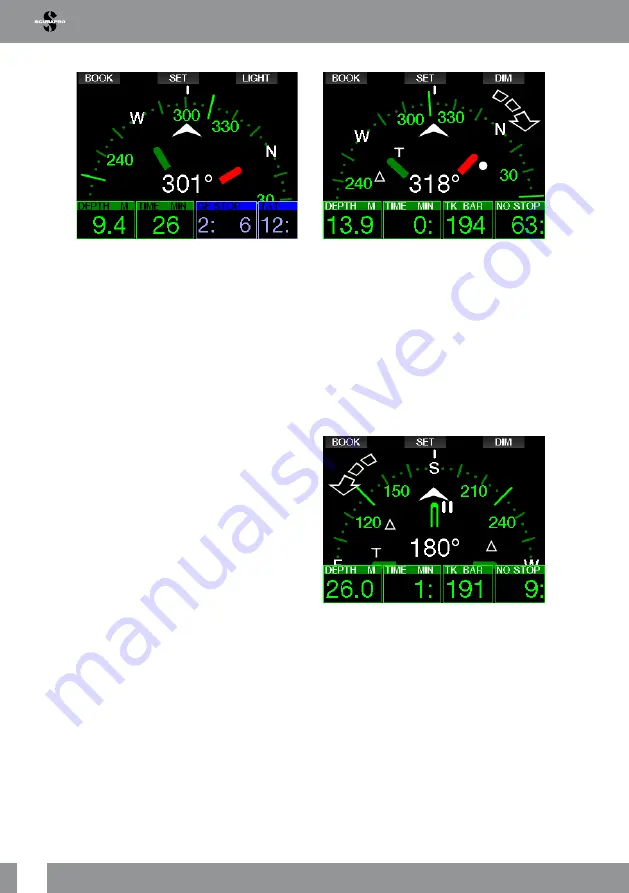
You can set the compass bearing by
pressing the middle (SET) button. Compass
bearing represents the direction the front of
the computer is pointed at. It is expressed
in degrees, from 0 to 359. 0 degrees is
North, 90 degrees is East, 180 degrees is
South, 270 degrees is West and any other
reading is interpolated in between.
The message
SET BEARING
SUCCESSFUL
will be shown on the
display and a white dot will appear in
the position of the set bearing. Setting a
bearing allows you to navigate towards a
reference direction. A press-and-hold of
the middle button will erase the set bearing.
Note that the set bearing stays in memory
until you either set a new one or erase it.
If you have set a reference bearing, arrows
will appear to the left or to the right of the
numeric bearing indication, to show you
in which direction you should turn in order
to match the set bearing. As an additional
aid in navigation, the G2TEK automatically
marks the positions at 90 and 120 degrees
to the left and to the right of the set bearing,
in addition to the position at 180 degrees
(as an aid for square course, triangular
course and reciprocal course navigation
respectively). These are denoted with “T”,
Δ and
∥
.
F
NOTE: Do not use the G2TEK’s
compass close to a magnet, as
the magnetic force may cause the
compass calibration to reset.
F
NOTE: When triggered, alarms and
warnings will supersede the G2TEK’s
compass while it is active on the
display. You will need to push-on for
displaying the compass again.


