6. Service the tool annually to ensure proper function and extend the life
of the tool. Uponor offers the Tool Depot for service, repair or warranty
work. For more information on the Tool Depot, refer to the Repairs
section on
page 10
.
Note:
Failure to properly lubricate the tool may result in tool damage
or improper connections.
Caution:
Excessive lubrication may result in improper
connections. Only use a small amount of lubricant to keep
the tool working properly.
Troubleshooting
If you experience difficulty making connections, follow the steps below.
1. Ensure the battery is fully charged.
2. Do not overload the tool’s capacity. After approximately 50 completed
cycles, allow the tool to cool down for 15 minutes before continuing
operation.
3. Check if the tool needs lubrication on moving parts. Lubricate with a
high-grade, light oil.
Refer to the following table for instructions about troubleshooting the
Mini-Press Battery Tool.
Table 4-1: Troubleshooting Table
9
Section 4 – Tool Operation and Guidelines
Warning:
The Mini-Press Battery Tool is not designed for continuous
press operations. After approximately 50 completed cycles, allow
the tool to cool down for 15 minutes before continuing operation.
Failure to do so can cause heat damage to the tool.
Tool Guidelines
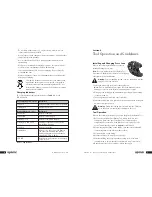
• Ensure the locking pin is properly secure before making connections.
• Perform a test connection to ensure the tool is operating properly.
• Ensure the pressing cycle is complete before releasing the trigger.
• If a pressing cycle is interrupted (i.e., the trigger is released before
the fitting is complete), remove the fitting, cut off the damaged section
of the tubing and start over with a new fitting.
• Ensure there are no foreign objects (e.g., plaster, metal shavings, tubing
pieces, etc.) between the press jaws.
• In case of error or emergency, slide the retract slide toward the battery
to retract the jaws.
• Do not use this tool to assemble gas lines.
• Operating the tool in intense heat or cold will damage the tool. Only
operate the tool within the recommended operating temperature range
of 50 to 104°F (10 to 40°C).
• Do not operate the tool in pouring rain or under water.
Tool Maintenance
The Mini-Press Battery Tool can accommodate
1
⁄
2
",
5
⁄
8
",
3
⁄
4
" and 1" press
jaws. It is very important to keep the press jaws on the tool or in the tool
case at all times as dirt and other debris can affect the connection process.
Refer to the following instructions to properly maintain the Mini-Press
Battery Tool.
1. Clean and dry the tool and press jaws after each use. Ensure all parts
are completely dry before placing them in the case.
2. Apply recommended lubricant daily to the jaw pin, drive rollers and
guides. Keep all other parts of the tool free from lubricant.
3. Check the tool and press jaws regularly for proper function.
4. Keep the press jaws clean. Remove dirt with a brush.
5. Store the tool, press jaws, battery and charger in a dry location to
prevent rust. Store tool and accessories properly in the case and
ensure the case is stored in an area where temperatures do not exceed
the recommended range of 50 to 104°F (10 to 40°C).
8
w w w.uponor-usa.com
Problem
Cause
Remedy
Tool does
not start
Dead or defective battery
Corroded battery contacts
Defective trigger switch
Defective tool motor
Replace with new,
fully charged battery.
Replace with new,
fully charged battery.
Return the tool to the
Tool Depot.
Return the tool to the
Tool Depot.
Press jaws do
not close
completely
Low battery charge or
defective battery
Defective drive unit
Incorrect press jaw used
for the fitting size
Ensure battery is fully
charged or replace with a
new, fully charged battery.
Return the tool to the Tool
Depot.
Ensure the press jaw size
matches the tubing size.
Summary of Contents for Mini-Press Battery Tool
Page 12: ...16 www uponor usa com...

