background image

Section 3 

Battery Operation

Charging the Battery

Only use the included charger to charge 
the battery for the Mini-Press Battery Tool. 
Charge the battery before initial operation.

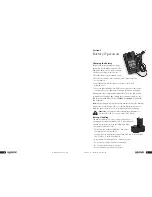
1. Remove the charger from the case.

2. Plug the charger into a standard outlet.

3. Ensure the vent slots in the top and bottom of the charger are 

not obstructed.

4. Insert the battery into the charger (+ pole to + pole) with 

minimum force.

5. The green light-emitting diode (LED) on the right side of the charger

(opposite the + pole) illuminates to indicate the battery is charging.

Recharge time takes approximately 40 minutes. The green LED will turn 
yellow when the battery is 90% charged. Once charging is complete, the 
LED turns green and flashes. Refer to

Table 3-1

on 

page 6

for additional 

LED definitions.

Note:

Battery temperature increases during and shortly after use. Batteries

may not accept a full charge if they are charged immediately after use.
Allow the battery pack to cool to room temperature before charging.

Caution:

Do not use the charger at ambient temperatures of 

less than 50°F (10°C) or greater than 104°F (40°C).

Battery Handling

The Mini-Press Battery Tool uses rechargeable batteries 
containing nickel cadmium (NiCad) cells. To effectively and 
properly use the batteries, keep the following in mind.

• Recharge cool batteries only.

• The battery can recharge 1,000 times, and reaches

full capacity after several charges.

• Store batteries at temperatures greater than 50°F (10°C), but less than

104°F (40°C), to optimize battery life.

• Only recharge the battery after it is drained of power.

• Do not use the charger if dropped or damaged.

• Do not connect two chargers together.

• Keep the battery in a frost-free, dry place.

5

4

Section 3 – Batter y Operation

w w w.uponor-usa.com

Summary of Contents for Mini-Press Battery Tool

Page 1: ...omposite MLC Tubing MiniPressTool_OMHB_10 07 Copyright 2007 Uponor Printed in the United States RADIANT HEATING SYSTEMS MINI PRESS BATTERY TOOL Uponor Inc 5925 148th Street West Apple Valley MN 55124...

Page 2: ...current technical information go to the Uponor website at www uponor usa com Uponor is not liable for installation practices that deviate from this manual or are not acceptable practices within the me...

Page 3: ...rs 6 Section 4 Tool Operation and Guidelines Installing and Changing Press Jaws 7 Tool Operation 7 Tool Guidelines 8 Tool Maintenance 8 Troubleshooting 9 Safety Guidelines 10 Repairs 10 Warranty 11 Se...

Page 4: ...art D6261000 Two batteries 9 6V replacement part D6260001 One battery charger replacement part D6260002 Operation Manual Carrying Case The Mini Press Battery Tool Kit without Jaws D6260000 features th...

Page 5: ...ange 50 to 104 F 10 to 40 C Sound Level 70 dB Vibrations 2 5 m s2 Storing the battery in temperatures below 50 F 10 C greatly reduces battery capacity Battery Voltage 9 6 Volts DC Capacity 1 3 Ah Char...

Page 6: ...itions Note Battery temperature increases during and shortly after use Batteries may not accept a full charge if they are charged immediately after use Allow the battery pack to cool to room temperatu...

Page 7: ...ally check to ensure the tips of the jaws are completely closed 6 Once the pressing cycle is complete release the trigger 7 Section 4 Tool Operation and Guidelines Do not allow metal objects e g screw...

Page 8: ...c between the press jaws In case of error or emergency slide the retract slide toward the battery to retract the jaws Do not use this tool to assemble gas lines Operating the tool in intense heat or c...

Page 9: ...le fluids or gases danger of explosion Do not use the tool for any function other than installing MLC press fittings Always wear protective eyewear and clothing when operating the tool Use original Up...

Page 10: ...ings on Uponor MLC tubing PEX fittings are not compatible with Uponor MLC tubing 4 Only use MLC tubing and MLC Press Fittings in radiant heating applications Tools Needed Mini Press Battery Tool Tubin...

Page 11: ...m 4 Remove the tool and clean any shavings from the chamfered end Installing the MLC Press Fitting Refer to the following instructions to make the press fitting 1 Insert the tubing end into the MLC Pr...

Page 12: ...16 www uponor usa com...

Reviews: