5
Industrial/EasyLAN 100i Interface Kit for XP – Installation Instructions Ed. 1
Chapter 2 Installation
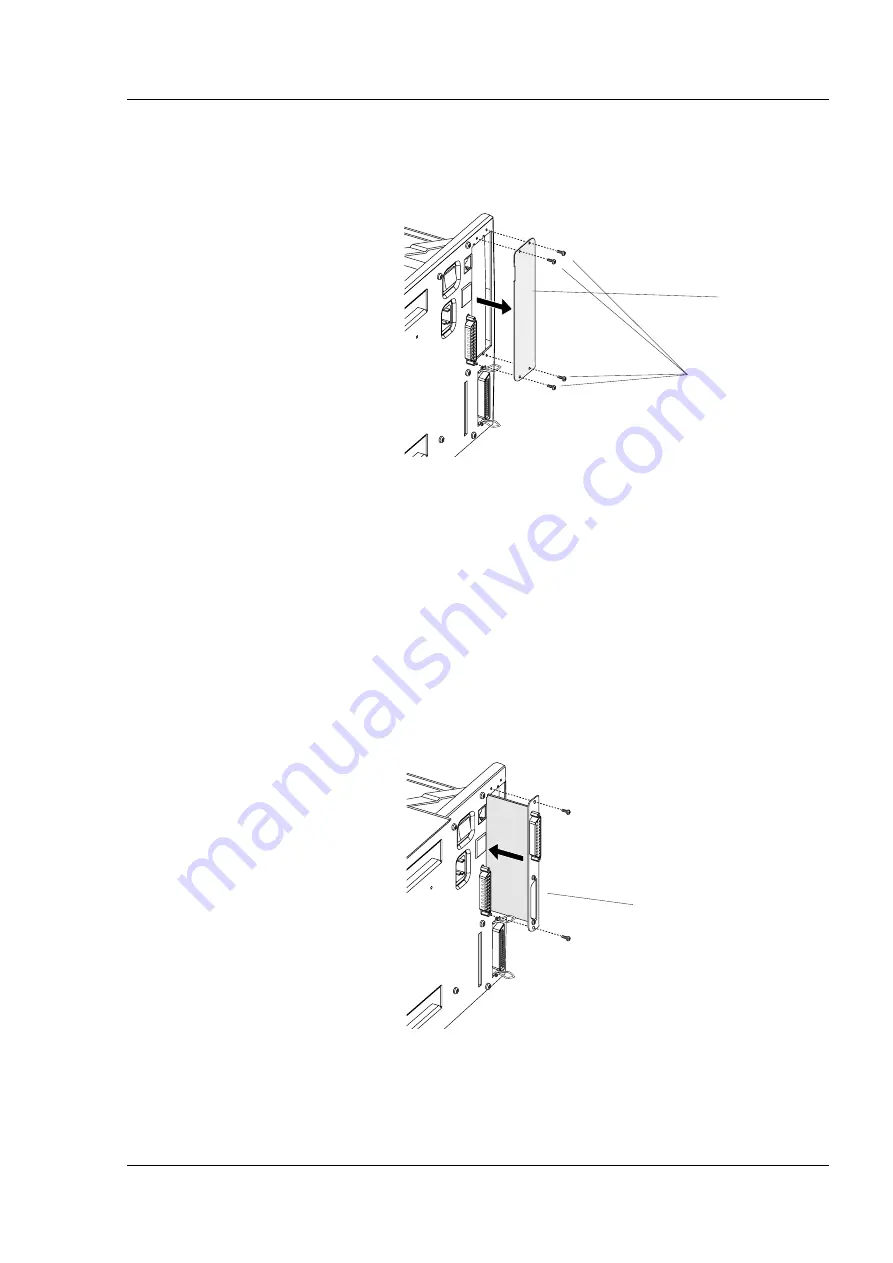
#T10 Torx screws (4x)
Cover Plate
• Remove the four #T10 Torx screws that hold the interface
cover plate above the parallel interface connector on the
printer’s rear plate. Remove the cover plate.
• Save the cover plate for possible later use. Keep the
screws.
• Insert the Industrial Interface Board into the slot previously
covered by the cover plate. It does not matter in position
(left/right) you fi t the two boards, but we recommend to fi t
the Industrial interface board to the left and the EasyLAN
100i interface board to the right (as seen from behind) for
easiest access to the Test button on the EasyLAN 100i inter-
face board.
• Check that the top and bottom edges of the board fi t into the
two square cut-outs in the rear plate.
Step-by-Step Instruc-
tions, cont.
Industrial Interface Board


