background image

Installation Manual

10

7.

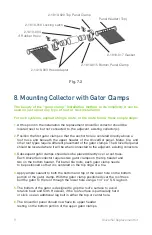
 Locate and mount the (2) long gator clamps (2-1060-001) along the bottom 

header of each panel. The bottom gator should be installed allowing for  

expansion & contraction of the collectors based on temperature at installation.

8.

 Once all gators are properly lagged to rack or roof surfaces, and all the collectors 

are hung in place, connect UniverSol panel to adjacent, existing collectors according 

the steps outlined in Section 7 “Connecting UniverSol Collector with Hose Adaptor” 

and Fig. 7.2. Snap the top portion of each gator clamp over the panel header onto 

the bottom portion of each gator clamp by pushing down firmly.

9.

 Install (2) SS Screws (2-1020-006) to secure gator top to gator bottom assembly.

Fig. 8.1

Short Gator Clamps

Long Gator Clamps

Summary of Contents for UniverSol 32

Page 1: ...een taken to make this an easy to follow procedure A little time spent understanding the system and its parts will assure a successful trouble free installation CAUTION SAFETY COMES FIRST When working on or around your roof or pool please take care to avoid hazards such as electrical wires and loose shingles 9 9014 026 1804 2018 UMA Solar ...

Page 2: ...ts Breakdown 7 6 Adding UniverSol Panel to Existing Solar System 7 7 Connecting UniverSol Panel with Hose Adaptor 9 8 Mounting Panel with Gator Clamps 11 9 Connecting UniverSol Panel to Feed Return Lines 12 10 Operation Check Out Procedures 13 11 Troubleshooting 16 12 Repair Procedures 1 UniverSol Replacement Kit ...

Page 3: ...y to correctly install the UniverSol Replacement Kit By following this step by step guide your system will meet the installation standards recommended by the factory While the manual explains how to install the UniverSol Replacement Kit properly in typical situations it cannot address all the unique or individual circumstances possible If you have any installation questions contact UMA Solar for a...

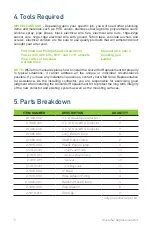
Page 4: ...eas often times look bigger than they really are so be sure to measure the available area before making your schematic Be sure that the layout of the collectors will allow the collectors to drain when the pool pump shuts off 5 Familiarize yourself with all of the UniverSol Replacement Kit components you will need to complete the installation 6 Don t take shortcuts Whenever possible panels should b...

Page 5: ...rs and the PVC pipe should be installed so the water will drain out of them when the pump shuts off This is especially important in areas of the country where freezing conditions occur For unique roof designs or adverse pool equipment locations if it is not possible to achieve complete automatic drain down manual drain down valves should be installed in appropriate places in the plumbing or at the...

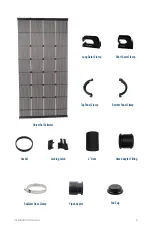
Page 6: ...ess all the unique or individual circumstances possible If you have any installation questions contact your UMA Solar Representative for assistance As the installing contractor you are responsible for exercising good judgment when installing the UniverSol Replacement Kit to protect the long term integrity of the new collector and existing system as well as the mounting surfaces 5 Parts Breakdown 5...

Page 7: ...End Cap Pipe Adaptor Radiator Hose Clamp Installation Manual 6 Gasket Locking Latch 4 Hose Hose Adaptor Fitting Bottom Panel Clamp Top Panel Clamp UniverSol Collector Long Gator Clamp Short Gator Clamp ...

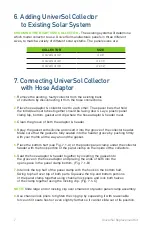
Page 8: ...groove by pushing firmly with your thumb all the way around the gasket 5 Place the bottom half see Fig 7 1 A of the plastic panel clamp under the collector header with the hook portion of the panel clamp on the inside of the collectors 6 Seat the hose adaptor header together by inserting the gasket into the groove on the hose adaptor and placing the ends of both into the open space in the panel cl...

Page 9: ...r gator clamps before proceeding See Section 8 Mounting Collector with Gator Clamps 11 At this point slide 2 stainless steel hose clamps onto the 4 long rubber hose 12 With hose adaptors now connected to either header with plastic panel clamps slide and seat the 4 long rubber hose over each hose adaptor and the adjacent existing collectors headers The hose should reach either plastic panel clamp 1...

Page 10: ...y over a roof truss Each UniverSol collector requires two gator clamps on the top header and two on the bottom header For barrel tile roofs each gator clamp needs to be positioned so that it is centered on the top ridge of a tile 4 Apply ample sealant to both the bottom and top of the lower hole on the bottom portion of the gator clamp With the gator clamp positioned over the roof truss bolt the g...

Page 11: ...d to rack or roof surfaces and all the collectors are hung in place connect UniverSol panel to adjacent existing collectors according the steps outlined in Section 7 Connecting UniverSol Collector with Hose Adaptor and Fig 7 2 Snap the top portion of each gator clamp over the panel header onto the bottom portion of each gator clamp by pushing down firmly 9 Install 2 SS Screws 2 1020 006 to secure ...

Page 12: ...10 005 pipe connector to the panel header using the 2 1810 004 plastic panel clamp as described in the section Connecting UniverSol Collector with Hose Adaptor 3 Cement the PVC pipe to the 2 1810 005 pipe connector as shown in Fig 9 1 4 The 2 1810 005 Pipe Connector allows 1 PVC Pipe or a 1 St 90 to be cemented directly into the socket or a 2 PVC 90 to be cemented on the outside CPVC or multi purp...

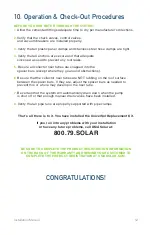
Page 13: ...e that the collector riser tubes are NOT rubbing on the roof surface between the spacer bars If they are adjust the spacer bars as needed to prevent this or a hole may develop in the riser tube 7 Be certain that the system will automatically drain down when the pump is shut off or that enough manual drain valves have been installed 8 Verify that all pipe runs are properly supported with pipe clamp...

Page 14: ...lear lid on the pump and can see air bubbles in the trap run water over the lid and each joint individually to see if the air bubbles will clear up using a garden hose If there is not a clear lid listen to pump noise for a smoother operation repair any air leaks 2 If the vacuum breaker is installed on the roof there is not enough water pressure in the solar system to keep the vacuum relief valve c...

Page 15: ...ls indicate low water flow Install issue A If the system is a single row array and there is adequate flow use the HBV on the return line to throttle the flow back to produce more back pressure on the system This will even out the flow through the panels If the array contains more panels than the maximum recommended on page 7 of this manual change the array to a double row or single row split feed ...

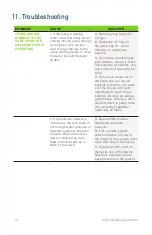
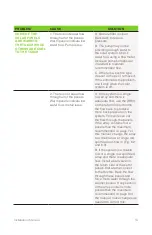
Page 16: ...BALL VALVE WILL NOT TURN Internal parts need to be lubricated or replaced If the valve has a grease fitting turn it clockwise to inject grease into valve then turn the diverter past the grease fitting to spread the grease If the grease fitting is dry fill it with silicone grease If there is not a fitting disassemble valve and lubricate with silicone grease Replace worn or broken parts THE AUTOMATI...

Page 17: ...maged riser as close as possible to the header carefully avoiding damaging adjacent riser The sloped side of the chisel should face away from the header 2 Spray the shaft of the insert tool and the rubber insert with silicone spray Insert the insert tool into the rubber insert By holding the rubber insert with one hand and the insert tool with the other gently stretch the rubber insert As you do p...

Page 18: ...items are the responsibility of the Purchaser UMA Solar shall be released from all obligations under its warranty in the event a that the Collector has been subject to misuse neglect accident other external causes or improper installation or if repairs or modifications were made by service personnel not authorized by UMA Solar b that the Collector was not installed and or operated in accordance wi...

Page 19: ...L TO UMA Distributors LLC Attn UniverSol Warranty 950 Sunshine Lane Altamonte Springs FL 32714 Homeowner Business Info Installation Type Residential Commercial Homeowner Business Name Street Address City State Country Postal Code Email Phone Dealer Info Purchasing Company Street Address City State Country Postal Code Email Phone Sales Rep Installer Product Info Panel Type Quantity Warranty Type 1 ...

Page 20: ......

Reviews: