6. Adding UniverSol Collector
to Existing Solar System
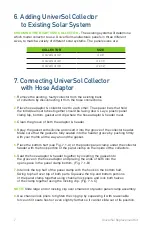
CHOOSING THE RIGHT SIZE COLLECTOR
- The existing system will determine
which model collector to use. UniverSol manufactures panels in three different
sizes, to match a variety of different solar systems. The panels sizes are:
7. Connecting UniverSol Collector
with Hose Adaptor
1.
Remove the existing, faulty collector from the existing bank
of collectors by disconnecting it from the hose connections.
2.
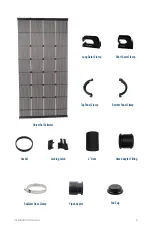
Place hose adaptor & collector next to each other. The spacer bars that hold
the individual riser tubes together should be facing down. Lay a plastic panel
clamp top, bottom, gasket and clip where the hose adaptor & header meet.
3.
Clean the groove of both the adaptor & header.
4.
Spray the gasket with silicone and insert it into the groove of the collector header.
Make sure that the gasket is fully seated into the header groove by pushing firmly
with your thumb all the way around the gasket.
5.
Place the bottom half (see Fig. 7.1-A) of the plastic panel clamp under the collector
header with the hook portion of the panel clamp on the inside of the collectors.
6.
Seat the hose adaptor & header together by inserting the gasket into
the groove on the hose adaptor and placing the ends of both into the
open space in the panel clamp bottom. (Fig. 7.1-B)
7.
Interlock the top half of the panel clamp with the hook on the bottom half.
Swing top half over top of both parts. Squeeze the top and bottom portions
of the panel clamp together using channel lock pliers and lock both halves
of the clamp together using the locking clip. (Fig. 7.1-C)
NOTE:
Slide large end of locking clip over small end of plastic panel clamp assembly.
8.
Use channel lock pliers to tighten the clip grip by squeezing it with reasonable
force until it seats flush or even slightly farther so it cannot slide out of its position.
7
UniverSol Replacement Kit
COLLECTOR
SIZE
UniverSol 32
4’ x 8’
UniverSol 40
4’ x 10’
UniverSol 48
4’ x 12’
Summary of Contents for UniverSol 32
Page 20: ......


