-
14
-
4.
Close the feed door and secure tightly.
5. Adjust the air inlet control as described in the “Fueling Instruction” section of this manual.
6. Empty ashes regularly. Do not allow ashes to pile up. Properly dispose of hot ashes (see the “Ash Removal
And Disposal” section of this manual).
7.
Burn small, intense fires instead of large, slow burning fires when possible. Large slow burning fires can deposit
creosote within the heating system.
8. Learn your appliance’s operating characteristics to obtain optimum performance.
VISIBLE SMOKE
The amount of visible smoke being produced can be an effective method of determining how efficiently the
combustion process is taking place in the given settings. Visible smoke consists of unburned fuel and moisture
leaving your stove. Learn to adjust the air settings of your specific unit to produce the smallest amount of visible
smoke. Wood that has not been seasoned properly and has a high wood moisture content will produce excess
visible smoke and burn poorly.
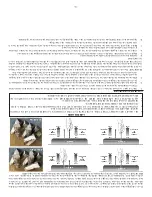
AIR TUBES
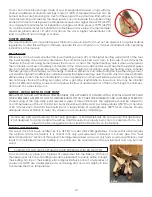
The air tubes assembled in this unit are designed to provide an accurate mix of secondary air to ensure the
highest efficiency. Any damage or deterioration of these tubes may reduce the efficiency of combustion. The air
tubes are held in position by screws or snap pins. Locate these to either side of the tube and remove it to allow
the tube to be removed and replaced.
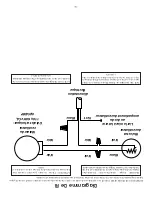
BLOWER OPERATION
The variable speed blower circulates air warmed by the firebox into the living area to distribute the heat more
evenly. The blower control knob is located on the side of the blower housing. Turn the knob clockwise to turn the
blower on. The speed is controlled by turning the knob clockwise for slower speeds and counter-clockwise for
faster speeds. To turn the blower off, turn the speed control knob fully counter-clockwise. It is recommended to
turn the blower off when the unit is not in operation. The blower needs to be removed and air-blown clean. Make
sure the blades do not have build up.
CAUTION:
Do not overfire appliance. You are overfiring if any part of the appliance glows red. Close the door and shut
damper immediately to reduce the air supply and slow down the fire.
Chimney Maintenance
CAUTION:
Slow burning fires for extended use or burning green wood may cause excessive creosote build-up. Ignition of
creosote or overfiring could cause a chimney fire. Chimney fires burn extremely hot and may ignite surrounding
combustible materials. In case of a chimney fire, call the fire department immediately!
CREOSOTE FORMATION AND NEED FOR REMOVAL
When wood is burned slowly, it produces tar and other organic vapors, which combine with expelled moisture to
form creosote. The creosote vapors condense in the relatively cool chimney flue of a slow-burning fire. As a result,
creosote residue accumulates on the flue lining. When ignited this creosote makes an extremely high temper fire.
The chimney connector and chimney should be inspected at least once every two months during the heating
season to determine if a creosote build-up has occurred. If creosote has accumulated (3 mm or more), it should
be removed to reduce the risk of a chimney fire.
We strongly recommend that you install a magnetic thermometer on your smoke exhaust pipe, approximately
18” above the stove. This thermometer will indicate the temperature of your gas exhaust fumes within the smoke
exhaust system. The ideal temperature for these gases is somewhere between 275°F and 500°F. Below these
temperatures, the build-up of creosote is promoted. Above 500°F, heat is wasted since a too large quantity is lost
into the atmosphere.
TO PREVENT CREOSOTE BUILD UP
•
Always burn dry wood. This allows clean burns and higher chimney temperatures, therefore less creosote
deposit.
• Leave the air control fully open for about 5 min. every time you reload the stove to bring it back to proper
operating temperatures. The secondary combustion can only take place if the firebox is hot enough.
• Always check for creosote deposit once every two months and have your chimney cleaned at least once a
year.
Summary of Contents for VOGELZANG VG3200
Page 19: ... 19 Notes ...

