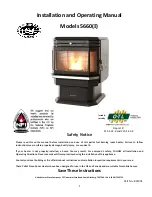
background image

8


OPERATING


INSTRUCTIONS


Check


and


Fill


the


Fuel


Hopper


with


Pellets:


This


Pellet


Stove


is


available


as


a


freestanding


unit


or


as


a


fireplace


insert.


There


is


a


different


method


for


filling


the


hopper


for


each


type


of


heater:


To


check


and


fill


the


hopper


of


the


freestanding


heater,


simply


lift


the


hopper


door,


visually


check


the


hopper


and


add


pellets


when


needed.


To


check


and


fill


the


hopper


of


the


insert


heater,


pull


hopper


lid


forward,


visually


check


the


hopper


and


add


pellets


when


needed.


CAUTION:


DO


NOT


OVERFILL


THE


PELLET


FUEL


HOPPER.


AS


A


SAFETY


PRECAUTION,


AUGER


WILL


NOT


OPERATE


AT


ANY


TIME


WHEN


FUEL


HOPPER


DOOR


IS


OPEN.


Pre

start


Check

up:


Make


sure


that


all


parts


of


the


Pellet


Stove


Room


Heater


are


cool


before


proceeding.


Remove


the


burn


pot


and


clean


out


any


ash


debris.


Be


sure


to


re

install


the


burn


pot


in


the


correct


position


(see


page


29).


The


blowers


and


automatic


fuel


supply


are


controlled


from


a


panel


located


on


the


right


hand


side


of


the


stove.


Note:


Your


Pellet


Stove


may


omit


an


odor


as


oil


residue


from


the


manufacturing


process


burns


off


and


the


high


temperature


paint


cures.


You


can


minimize


this


effect


by


running


a


smaller


fire


for


the


first


few


hours


of


operation.


Avoid


placing


any


items


on


the


stove


top


during


this


period


as


the


stove’s


paint


could


be


permanently


damaged.


Lighting


Instructions:


ATTENTION:


Viewing


door


must


be


securely


latched


to


ensure


proper


stove


operation.


Push


door

handle


downward


until


latch


is


fully


engaged;


you


will


feel


the


latch


engage


and


hear


an


audible


click.


When


first


operating


your


Pellet


Stove,


depress


the


MODE


button


until


the


LED


indicator


above


MANUAL


lights


up.


This


will


engage


MANUAL


mode


and


provide


you


with


full


control


of


the


heater’s


control


board


functions


and


allow


you


to


familiarize


yourself


with


how


the


heater


works.


The


heat


level


for


T

STAT


mode


can


only


be


set


when


the


control


is


in


the


Manual


Mode.


Starting


Up


The


Pellet


Stove


Room


Heater:


Whenever


Operating


the


Pellet


Stove


for


First


Time,


or


if


The


Stove


Runs


Out


Of


Pellets,


it


is


Necessary


to


Prime


the


Auger


with


Pellet


Fuel.


To


do


this,


Press


and


Hold


the


AUGER


Button


for


Approximately


3


Seconds


until


the


AUGER


LED


illuminates.


This


Procedure


will


prime


the


Auger


and


then


Automatically


Initiate


the


Normal


Ignition


Cycle.


CAUTION:


Do


not


use


this


procedure


for


normal


startup.


To


do


so


would


cause


excessive


fuel


build

up


in


the


burn


pot.


For


normal


startup


with


pellets


fuel


in


the


auger,


press


and


release


the


On/Off


button.


The


LED


indicator


light


above


the


On/Off


button


will


alternately


flash


green


then


red


to


indicate


that


the


start

up


cycle


has


begun.


The


light


above


the


Auger


button


will


flash


intermittently


to


indicate


the


activation


of


the


auger


feeding


the


pellets


into


the


burn


pot.


The


electric


igniter


will


also


be


activated


at


this


time.


The


igniter


takes


a


few


minutes


to


come


up


to


temperature


in


order


to


ignite


the


pellets


in


the


burn


pot.


It


will


normally


take


between


4


minutes


and


8


minutes


for


pellets


to


ignite.


NOTE:


If


pellets


do


not


ignite


within


12


minutes


the


heater


will


shut


down,


requiring


you


to


turn


on


the


heater


and


repeat


the


start

up


process.


Summary of Contents for PELLET 5660(I)

Page 1: ...may result For everyone s safety FOLLOW all Installation and Operating Directions Never use makeshift compromises during the installation of this appliance Contact your local building or fire official...

Page 2: ...ting Instructions 8 11 Thermostat Installation 12 Clearances to Combustibles 13 Installing Your Room Heater 14 23 Mobile Home Installations 24 Insert Pellet Stove Installation 25 28 Vent Termination L...

Page 3: ...meter by 1 1 2 length Ash Content 1 Maximum Premium grade 3 Maximum Standard grade Moisture Content 8 Maximum Heat Content Minimum 8 200 btu s per hour It is important to note that the ash content of...

Page 4: ...e is maintained Make sure that structural integrity of the home is maintained when passing vent pipes through walls ceilings and roofs It is recommended that the exhaust vent be cleaned bi annually or...

Page 5: ...ower outages with battery backup or room air starvation occurs during operation of heater smoke in the house may result This may trigger smoke detectors if they are installed CAUTION DO NOT CONNECT TO...

Page 6: ...6 SPECIFICATIONS Heating Specifications Burn Rate 43 900 btu s per hour or 5 1 lbs of fuel per hour Hopper Capacity 55 lbs Dependent upon quality and heating value of pellet fuel DIMENSIONS Figure 1...

Page 7: ...7 DIMENSIONS continued The minimum installation dimensions of the insert opening are 32 813mm wide x 22 3 4 578mm high x 12 1 4 311mm deep Figure 2...

Page 8: ...d you will feel the latch engage and hear an audible click When first operating your Pellet Stove depress the MODE button until the LED indicator above MANUAL lights up This will engage MANUAL mode an...

Page 9: ...u desire to operate the circulation fan at its maximum setting regardless of heat setting you may do so by pressing the FAN button Auger Trim When operating at Heat Level 1 if the flame goes out or th...

Page 10: ...will end this takes between 8 12 minutes At this point the LED indicator light above the ON OFF button will glow solid green The user will now be able to make heat level adjustments HEAT LEVEL Button...

Page 11: ...t accidental injury KEEP PELLET FUEL HOPPER LID CLOSED AT ALL TIMES EXCEPT WHEN REFILLING DO NOT OVERFILL HOPPER Safety Features and warning code 1 Your heater is equipped with a temperature high limi...

Page 12: ...wires and connect to the screw terminal on the rear of the control panel see Figure 4 If you have installed a remote thermostat for your pellet stove and wish to have the heater controlled by that the...

Page 13: ...stalled on a combustible floor it is mandatory that a 1 2 13mm thick non combustible hearth pad be installed under the heater The non combustible hearth pad must extend at least 6 beyond the fuel load...

Page 14: ...sectional area of over 28 square inches 711mm2 Venting can pass through the ceiling and roof if approved pipe is used Where passage through a wall or partition of combustible construction is desired t...

Page 15: ...ir vent has an approved cap on it to prevent rodents from entering Be sure to install in location that won t become blocked with snow etc 8 The air intake pipe is equipped with a butterfly valve that...

Page 16: ...16 INSTALLING YOUR ROOM HEATER continued HORIZONTAL EXHAUST VENT INSTALLATION...

Page 17: ...r of the combustion air intake pipe at the back of your unit Line up the center with the same spot on your exterior wall and cut a 2 1 2 64mm diameter hole through the wall 5 Secure all vent joint con...

Page 18: ...the wall 5 Secure all vent joint connections with 3 screws Seal the exhaust vent joint connections with high temperature silicone sealant 6 Locate the center of the exhaust pipe at the back of the un...

Page 19: ...19...

Page 20: ...20 INSTALLING YOUR ROOM HEATER continued SELKIRK DIRECT TEMP VENT SYSTEM FOR PELLET STOVE HEATERS Images courtesy of Selkirk...

Page 21: ...21 INSTALLING YOUR ROOM HEATER continued SELKIRK DIRECT TEMP VENT SYSTEM FOR PELLET STOVE HEATERS Images courtesy of Selkirk UP OUT HORIZONTAL TERMINATION KIT Figure 12...

Page 22: ...22 INSTALLING YOUR ROOM HEATER continued SELKIRK DIRECT TEMP VENT SYSTEM FOR PELLET STOVE HEATERS Images courtesy of Selkirk STRAIGHT OUT HORIZONTAL TERMINATION KIT Figure 13...

Page 23: ...23 INSTALLING YOUR ROOM HEATER continued SELKIRK DIRECT TEMP VENT SYSTEM FOR PELLET STOVE HEATERS Images courtesy of Selkirk THROUGH THE ROOF VERTICAL TERMINATION KIT Figure 14...

Page 24: ...r person having jurisdiction on height restrictions In order for this unit to be installed in a mobile home the following criteria must be met The unit must be secured to the floor using lag bolts in...

Page 25: ...of the fireplace There is a small amount of assembly required when installing this model The steps are as follows Note The shroud must be installed before unit is set into its final position Step 1 S...

Page 26: ...k of the unit take the top shroud side piece and fasten as shown with 4 screws provided Step 4 Control Board Take the control board and insert it from the back of the right shroud side facing front of...

Page 27: ...a k factor of 0 84 For multiple layers add R values of each layer to determine the overall R value The R value for the required board is 1 2 Convert specification to R value k factor is given with a r...

Page 28: ...e adapter to the exhaust fan and either a 90 elbow or a clean out tee with cap The air intake can be attached to the heater with a hose clamp 6 Connect the heater to the coupling on the bottom of the...

Page 29: ...29 VENT TERMINATION LOCATIONS Figure 22...

Page 30: ...ol to room temperature before inspecting the burn pot Inspect the burn pot regularly to check that the holes have not become plugged If necessary clean thoroughly It is imperative that the burn pot be...

Page 31: ...r vacuum cleaner should have a special filter or bag to eliminate leakage 5 Remove ash pan and dispose of ashes into metal container 6 Reinstall ash pan 7 Reinstall burn pot and burn pot liner Ash Rem...

Page 32: ...on the blades of the circulation exhaust fans The fans should be inspected periodically and if any accumulation is present vacuumed clean as the ash or dust can impede the fans performance It is also...

Page 33: ...ermine if cleaning is necessary Door Gaskets Gaskets around the door and window panes should be inspected cleaned and repaired when necessary to maintain good seal Door Glass Removal and Replacement D...

Page 34: ...r local dealer for service Check the vacuum switch by shorting out the vacuum switch then depress ON OFF button to OFF and back to ON If the unit starts to operate change the vacuum switch Check the e...

Page 35: ...ns If the auger motor starts to function normally replace the high limit switch If the auger is not jammed and you have tried the other possible causes connect 120 volts directly to the auger motor If...

Page 36: ...runs constantly there is a problem with the circuit board Combustion blower is not operating Check the exhaust blower is operating if not bypass the exhaust temperature switch if the motor operates r...

Page 37: ...37 WIRING DIAGRAM...

Page 38: ...y 1 Microlite Glass ROBAX 5mm thick 2 High Temp Paint STOVE BRIGHT Aerosol can or brush bottle 3 Exhaust Blower J238 AC 115V 60HZ 1 5A 4 Circulation Blower F33HA AC 120V 60HZ 1 4A 5 Auger Motor 6120A1...

Page 39: ...made under the terms of this warranty are warranted only for the remaining period of the original heater warranty 4 Without specific written exclusionary waivers no one has authority to add to or var...

Page 40: ...40...

Reviews: