ENGLISH
ENGLISH
8
9
•
Note:
you should remember that the programmed time is approximate and you can specify it
according to your preferences.
•
Note:
in case the kitchen-stuff don’t belong to any group in the menu you should choose a similar
group.
•
The time of cooking (programmed)
•
This time is indicated after you chose the exact type of food button and means the time of cook-
ing after the pressure inside achieves working state. It doesn’t include the time until achieving
working pressure.
•
After time setting wait for some seconds and the process will start.
•
Pressure holding process begins when pressure inside is high enough.
•
When pressurizing is over, you’ll hear 3 sound signals, they indicate the end of cooking and the
start of keeping warm process.
•
Press Button to cancel parameter setting or current working status.
•
Take out the food in the following steps:
•
Turn the Relief Valve to “выпуск пара” position to release steam.
•
Note:
When cooking fluid food, such as porridge, to avoid squirting up remember not to release
the steam immediately after 3 sound signals. Let the pressure cooker cool down naturally or use
the cooling system. Otherwise the fluid food may squirt and result in damage.
•
Remove the plug form the socket.
Turn the Handle counter clockwise; open it and take the food out.
When the food is ready and the function “keeping warm” is switched , the pressure inside is high,
the protection devices don’t let open the Lid immediately. In order to speed up cooling down you can
use the cooling system to cool it and make the pressure down soon, especially when the food is fluid.
•
Unplug the device.
•
Turn regulator of reduce the pressure to the “vent of steam”.
•
The lid will be unlocked when internal temperature and pressure are reduced.
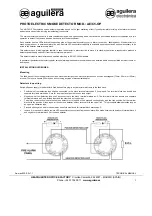
PRESSURE SMOKER USE
It should be on the unit and latched in place.
To use the unit:
1. Plug the cord into a grounded receptacle supplying 220-240 volts AC.
2. Position the removable pot in the Appliance Housing so that the arrow located on the right front of
the Cooking Pot Insert aligns with the arrow on the Appliance Housing. Slide the pot into the well
and press down on it so that the element pins will the internal power contacts.
If used to smoke food,slide the charring cup onto the end of the charring element. The charring
cup has two holes, one front and one rear. Ensure the charring element bar passes through both
of the holes. Place desired amount of wood chips into the charring cup. Pour a one tablespoon of
wood chips into the charring cup. When placing wood chips in the charring cup, be sure the wood
chips are resting against the charring element(bra)which runs through the charring cup. Place lid
on cup. When cold smoking food, do not add water or any liquid infusion. Always add water or
liquid infusion when; hot smoking, pressure cooking or steaming foods. Prepare foods according
to the recipes.
3. Place the food into the basket. Or, in the bottom of the cooking pot insert when browning food.
4. Place the lid onto the appliance. Hold the lid handle with both hands so that valve stem is directly
in front of your left hand. Align the edge of the handle with the condensation collector. Press
down and turn counterclockwise until it stops. The lid must be locked in all cooking modes except
Browning and Warming. Cook according to recipes.
5. At the end of the cooking cycle, the unit will beep.
6. Release the pressure before removing the top.
7. Release the pressure by removing the weighted knob. Be careful and keep face or other body
parts away from the hot steam.
8. When all the pressure is released, the top will unlock and can be removed.
9. Remove the top by twisting clockwise and lifting. When you remove the top, tilt it away from your
body to keep from being burned by steam trapped under the top.
10. Remove your food and eat it immediately or store it in the refrigerator or freezer for later con-
sumption. Be sure and use sealing refrigerator or freezer storage bags. Otherwise, the cooked
food will deteriorate and will flavor open items in the refrigerator with smoke. The cooked food will
hold up to a week in refrigerator and up to 6 months in the freezer.
Hot Smoke Mode(Smokes and cooks or barbeques the product)
1. Place product to be smoked into the basket in cooking pot insert and add water.
2. Place the top on the cooker and latch.
3. Place the weighted knob on the valve stem.
4. Press the “Горячее копчение”button until its light is it.
5. Set the desired pressure time the “+”or “-” button in the time display window.You can set the time
for 5 seconds after selecting the program.
Cold Smoke Mode(Smoking product only)
NOTE:The
“Холодное копчение”
mode will emit some smoke into the kitchen.If you object to
this smell,you may want to use the unit under a hood vented to the outside when cooking in to
“Холодное копчение”
mode.
Place product to be cold smoked into the basket in cooking pot insert.
Place the top on the cooker latch.
Place the weighted knob on the valve stem.
Press the
“Холодное копчение”
button.
Set the desired pressure time with the “+”or “-”button in the time display window. You can set the
time for 5 seconds after selecting the program.
Caution! Do not use the program “Cold smoker” for cooking crude products.
Mixing of hot and cold smoking
•
Bowl for charring wood chips through the hole, place on the heating element until it clicks,
sprinkle a little chip and close the lid, designed for this cup.
•
Add water in a bowl for smoking (200-300 ml).
•
Place the food on the food basket rack for smoking, then set it in a bowl for smoking
•
Close the lid and install a pressure regulator.
•
Select the first program of “Холодное копчение” and set the desired time. You can set the time
for 5 seconds after selecting the program.
•
Select “Горячее копчение” and set the time. You can set the time for 5 seconds after selecting
the program.
•
You need to wait for reducing the pressure to open the pressure cooker-smoker and remove
products.
Note: You can combine only modes in the sequence - cold smoking, hot smoking, as de-
scribed above, but not vice versa!
When the food is ready and the function “keeping warm” is switched , the pressure inside is high,
the protection devices don’t let open the Lid immediately. In order to speed up cooling down you can
use the cooling system to cool it and make the pressure down soon, especially when the food is fluid.
•
Unplug the device.
•
Turn regulator of reduce the pressure to the “vent of steam”.
•
The lid will be unlocked when internal temperature and pressure are reduced.
Display code
E1
E2
E3
E4
The problem
Open circuit of
the sensor
Short circuit of
the sensor
Over-temperature Disable signal
switch
WARNING!
1. In the condition of steam release, keep your face away from the Relief Valve to avoid an accident.
2. Do not touch the hot Lid immediately after cooking to avoid scald.
Summary of Contents for USP-1200S
Page 1: ...ELECTRIC PRESSURE SMOKER USP 1200S...
Page 8: ...RUSSIAN RUSSIAN 14 15 24 24 UNIT UNIT UNIT 220 240 50 UNIT 1 2 3 4 1 2 3 4 5...
Page 12: ...RUSSIAN RUSSIAN 22 23 6 7 00 00 4 00 4 24 8 9 P0 40 40 20 60 3 5 25 10 11 3 00 00 24 1 2...
Page 13: ...RUSSIAN RUSSIAN 24 25 1 1 2 3 2 3 4 5 6 7 8 9 10 11 12 5 13 14 5...
Page 14: ...RUSSIAN RUSSIAN 26 27 200 300 5 200 300 5 5 5 1 5...
Page 17: ...KAZAKH KAZAKH 32 33 UNIT 220 240 50 UNIT 1 2 3 4 1 2 3 4 5 USP 1200S USP 1200S 2 40 50 24...
Page 21: ...KAZAKH KAZAKH 40 41 3 6 3 4 5 6 2 7 00 00 4 00 4 24 8 9 P0 40 40 20 60 3 5 25 10 11 3 00 00...
Page 22: ...KAZAKH KAZAKH 42 43 24 1 1 2 1 2 3...
Page 23: ...KAZAKH KAZAKH 44 45 5 1 6...
Page 24: ...KAZAKH KAZAKH 46 47 NO 1 2 3 UNIT 4 UNIT 5 1 UNIT 2 3 4 USP 1200S 220 240 50 1100 6 22 0 70...